Unlike most other games where you fight against either creatures or human enemies, in Forbidden West, most of the enemies fought are machines. There are a lot of them in the game, especially bosses, with the main story having 14 to fight.
Many areas can improve on a boss fight. It's not only the attack patterns and fluidity of the fight but the set pieces, characters, weapons, and anything else that may come into play. Horizon Forbidden West has a lot of variety for these fights, so whatever style you tend to favor, you'll be sure to love parts from every battle.
14 Thunderjaw
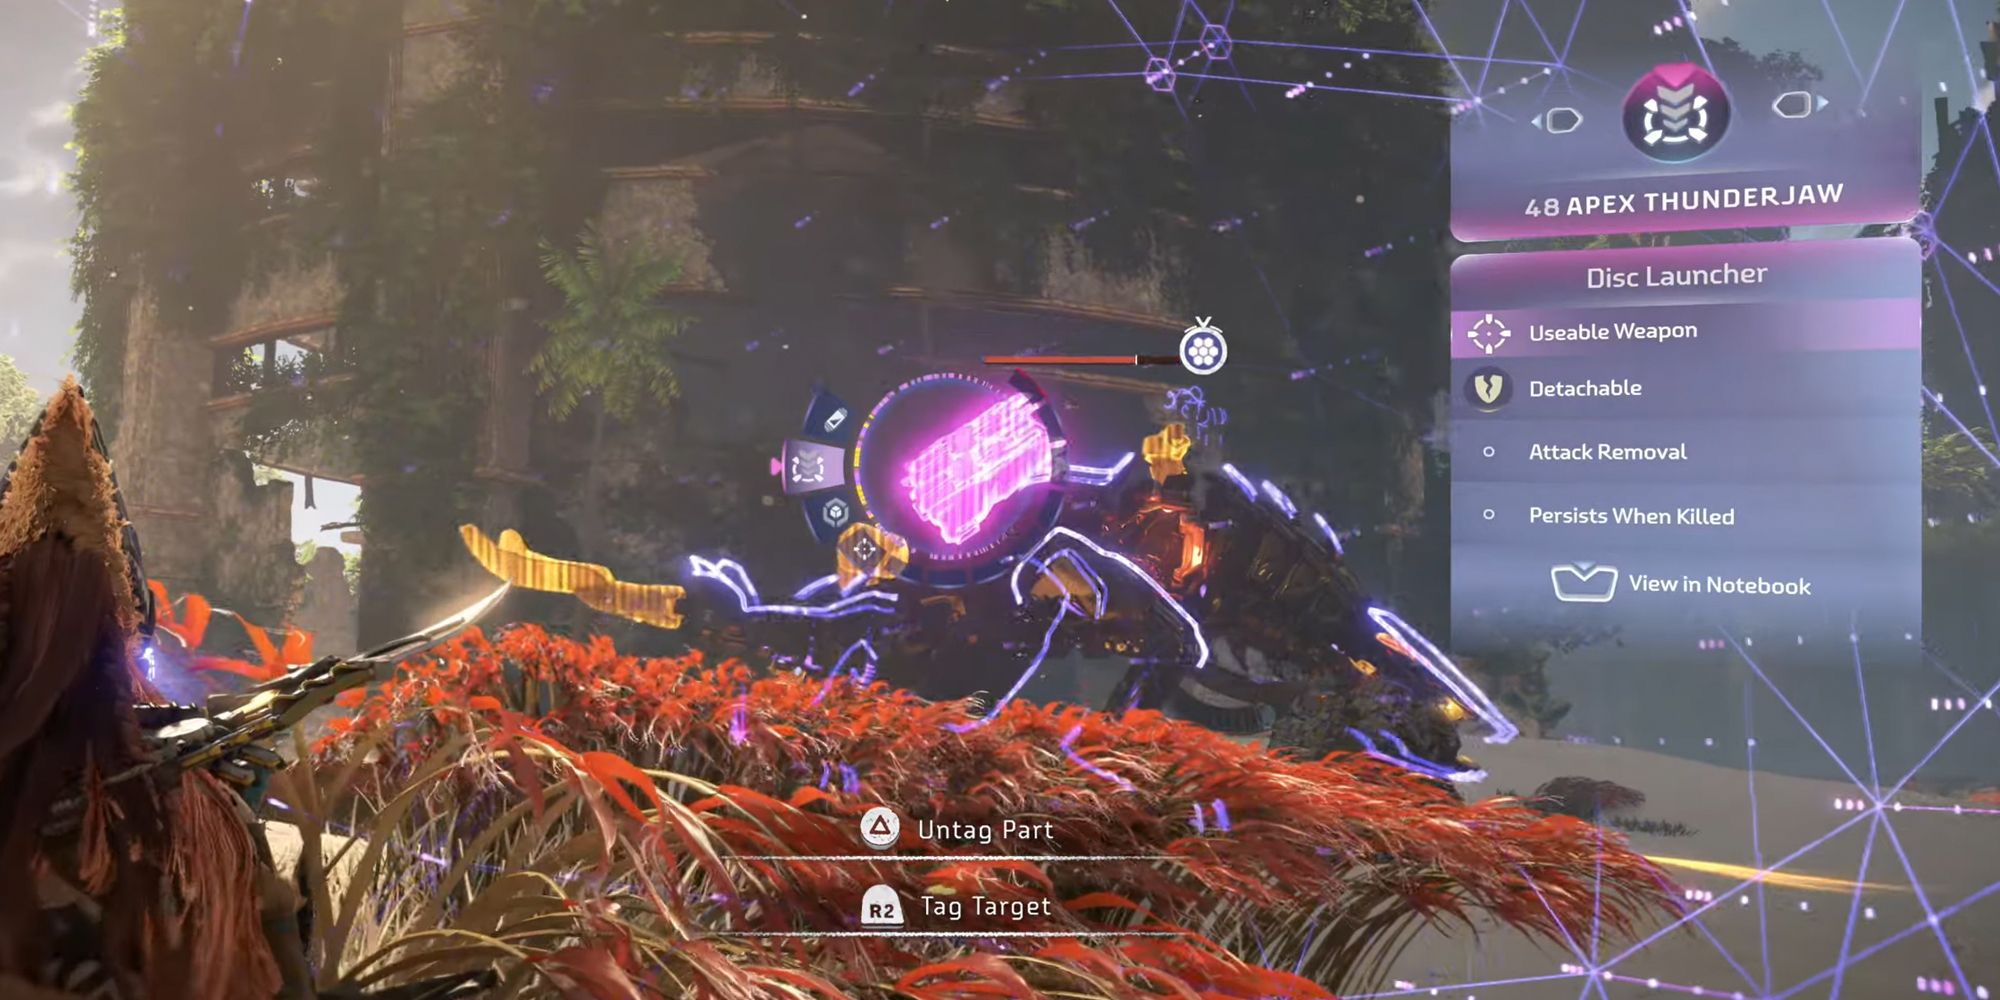
There's nothing wrong with the Thunderjaw boss, and it's still entertaining to play but unfortunately doesn't hold a candle to the other bosses in the game. The playing field is sandy, and most of the fight can be completed while hiding in the tall grass. So keeping sight of those weak points and aiming with ammo the Thunderjaw is vulnerable to is simple enough.
The Thunderjaw looks a lot more menacing than perhaps it is. As it isn't one of the essential bosses, however, the quality of the fight doesn't matter too much.
13 Slaughterspine
Like the Thunderjaw, the Slaughterspine takes place in one area without much else, acting as another of HEPHAESTUS' preventions from GAIA becoming whole again. The fight itself is straightforward so long as you don't get hit too much by the quick attacks of the machine – keeping your distance and firing from afar is recommended.
The Slaughterspine also resembles a type of dinosaur with components on its side that store plasma, making for added attack power if you don't deal with the plasma quickly.
12 Grimhorn
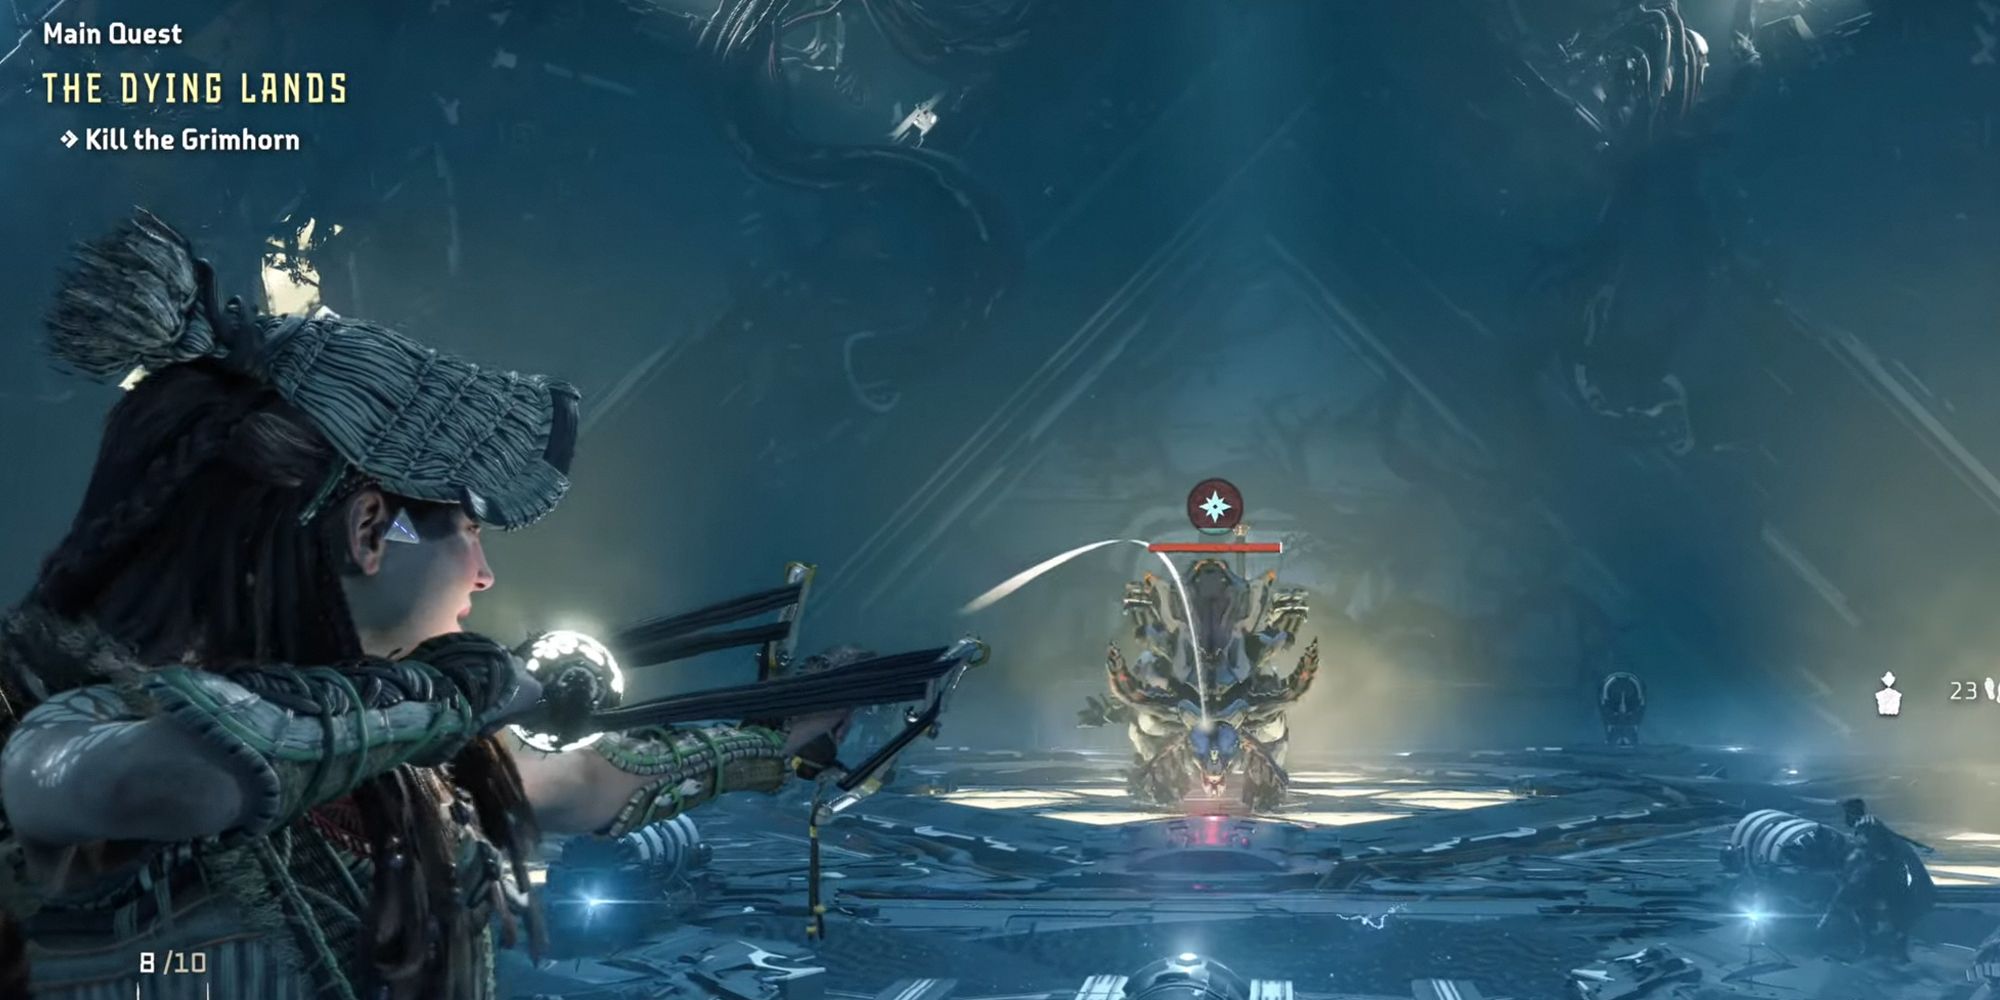
While at first Grimhorns may seem like tough opponents, there are so many more machines to worry over. This is one of the reasons why the Grimhorn boss doesn't quite make its mark. Grimhorns are easy to defeat with either purgewater or acid ammo, and their heavy weapon known as a Cluster Launcher can be detached for Aloy to use.
Overall the fight isn't too tough even though it's placed near the beginning of the game and feels more like an optional boss. It's similar to going out into the West and happening upon a pack of machines.
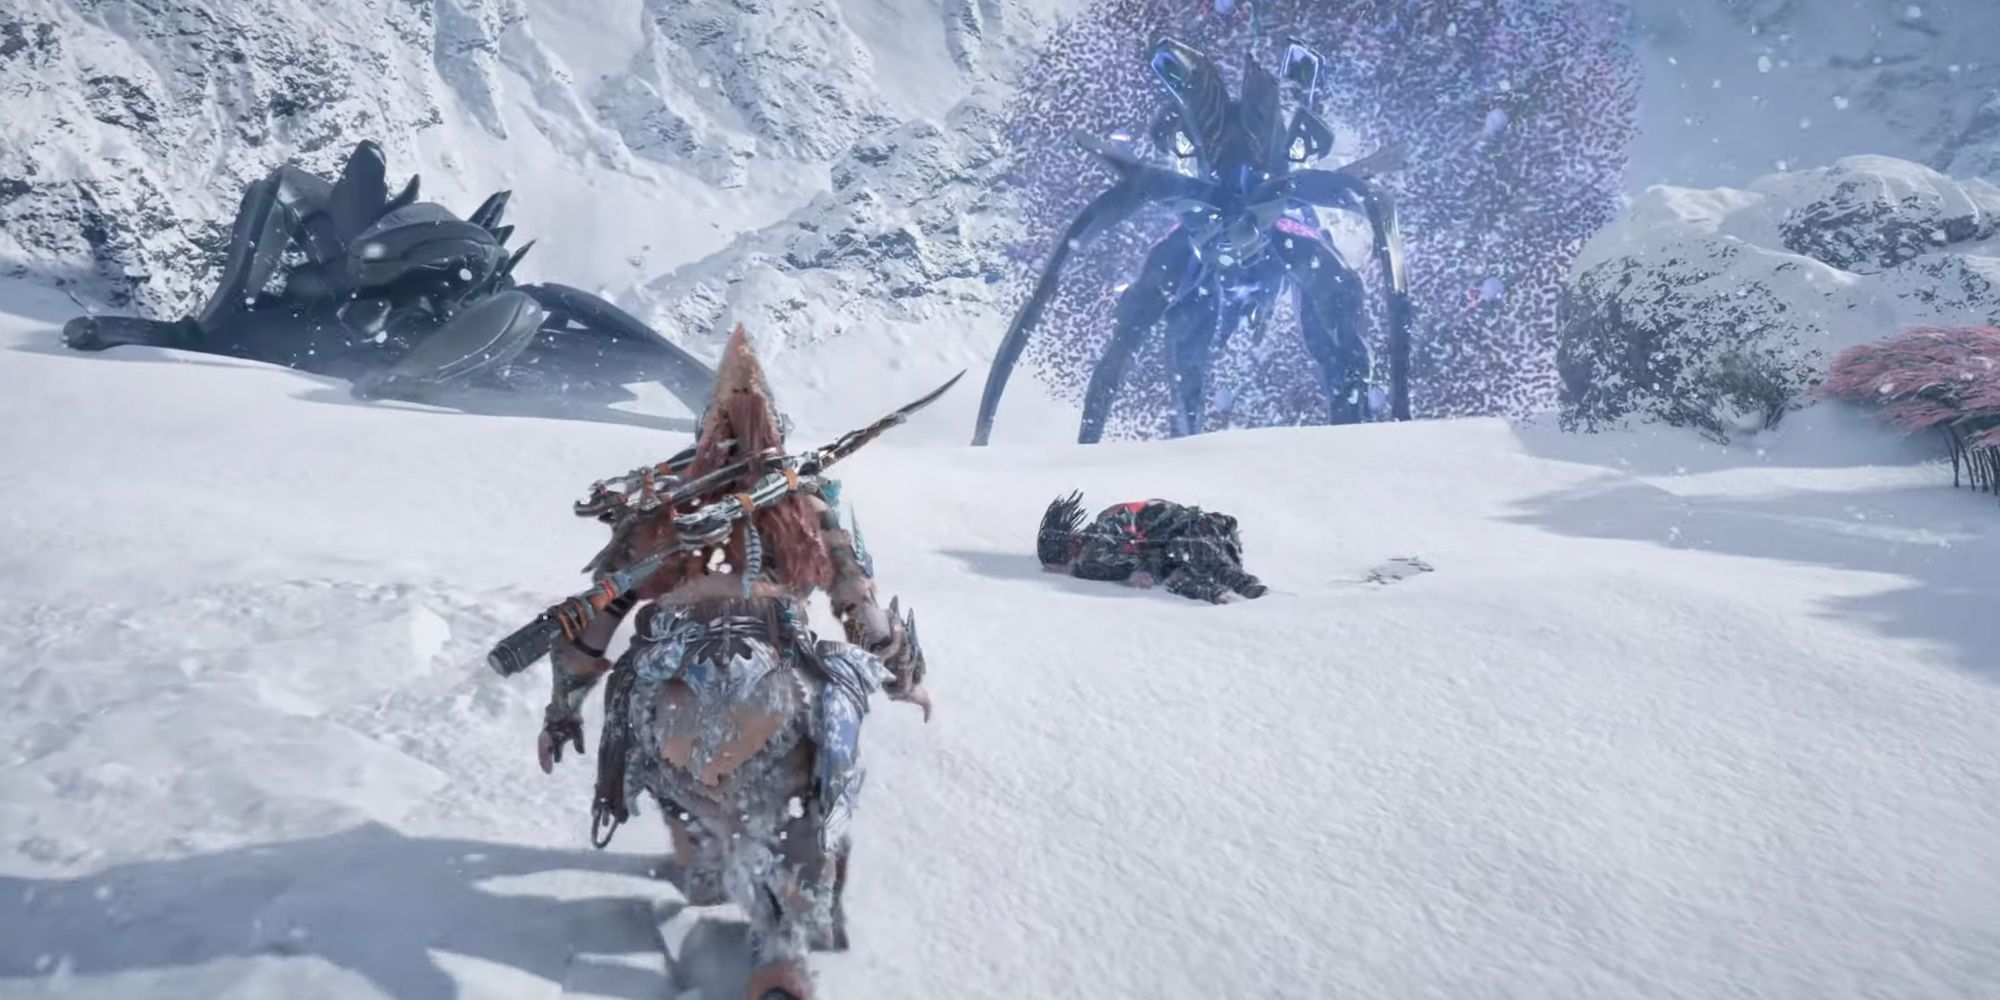
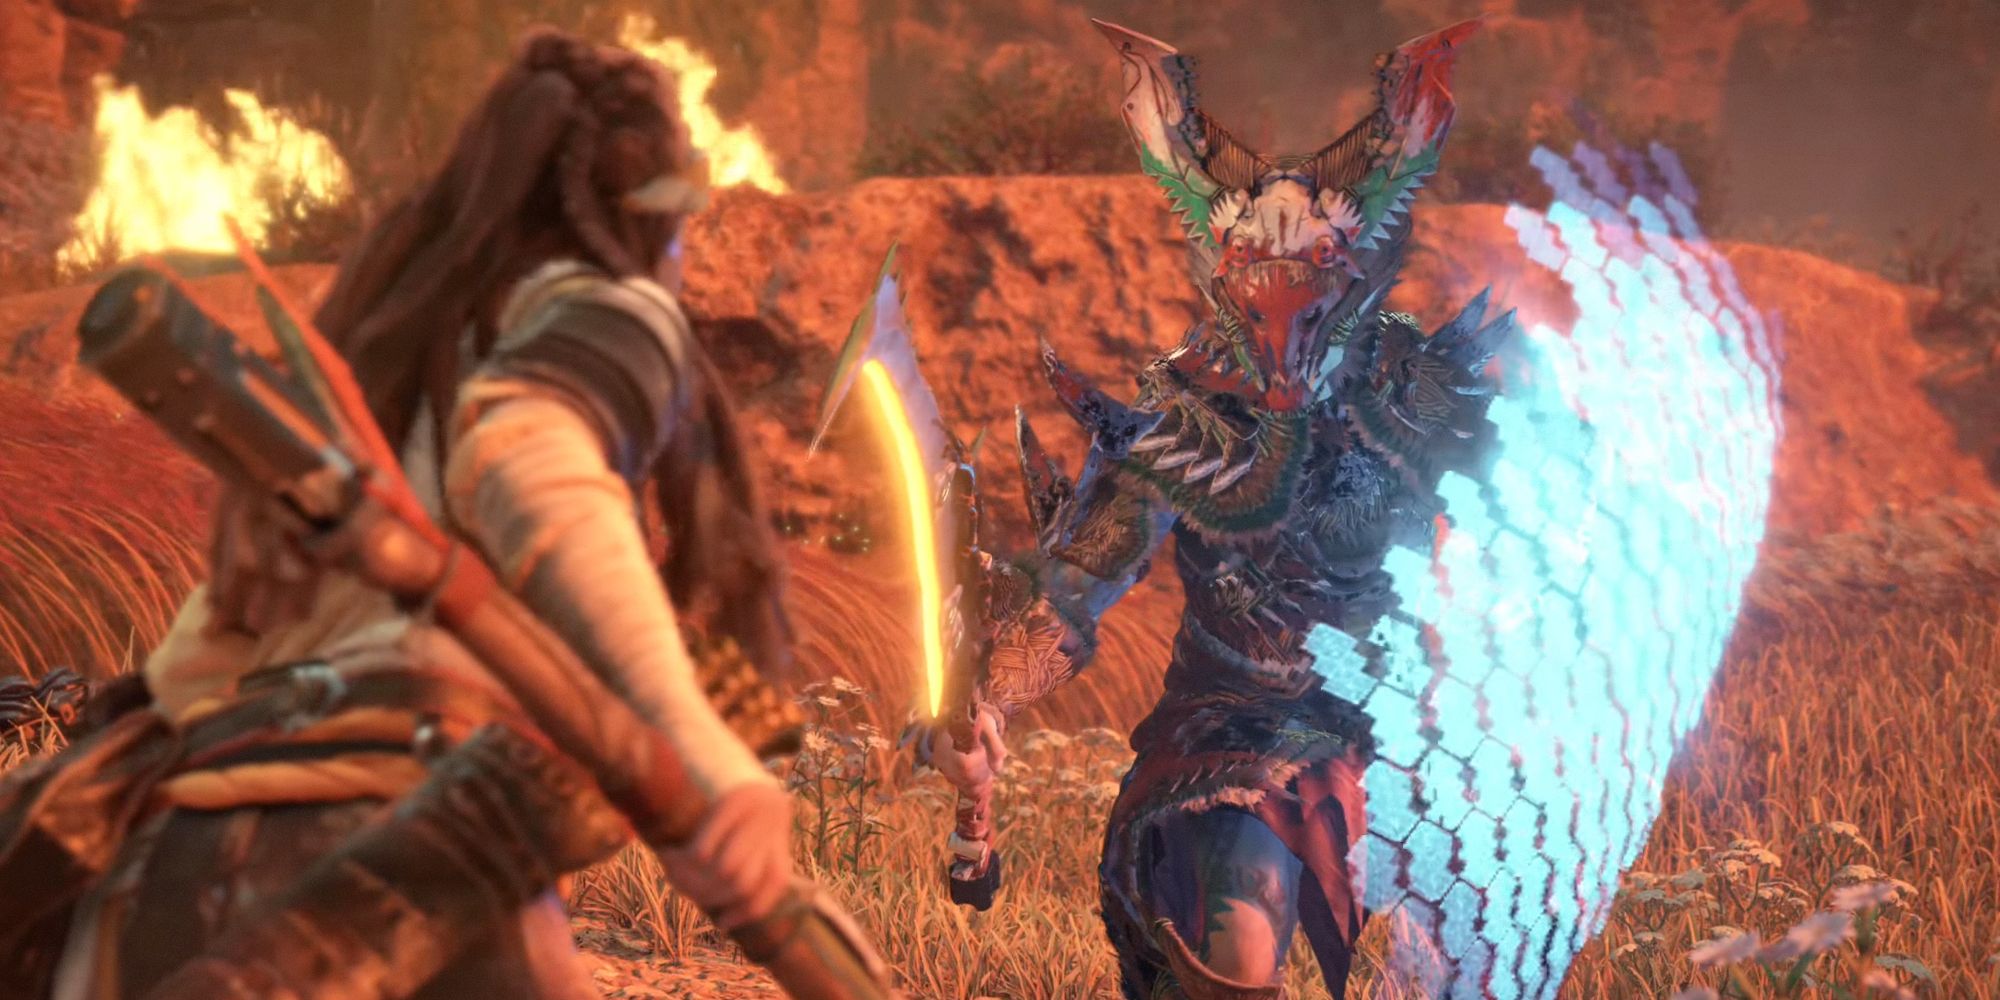
11 First Slitherfang
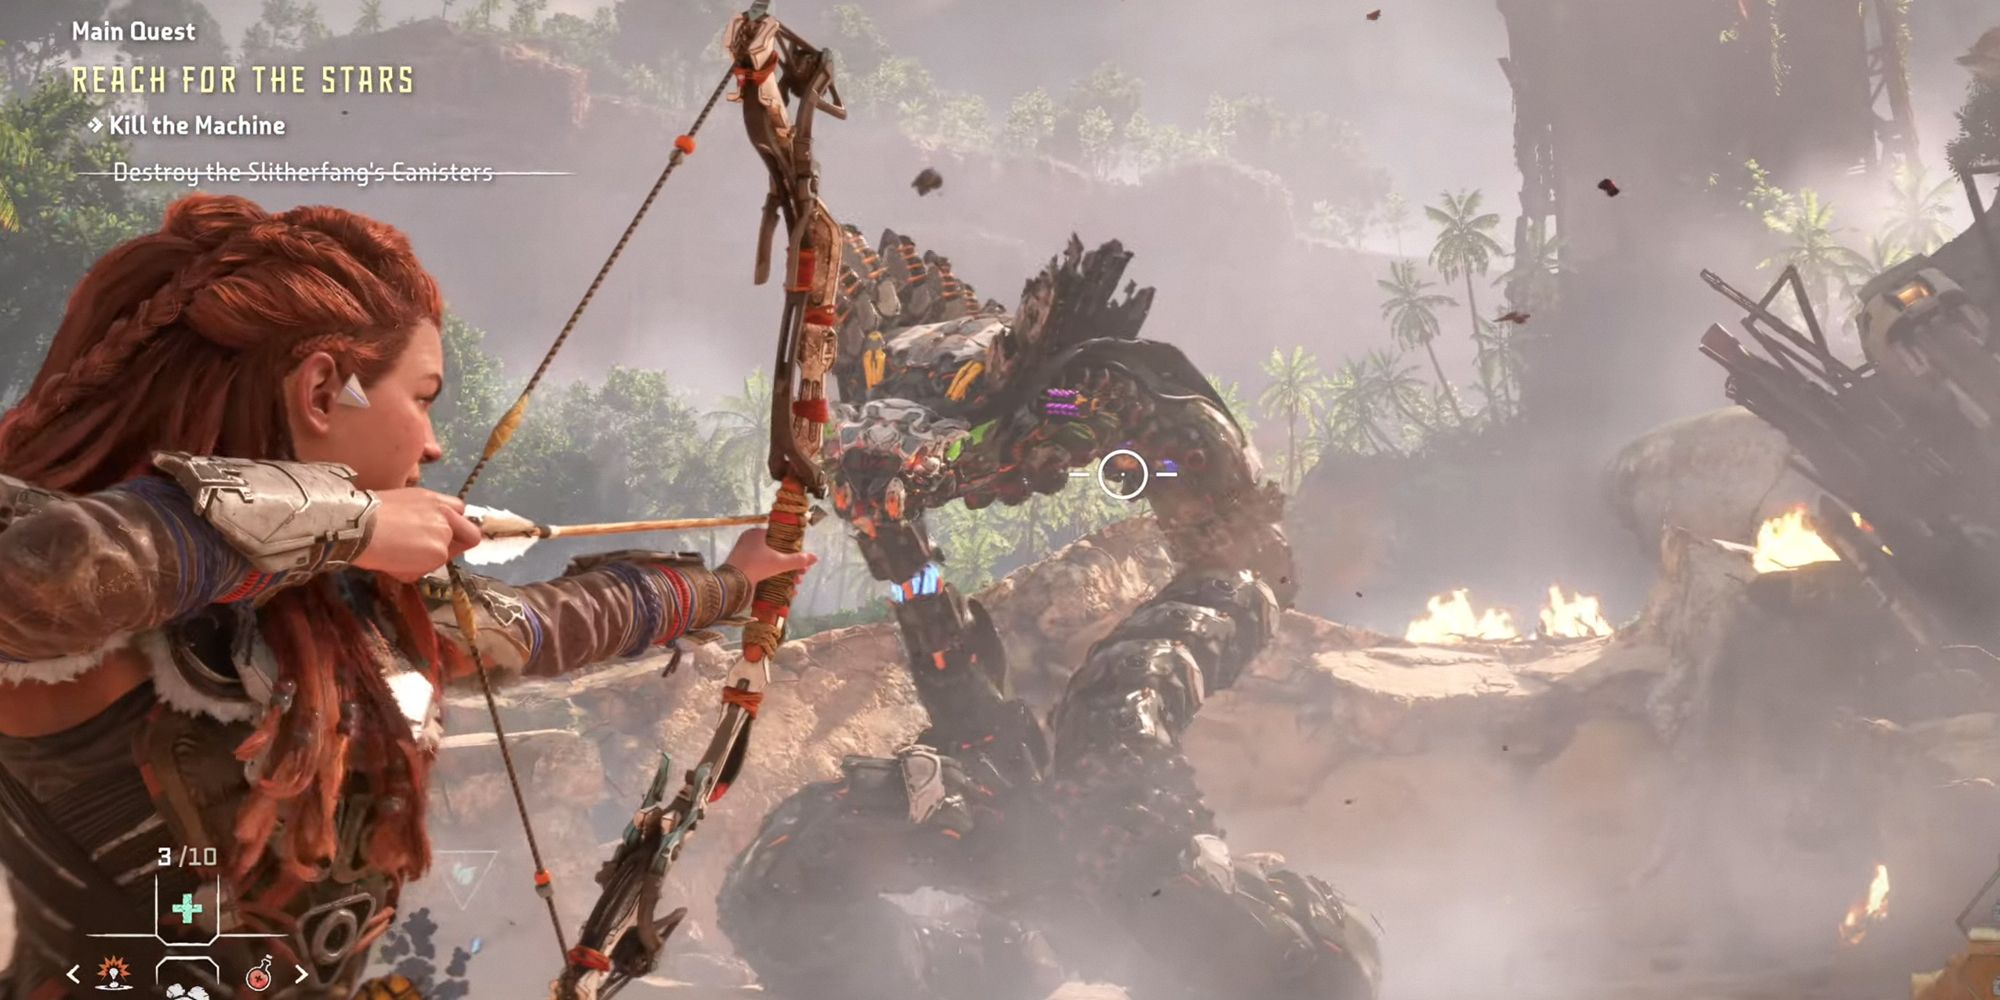
The very first boss of Forbidden West and what introduces you to the world and the atmosphere the game is going for, the first Slitherfang does make for a tremendous opening. Though since you're fighting a Slitherfang with whittled down health, and it is mainly there for being an end to the tutorial, it is ranked lowly on the list.
There's nothing really at fault with the battle, just that it isn't as enjoyable as most of the others. It certainly would've made its way up to higher if it were from aesthetics alone.
10 Dreadwing
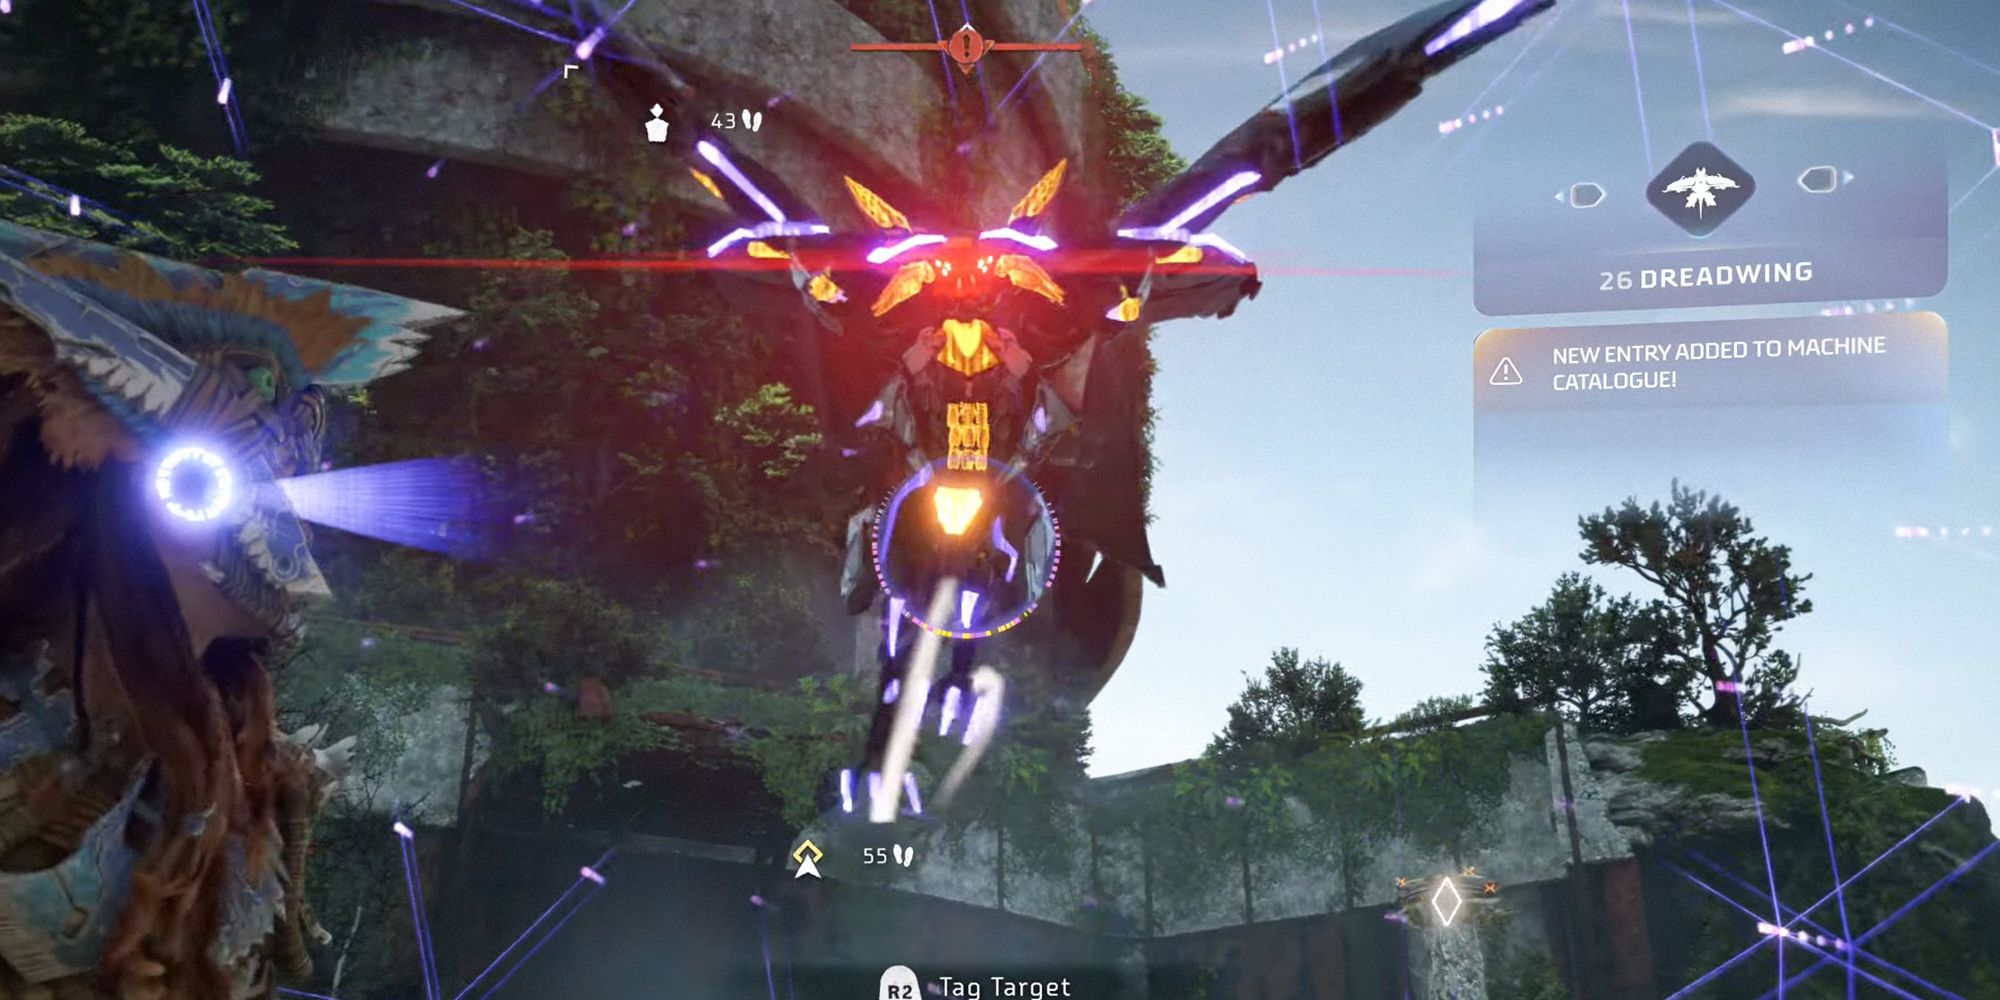
Before gaining access to the Test Station, Aloy must first battle against a Dreadwing, a huge bat-like creature with solid armor. Piling attacks consisting of fire ammo or explosive ammo will make the fight go by faster, which is excellent since, at times, the Dreadwing can feel like a bit of a bullet sponge.
Things get a little trickier when the Dreadwing goes invisible, but this is easily combated so long as you keep track of its flying patterns and where its last visible location was. The Dreadwing could've been much more but unfortunately doesn't live up to the quality of other bosses.
9 Specter
Running up through the facility to the Specters location is pretty daunting, especially since you don't know what Erend's condition will be like once you reach the machine. And once you do surface, there are a few different strategies for taking down the first Specter. You can use the tall grass and stealth abilities to sneak up behind the Specter and use Critical Strike.
You could also get out your most potent bow ammo and aim at all the right spots to make quick work of the boss. One of the best things about the Specter is there are a few reliable ways to take it down.
8 Erik, Second Appearance
Now, Erik's second appearance isn't a bad one, but it doesn't live up to the heights of either Regalla or Tilda's boss fights. The best thing to come out of Erik's second fight is the moments leading up to it where Aloy and Erik hash out all the things they wanted to throw at each other last time.
The main thing is to keep on the move during the fight and keep dodging. Heavy weapons like the Boltblaster are great for tearing down Erik's defenses but make quick movement more difficult to achieve. In all fairness, while the fight isn't terrible, it's one of the tamer and less memorable of the game.
7 Tremortusk
Even those who won't play Horizon Forbidden West will likely know of the Tremortusk since it was shown in most promotional material for the game. And good thing it was because now, every time a Tremortusk rears its head, another layer of dread approaches. In addition, the Tremortusk looks fantastic and moves believably in a way a heavyweight machine would.
Taking it down requires a bit of planning, like setting down traps and using weapons like the Boltblaster, Ropecaster, and Blastsling, so extra strategizing has to go into defeating the Tremortusk.
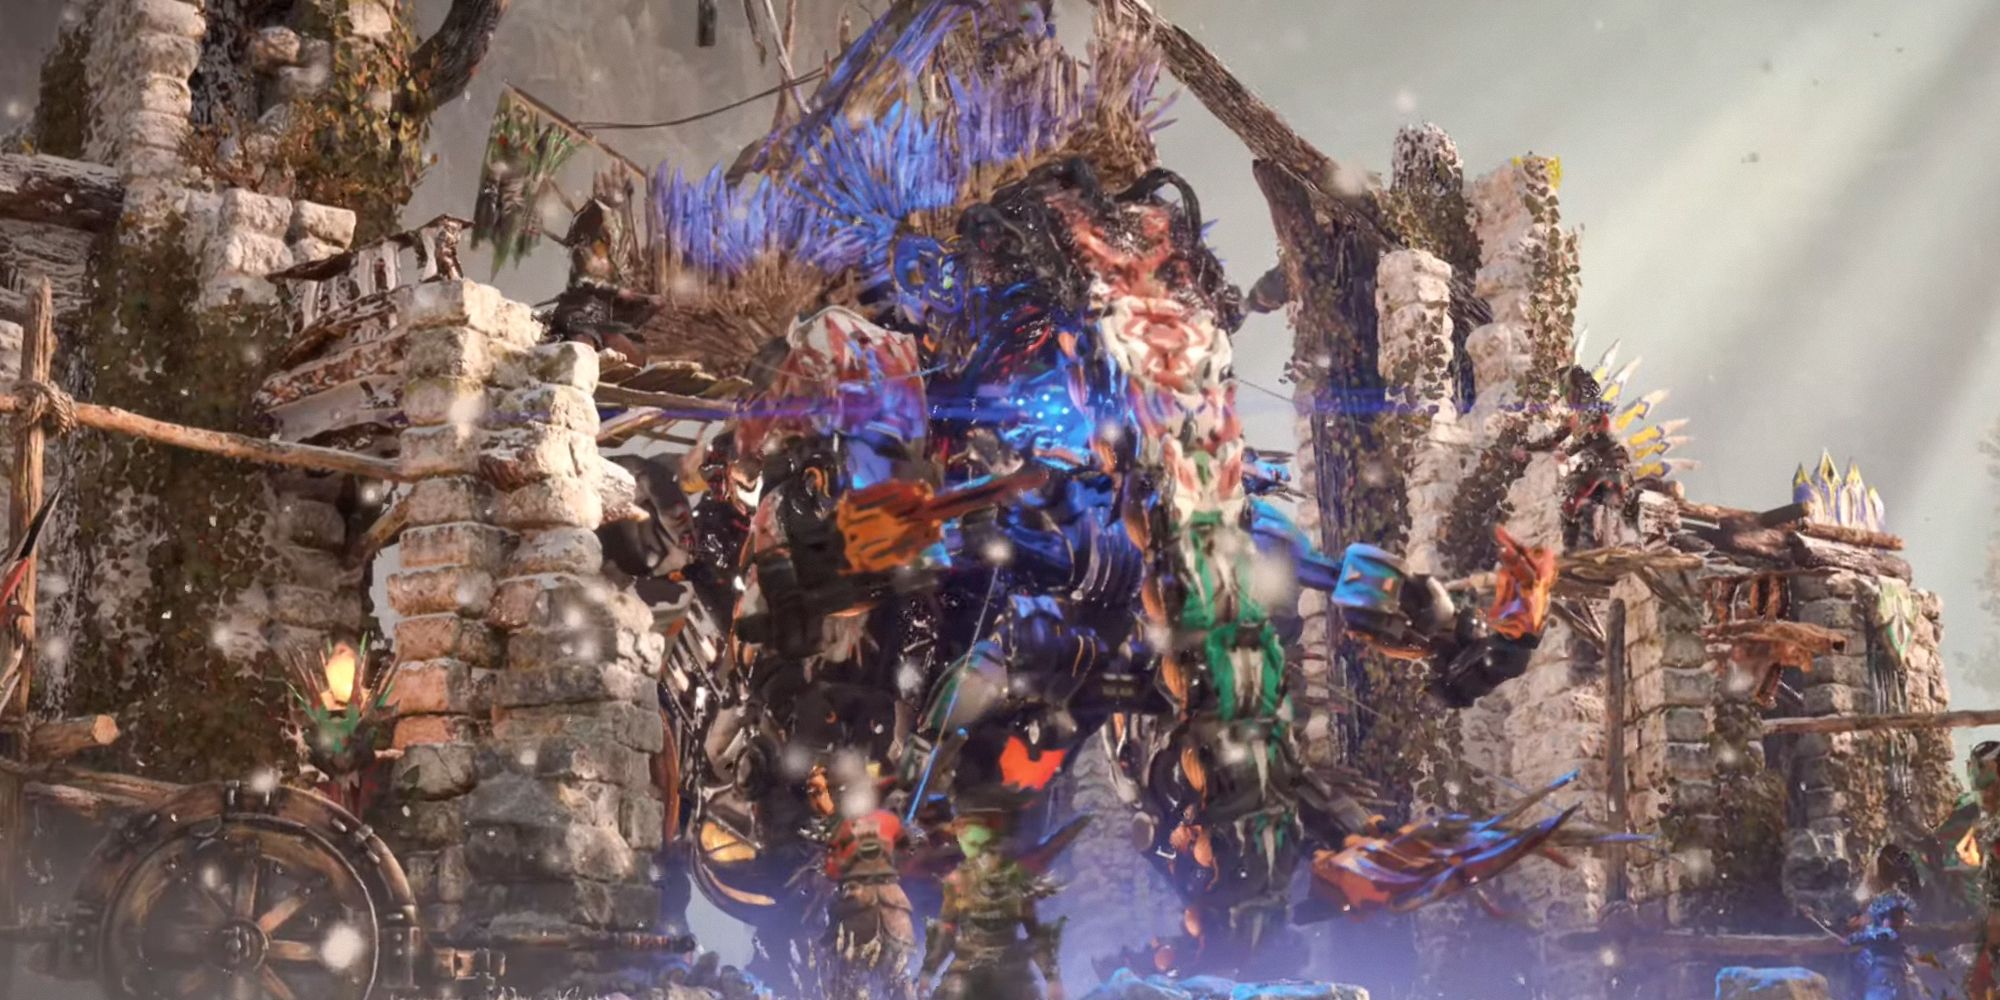
6 Regalla's Champion
By the time you're in the game's final stages, The Embassy will feel so far away, but one moment that will always remain from that time is the iconic fight between Aloy and Regalla's champion. The two battle it out after the slaughter of the Tenakth by the rebels, where after the champion is defeated, Aloy will obtain the Shieldwing.
Defeating the champion is satisfying while also rewarding you with one of the handiest items in the game. Gliding through the world is much easier than awkwardly sliding down the hillsides in a ploy to traverse quickly across the map.
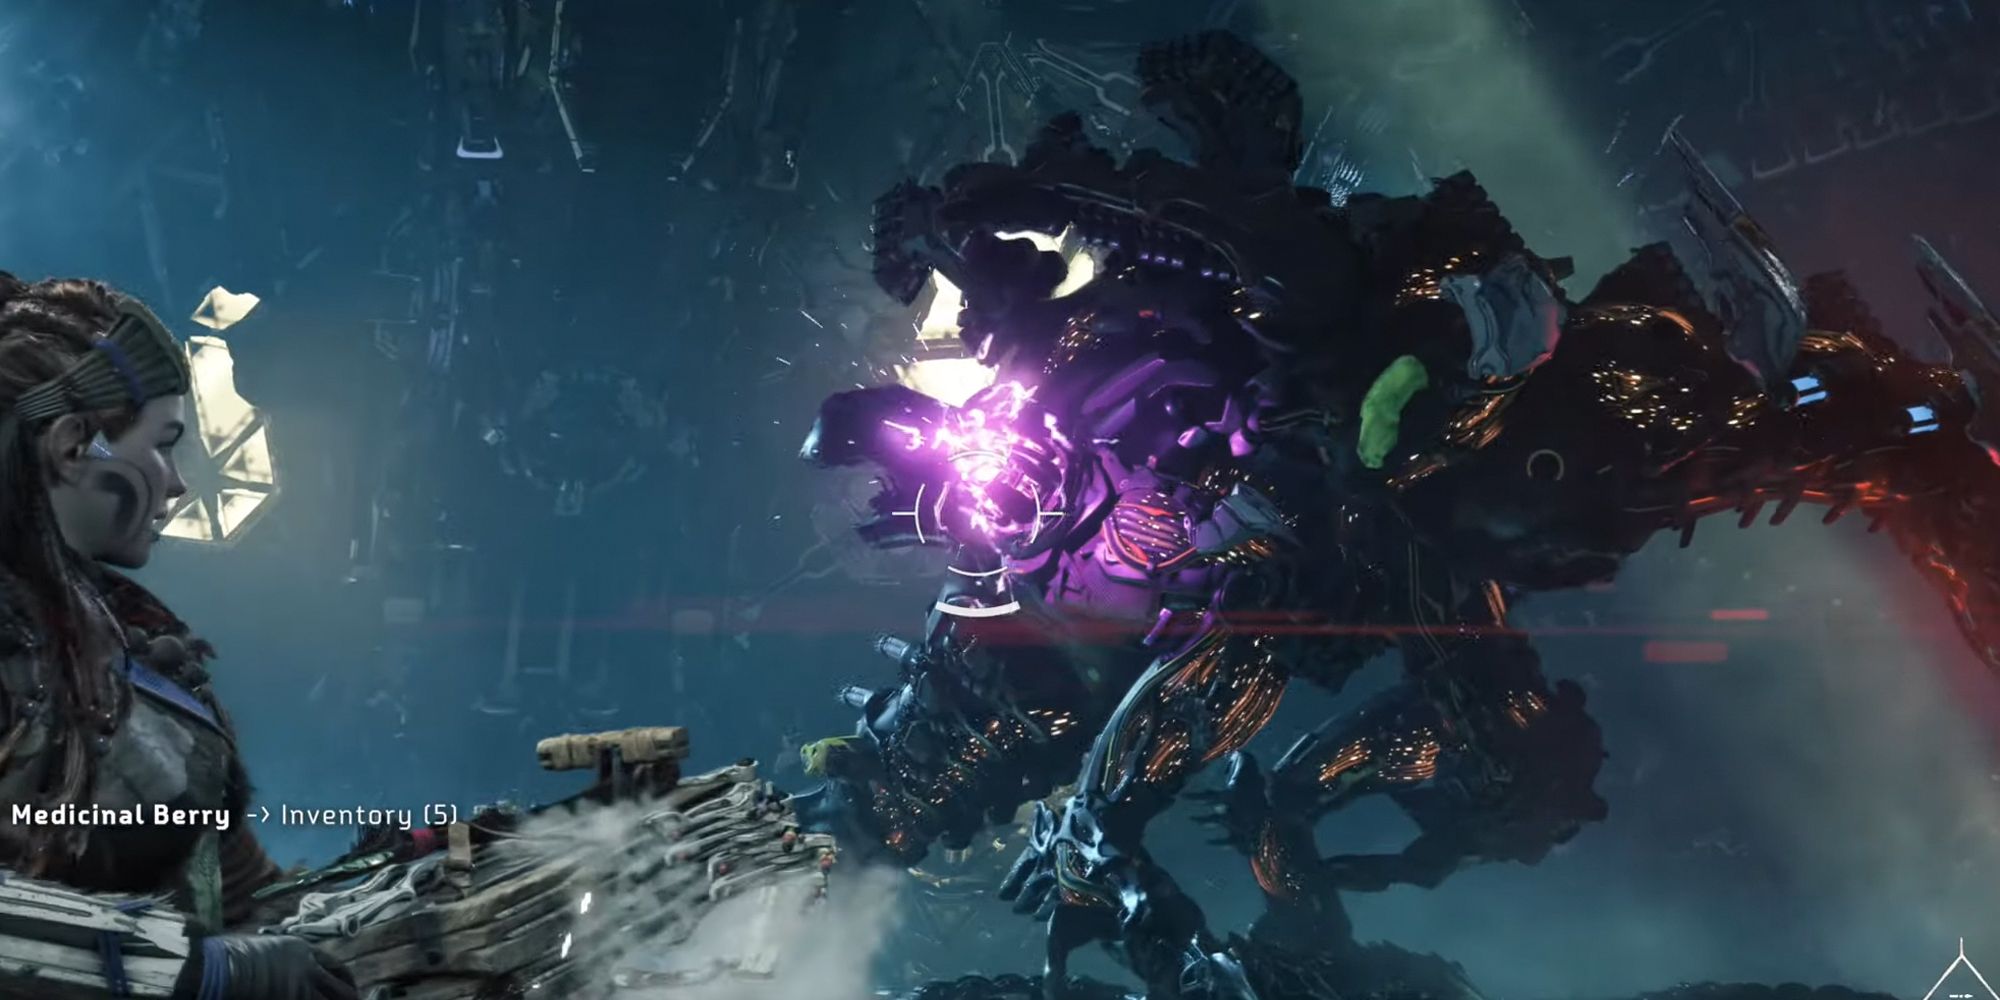
5 Tilda, Specter Prime
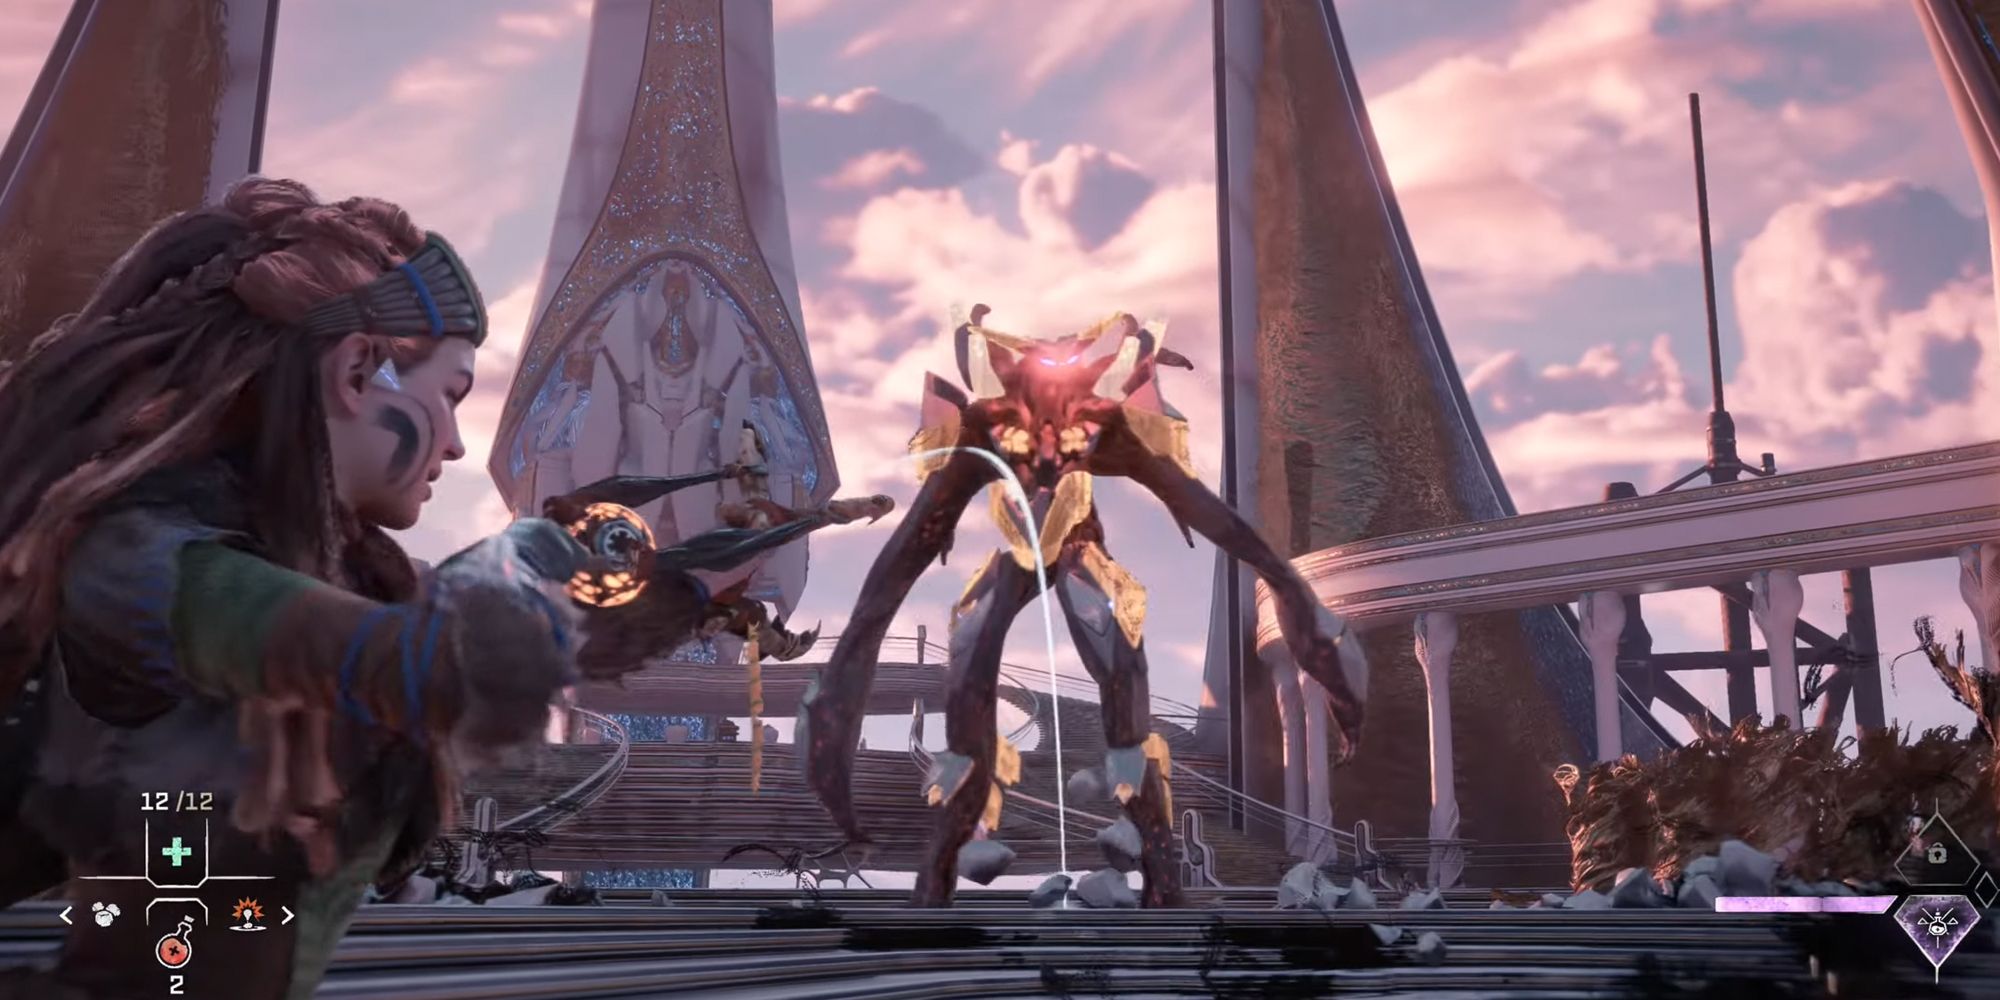
If there's one thing that Forbidden West could use more of, it's the Far Zenith known as Tilda – though even with her short screen time, Tilda's boss makes a statement, being one of the very best the game has to offer. The Specter Prime is the most futuristic Horizon has been this far, with the wild days of mechanical animals now seeming like the norm.
Specter Prime is an advanced version of the Specter and so is more powerful. Knocking off some armor is the only way to inflict any notable damage, so precision will take center stage, at least at the start of the battle. Specter Prime is a slick and entertaining boss that melds sci-fi beautifully into Aloy's world.
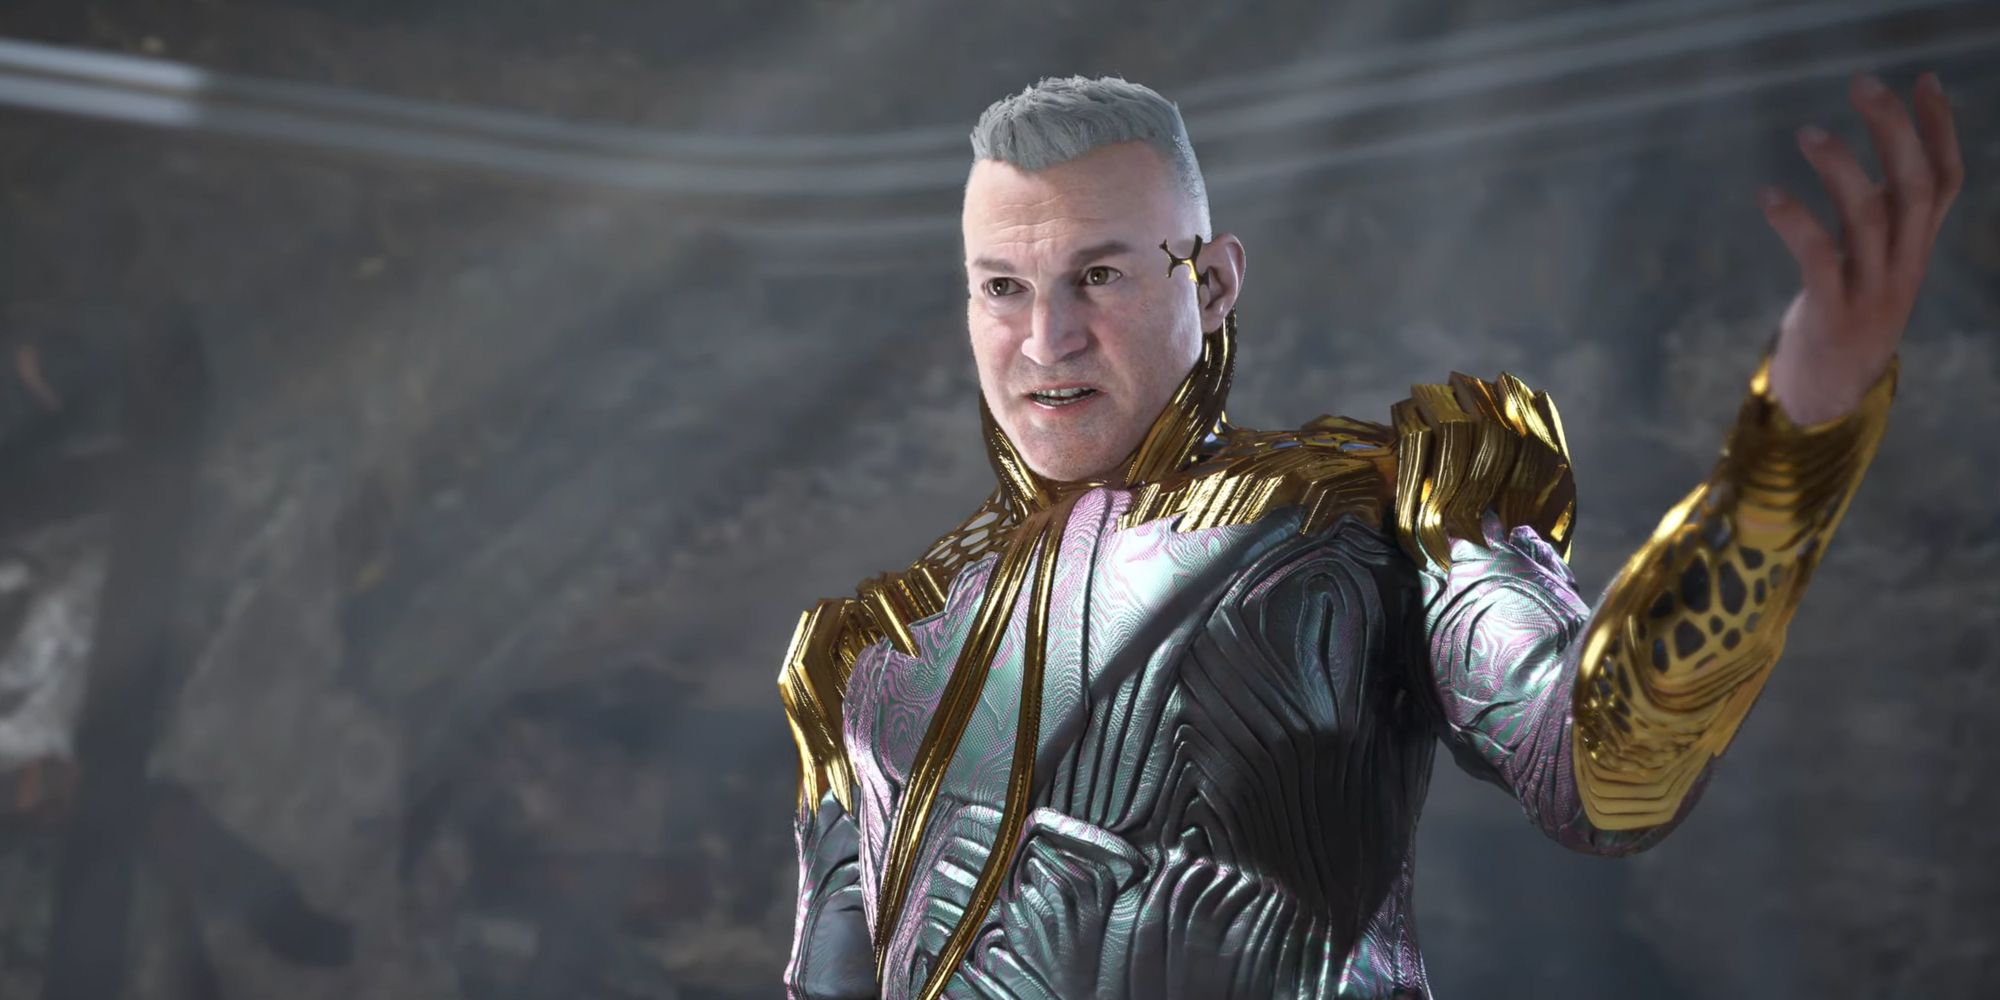
4 Erik, First Appearance
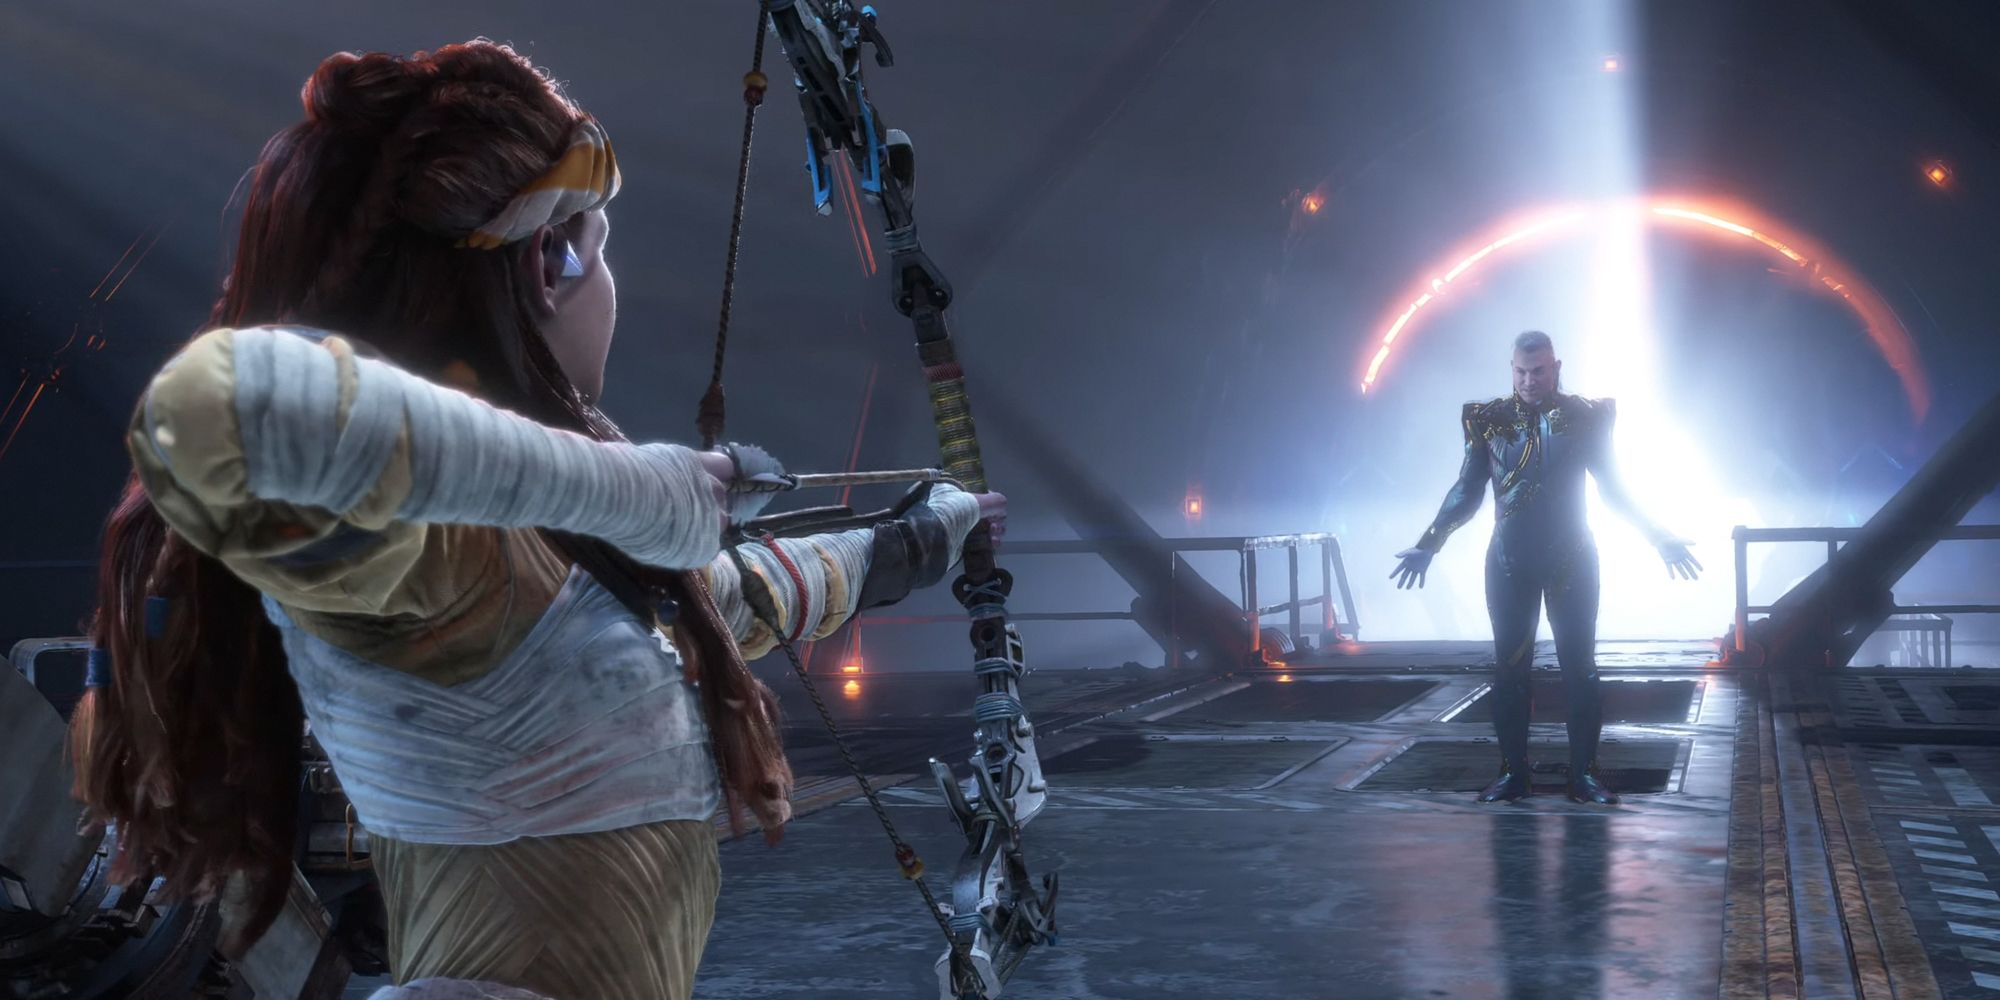
Erik is the first real look we get at the Far Zenith as their entrance is made short by the building collapsing upon itself (after Aloy shoots beams to try and damage Erik's shield). This boss isn't much of a fight considering you can't attack Erik head-on but does feature some of the best moments and one of the best cutscenes in the game.
The entrance of these new unknown characters, the Far Zenith and Aloy's questions about what they could want with GAIA, added to the tension of desperately trying to dodge Erik's attacks, makes for an incredibly well-crafted boss.
3 Second Slitherfang
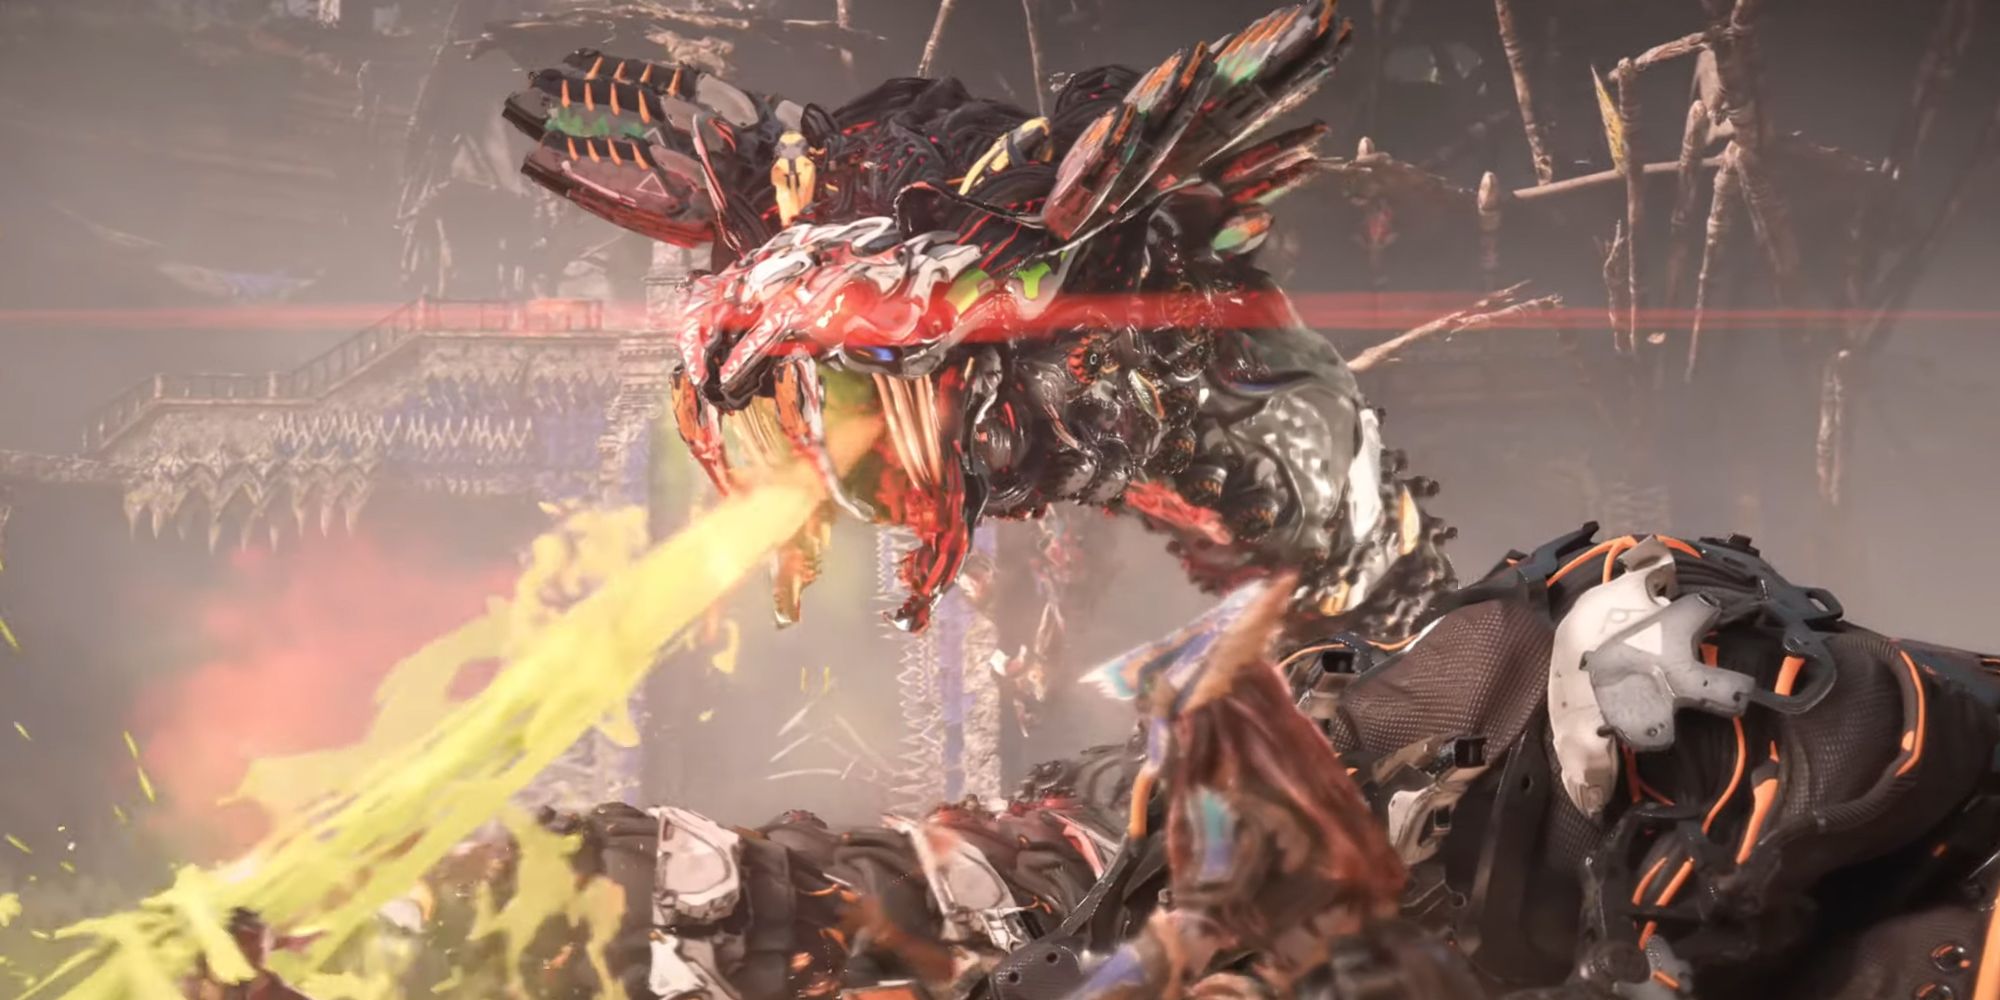
The second Slitherfang makes its appearance right when Aloy has more pressing matters in her mind. So the battle is not only a fantastic one to play, but there's also the feeling of there being no time to waste that rises with Aloy's frustration and anger. Set in an enclosed Colosseum-type place where it's just Aloy and the Slitherfang, its attacks are more likely to land, and dodging is trickier to complete.
This battle is better than the first Slitherfang because you have to fight it at its total health with the added pressure of trying to make sure everyone gets out safe. Even with the video game rules of everything stopping while you're in the middle of a boss, it can still be stressful to take down this machine.
2 Tideripper
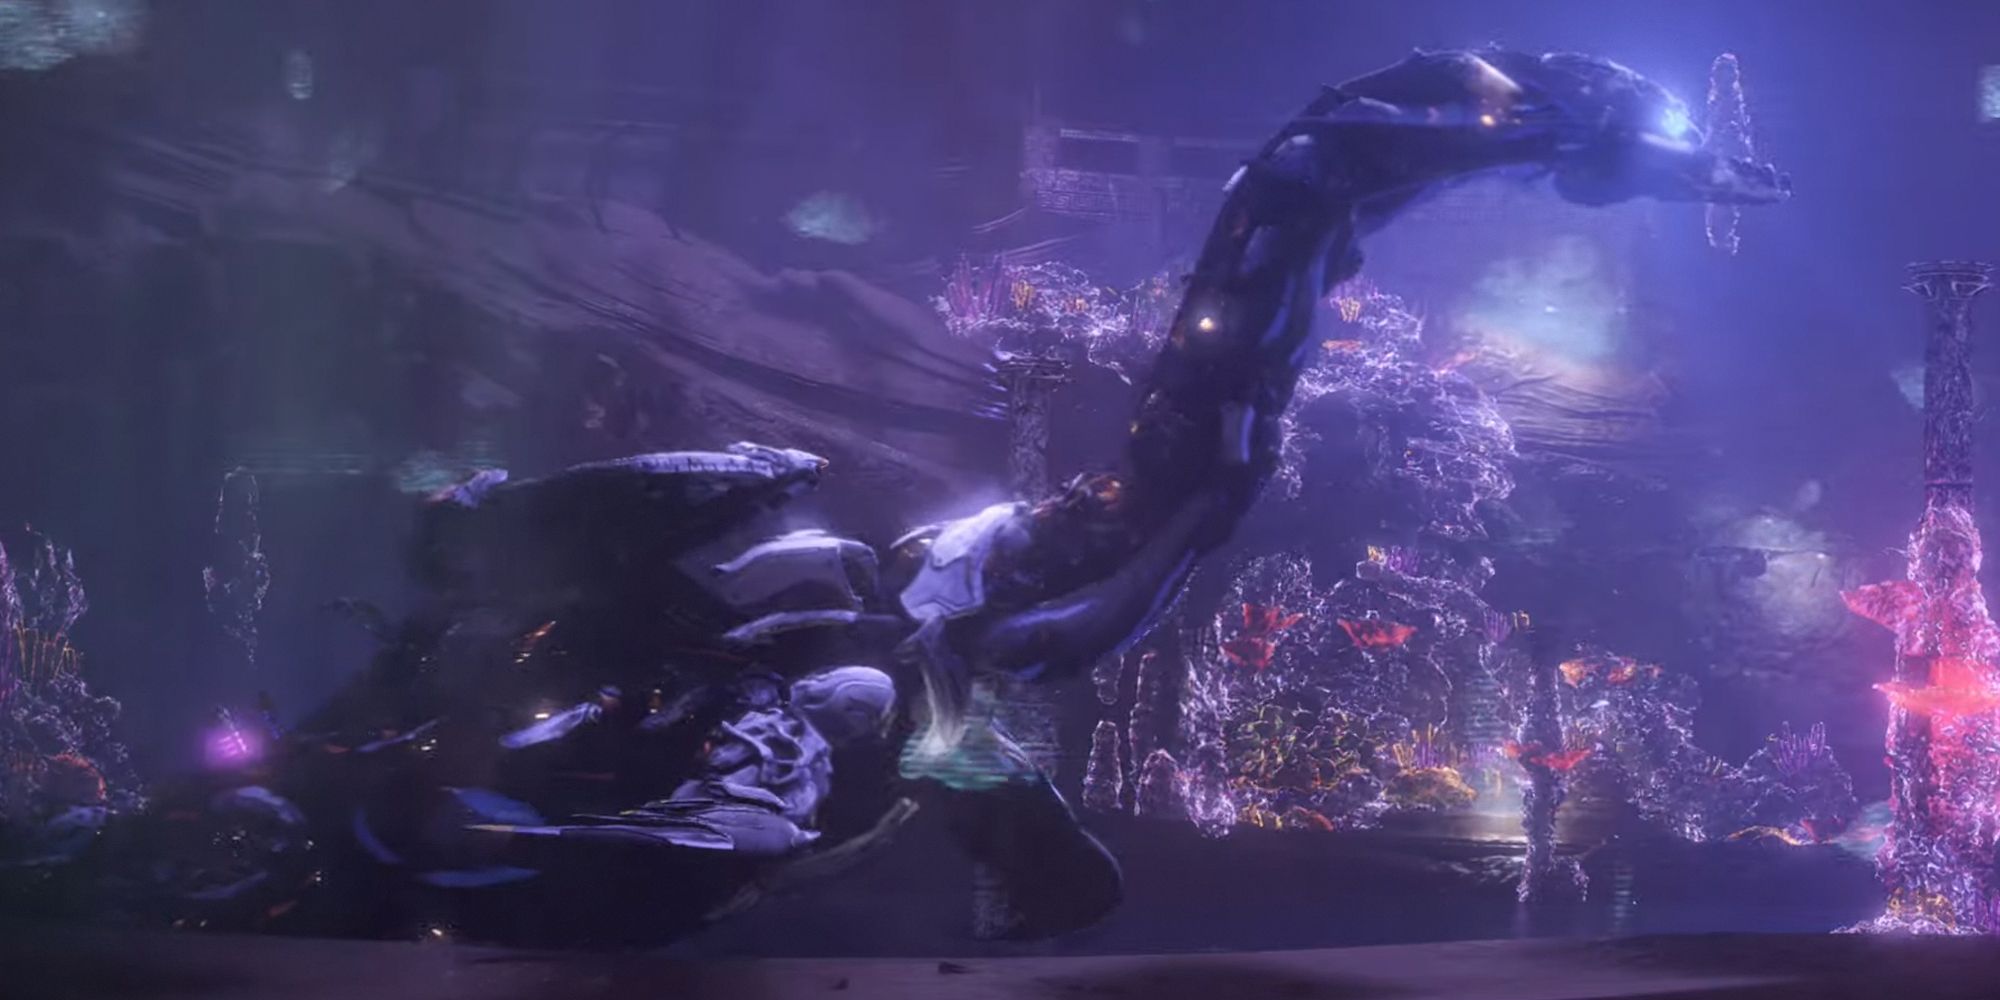
The Tideripper boss has everything going for it. The setting, the lighting, combat, characters, music, and more. Everything comes together to make this fight an incredibly atmospheric one where there are plenty of chances to use all the equipment Aloy has with her.
The entire underwater section that comes before the Tideripper fight also features a bunch of machines to take down, so the Tideripper may even come as a surprise to some. But, whether the Tideripper boss came as a surprise to you, it was still a wonderful one to play.
1 Regalla
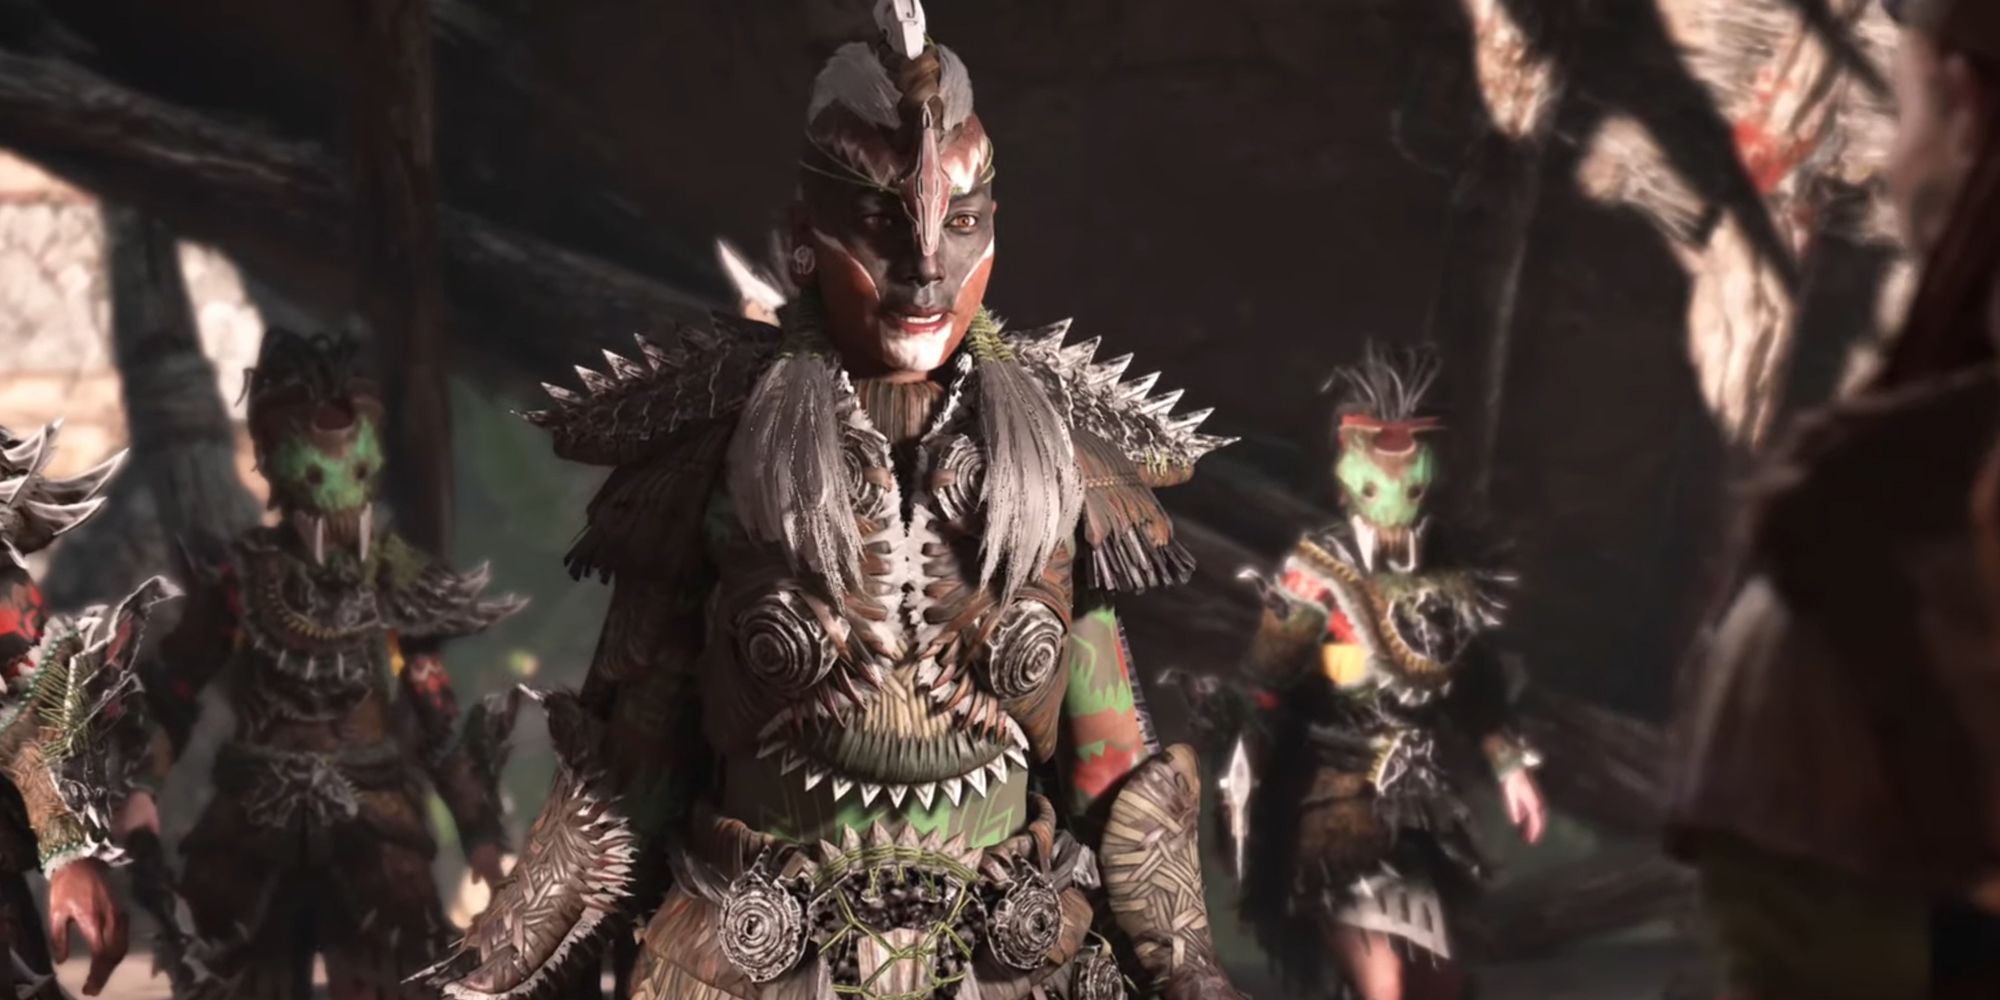
After everything in the game, all the tales you've heard about Regalla and her rebels, and Aloy's insistence to try and stay out of the conflict, she eventually has no choice but to take her down. Being as Regalla and Aloy are both skilled fighters, the battle lasts a while, taking around ten minutes to complete.
Neither party is about to give up, which is what makes the boss so unique. Where machines will fail, or the rebels will be silently taken down, Regalla won't be someone who is easily defeated.
Source: Read Full Article