Quick Links
- How To Build The Pig Cart
- How To Build The Raft
- How To Build The Fishing Pier
- How To Build The Caribbean Bridge
- How To Build The Parrot Perch
- How To Build The Lookout Tower Stairs
- How To Build The Rainwater Collector
- How To Build The Cargo Lift
- How To Build The Gangplank
The fifth world in LEGO Bricktales is a Caribbean island filled with quirky pirates. There are a lot of problems to be solved on the island, and many will take expert building skills. You've made it this far, but the Caribbean has several challenges that might require you to tear down your whole build and start over if anything is off.
If piratical precision is causing problems, this guide will provide step-by-step instructions for creating functional builds. It may not be a treasure map, but it's far less cryptic and still leads to a Happiness Crystal!
As with the other levels, most of the puzzles in LEGO Bricktales' Caribbean world have more than one solution. All the builds in this guide have been tested and proven to work, but you might find other functional solutions as well.
How To Build The Pig Cart
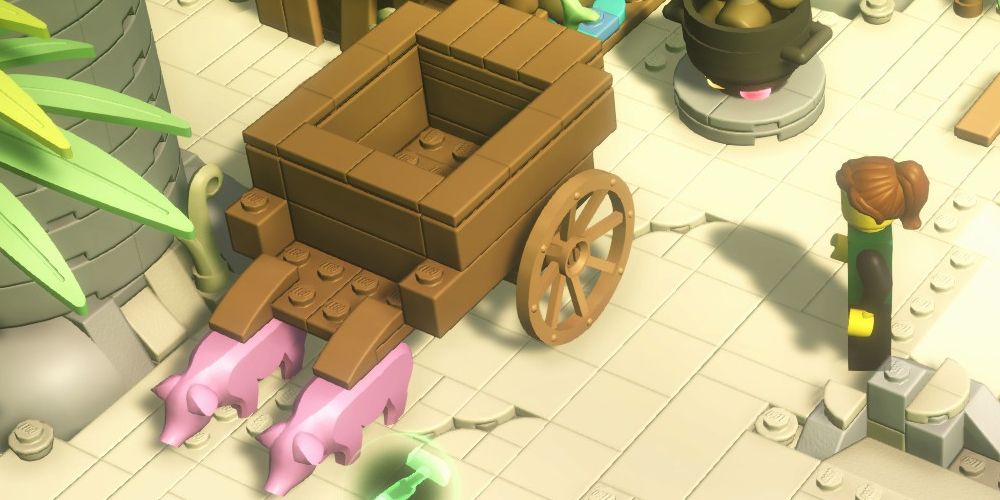
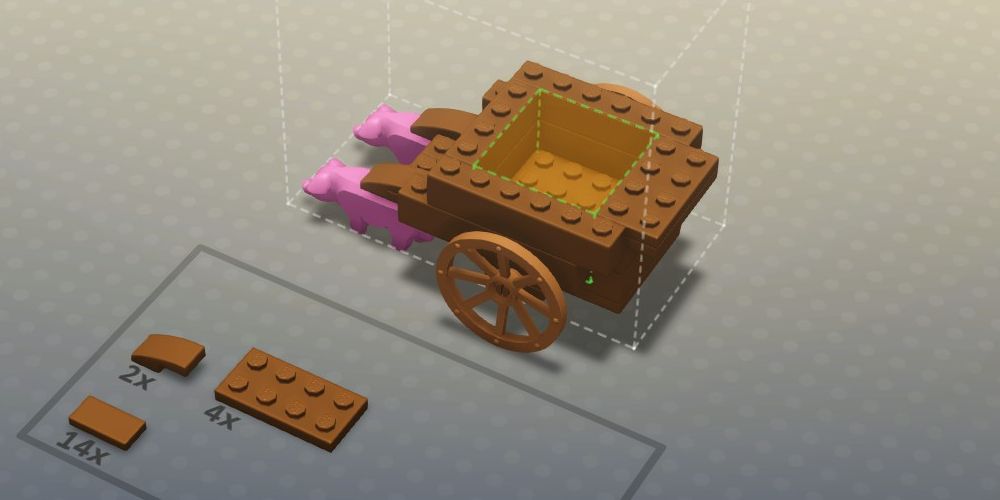
The pirates don't have horses, so they use pigs to pull wagons full of goods around the island… or rather, they would if they had any wagons.
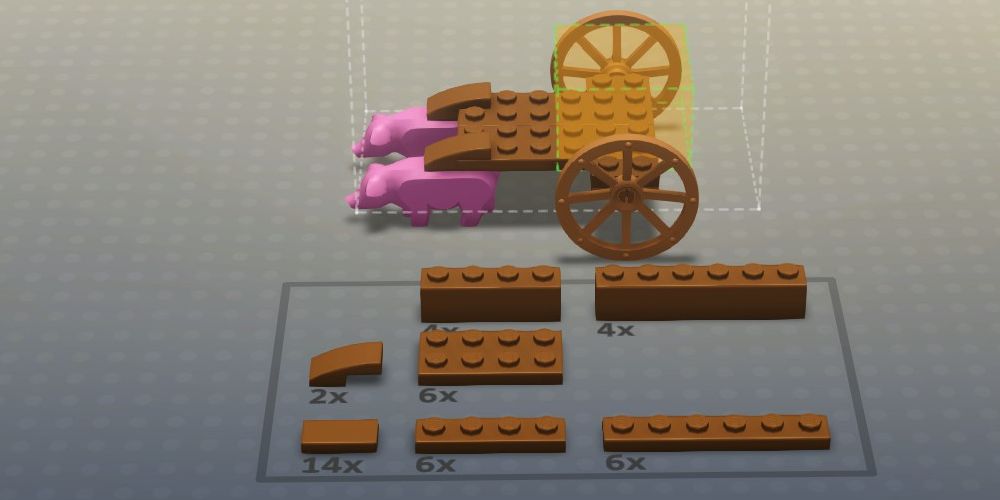
Start by placing both of the largest plates on the base and connecting them to the pigs using rounded pieces.
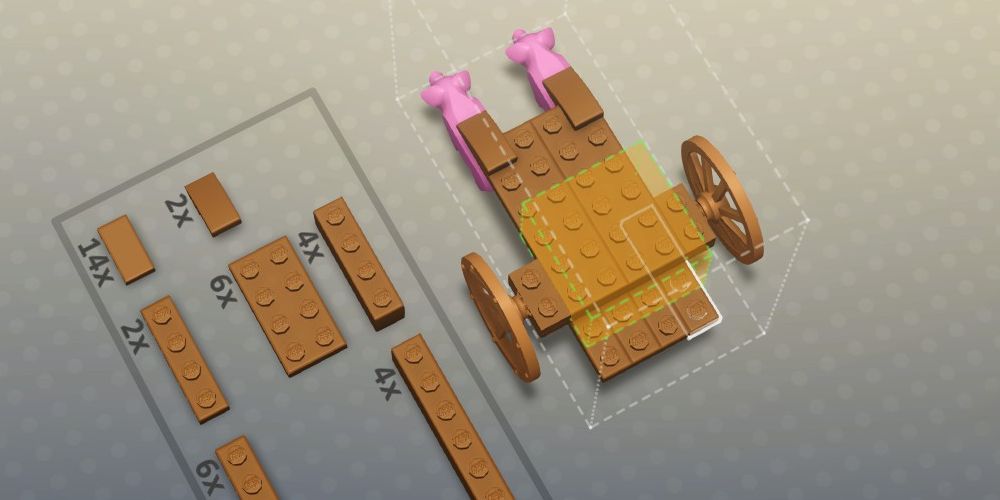
Attach four of the smaller thin plates to the underside of the cart, so that each has two pegs extending toward the rear. Make sure they clear the cargo area.
Stack a pair of four-peg bricks on the rearmost part of the wagon to form the backstop, then add a plate between it and the main part of the wagon to even out the floor.

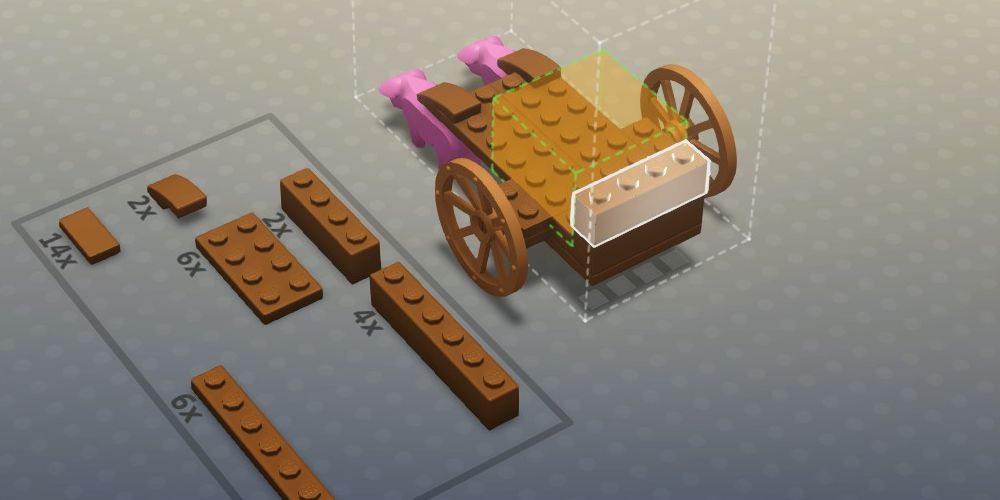
Stack bricks on the remaining sides of the cart to fully enclose the cargo area without putting any pieces inside it.
Fill the gap in the backstop with two-by-four plates so that all the wagon's walls are the same height.
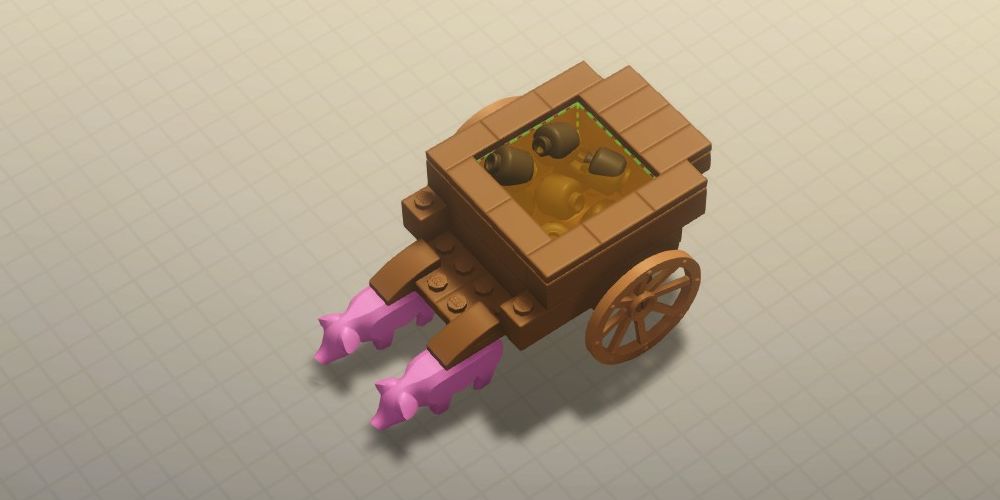
Cover the top of the cart with smooth plates to give it a finished look, then run your simulation – it should hold all the coconuts with ease!
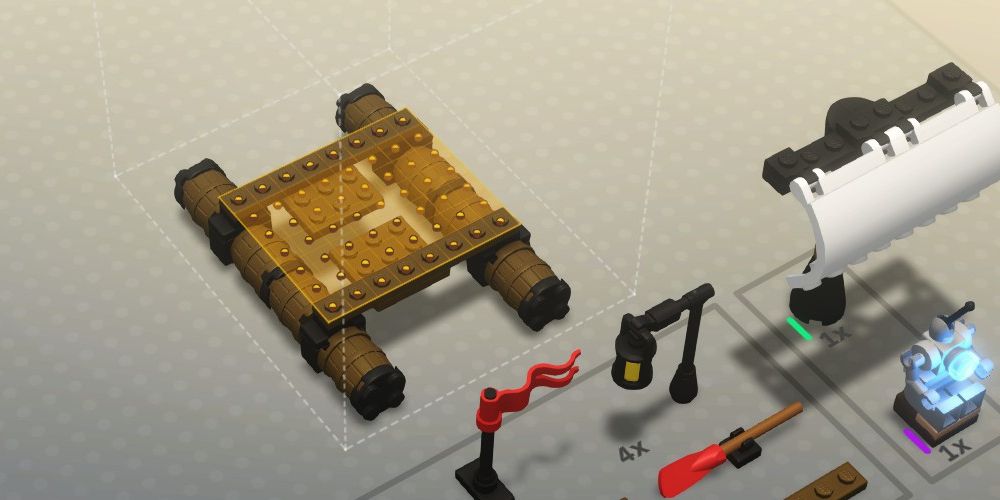
How To Build The Raft
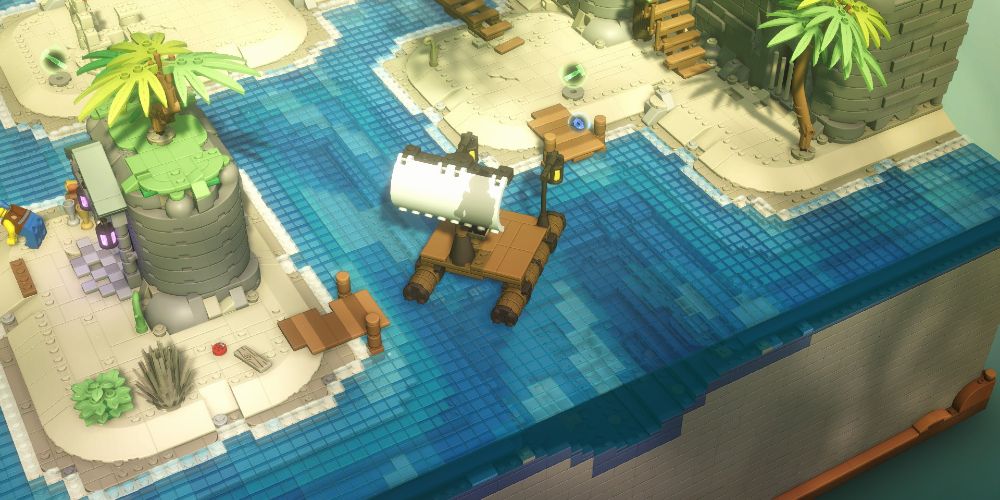
To reach Boo's shop and several quest items, you'll need to build a raft on the beach.
To start, connect the two logs with thin brown pieces at each end. The pieces will touch, but won't be connected until you put something above or below them.
Use your entire allotment of light-brown three-peg plates to start building a support structure underneath the raft. Again, they won't connect just yet, and the raft will be asymmetrical.
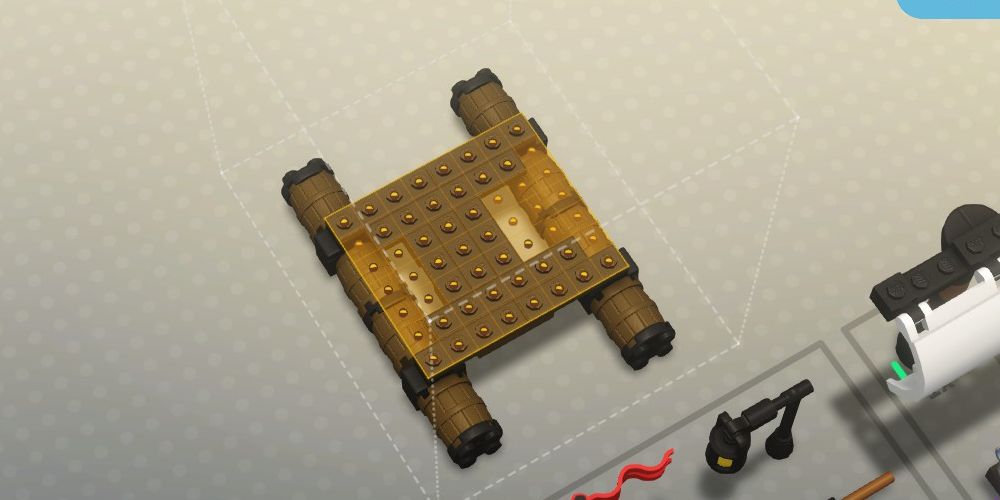
Use the longest available plates to connect the support pieces perpendicularly, then use the dark-brown three-peg plates to connect them from the top.
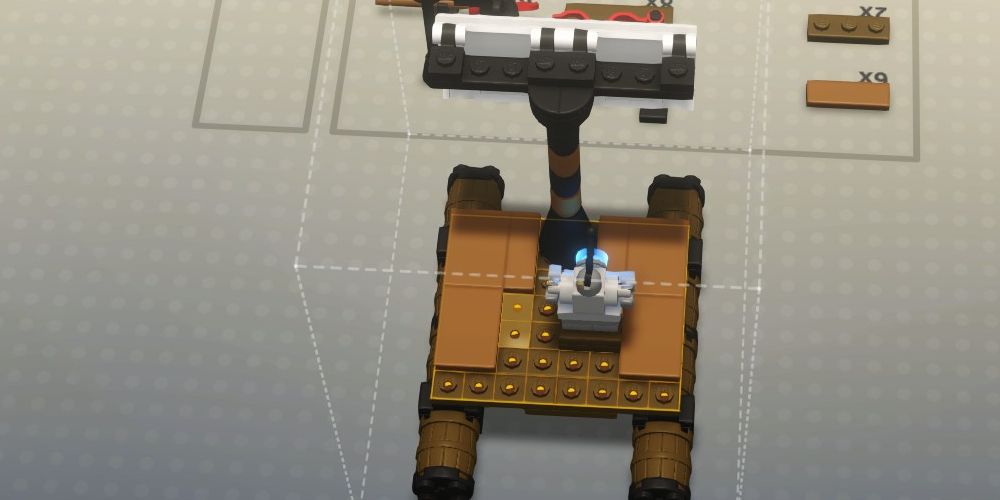
Place the sail and the test robot wherever you want, then start covering the top of the raft with smooth plates.
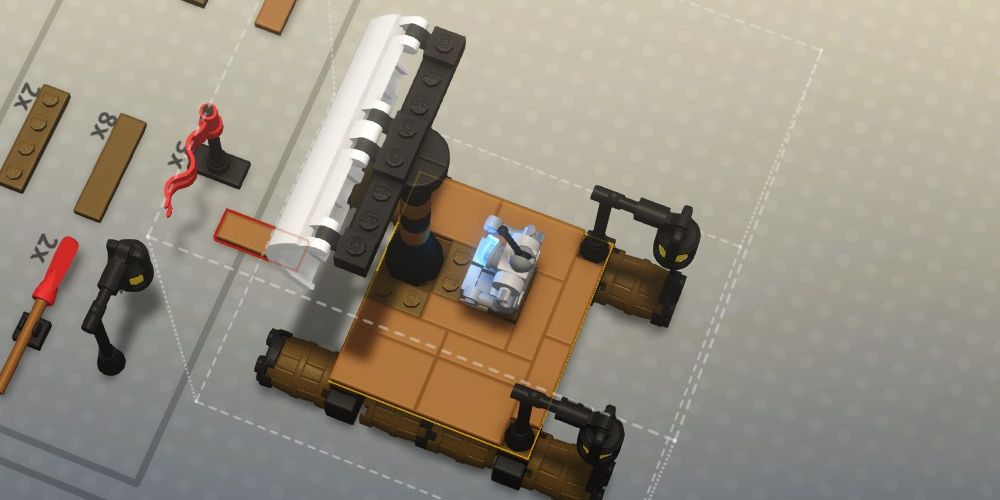
As long as the top of the raft is entirely covered, it doesn't matter which kinds of pieces you use. Lanterns, oars, and flags can all be used to give your raft some character!
How To Build The Fishing Pier
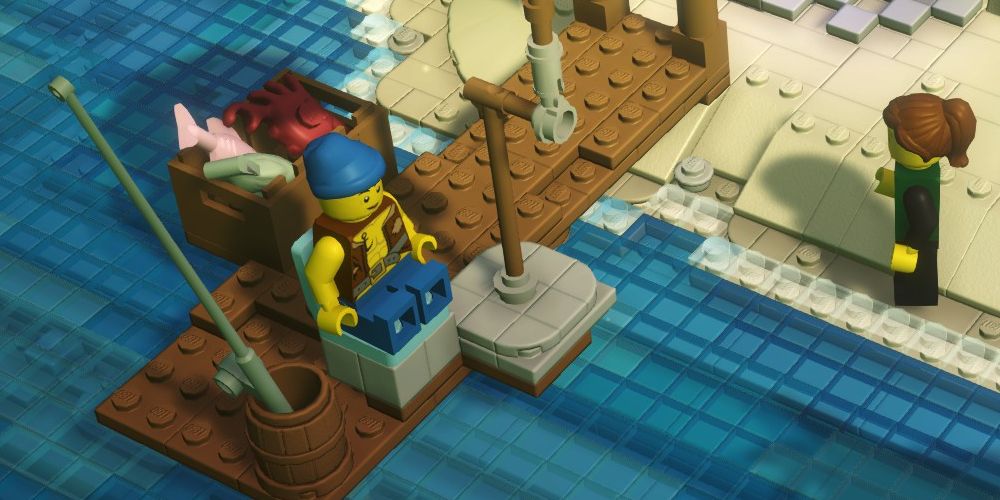
Not only does the fisherwoman's pier need to reach deeper water, but it also needs to have all the amenities for a perfect day of angling.
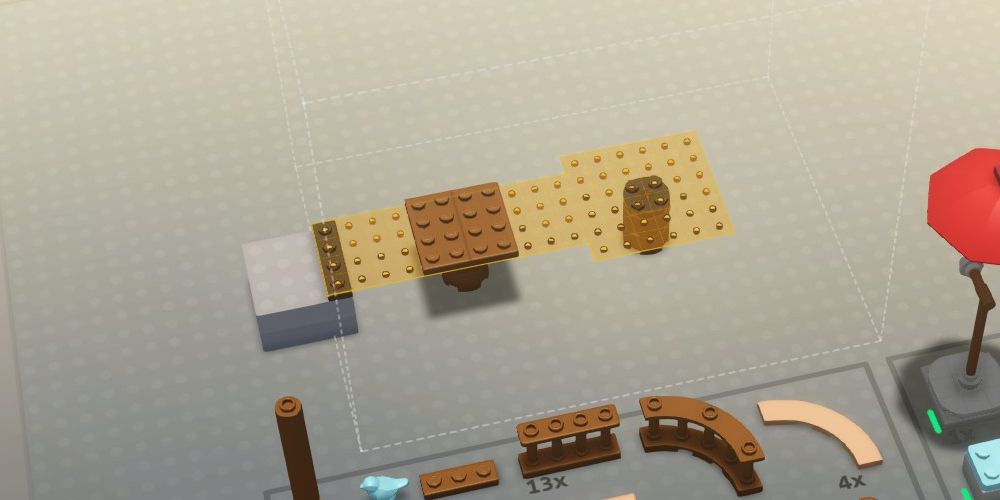
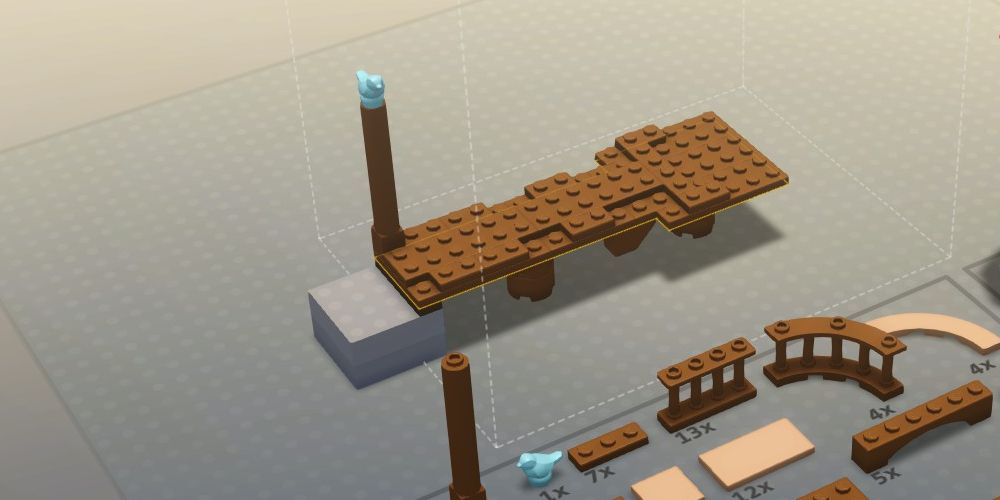
Start by placing a pair of two-by-four plates on the central pillar.
Use a pair of connectors to add another plate extending toward the shore, then place a fourth plate at the dock's starting point.
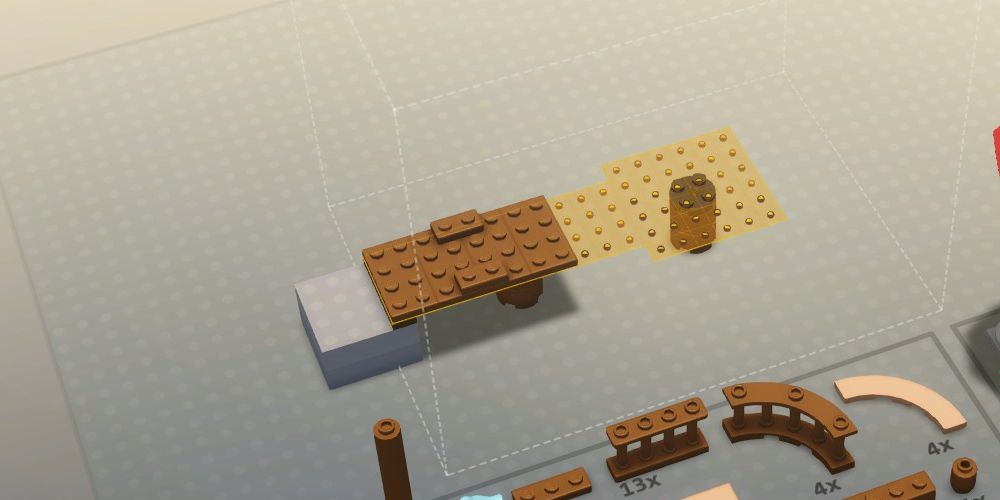
Continue using plates and connectors to extend the pier and hold it together.
Just before the dock widens, place two inverted wedges underneath to connect the next set of pieces.
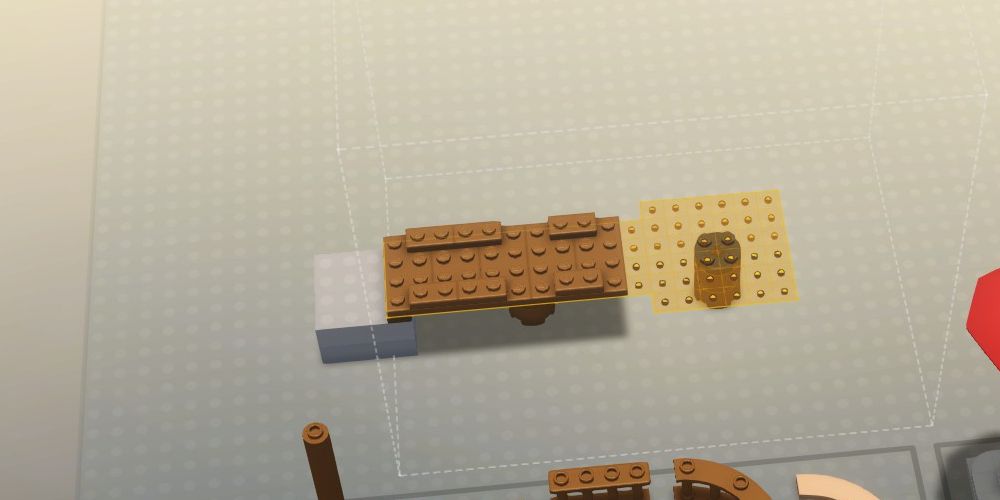
Put a long plate on the far pillar, then place corner plates on each of the inverted wedges.
Cross the plate with a pair of connectors, then hang corner pieces underneath the sides curving the back toward the shore.
Place connectors over the newest corner pieces so that you can hang plates underneath them to complete the basic dock structure.
Cover the middle path with plates to even out the surface and connect the plates beneath.
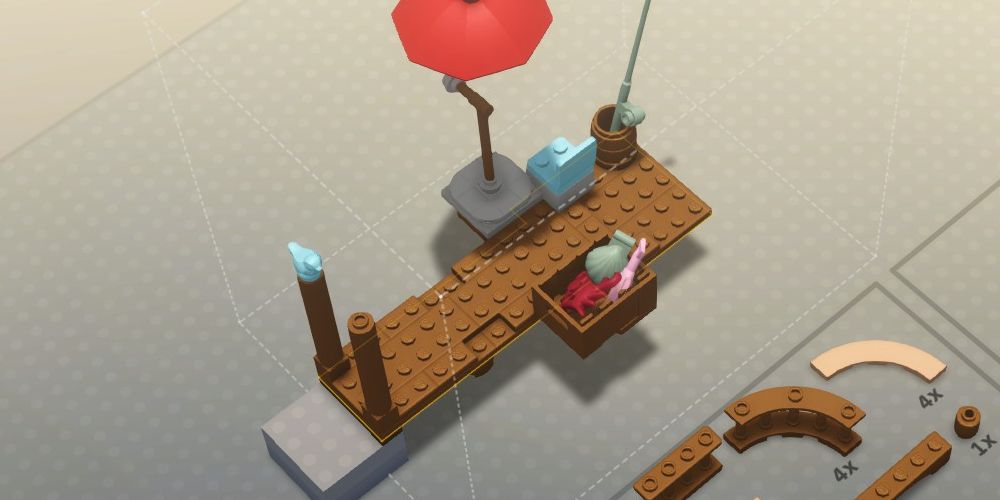
The center path has to remain clear, so you can extend platforms out to the sides to place the tackle box and umbrella.
As it turns out, having two poles at the start of the pier as shown in the image above will impede you later on. If you place a pole on the nearest corner to the piece stockpile, it will block you from being able to speak with the fisherwoman when she moves later in the story. Luckily, you can always remove the pole at that time!
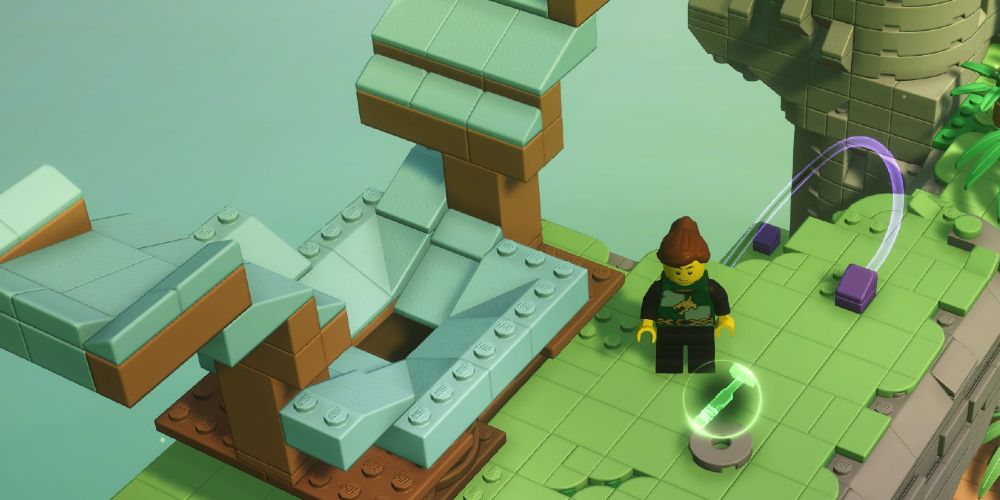
How To Build The Caribbean Bridge
Unlike the previous feats of engineering in the game, the bridge in the pirate's hideout is fairly straightforward.
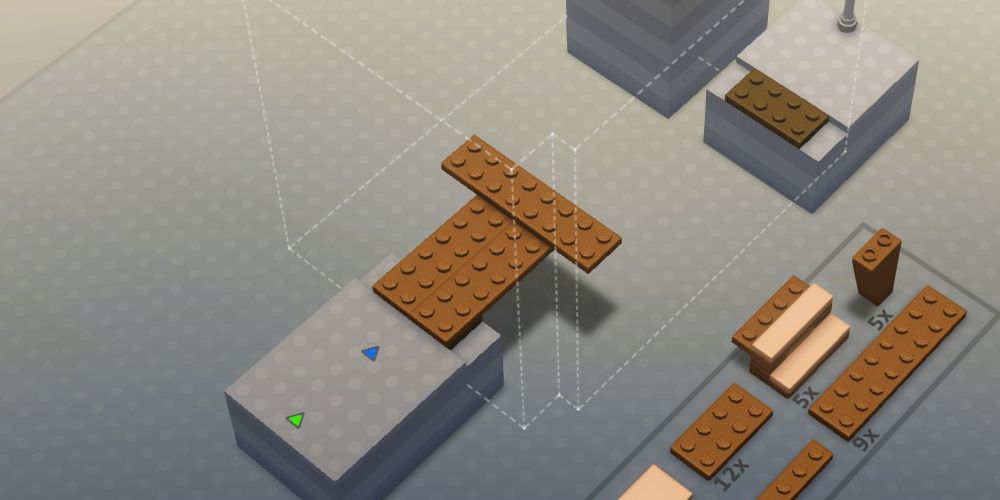
Start by using three long rectangular plates to make a thick T-shape extending from the start point. This way, you have the makings of a path to both flags.
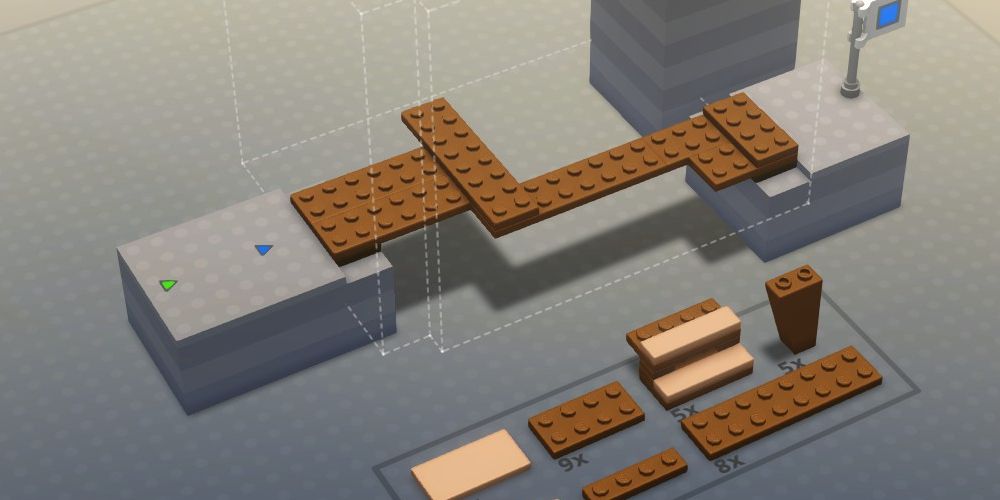
Hang another long plate under the right side of the T, extending toward the blue flag. Place smaller plates to connect it to the anchor point as shown above.

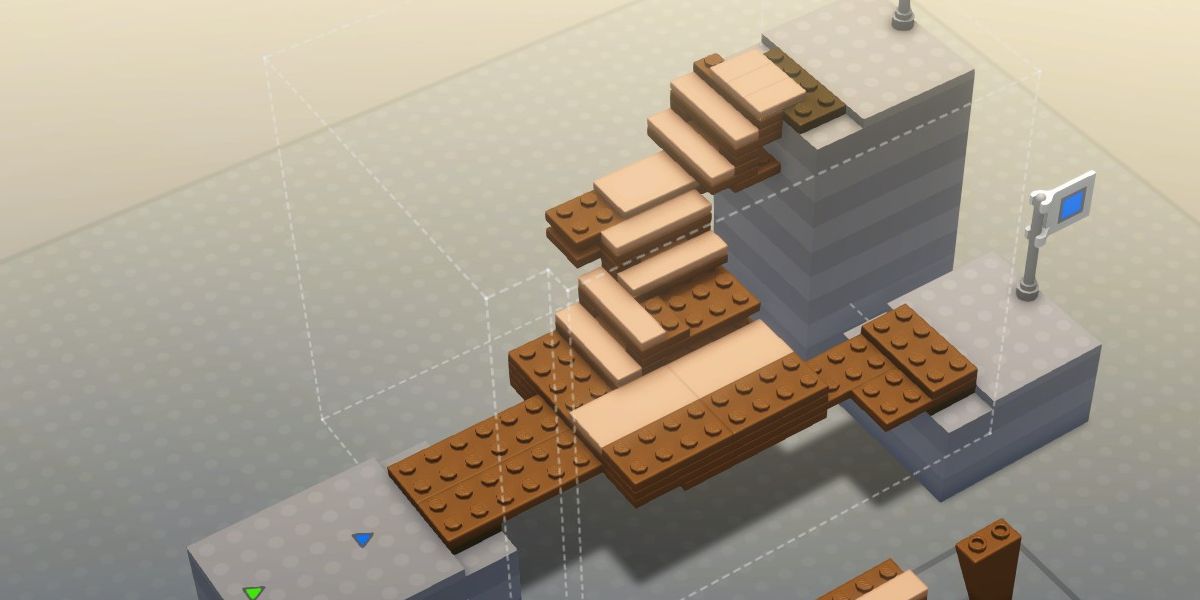
Put a set of stairs on the left side of the T, with plates hanging underneath to create a platform.
Use more stairs and plates to reach the green flag. With your main structure in place, the next step is to reinforce it.
Connect pieces to any cracks that you see. Try to do so from underneath wherever possible so as not to accidentally block the test robot's path.
If you miss a weak point and the bridge breaks, simply reinforce it and run your simulation again!
How To Build The Parrot Perch
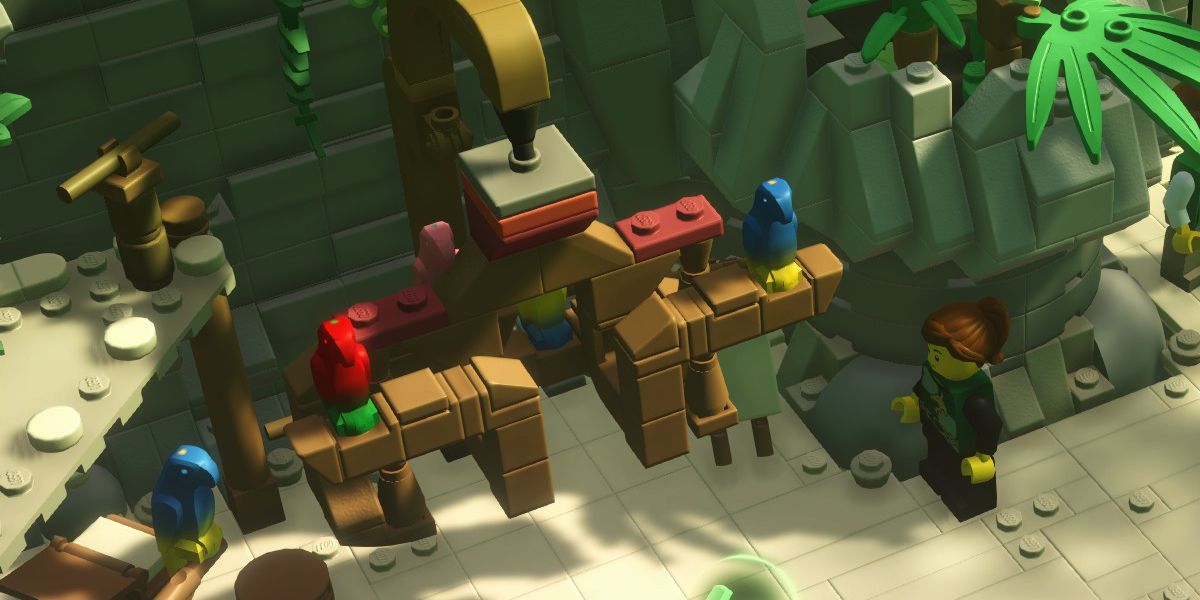
Once you've recovered the missing parrot, it's time to build a perch for the pirates' impressive collection of avian specimens!
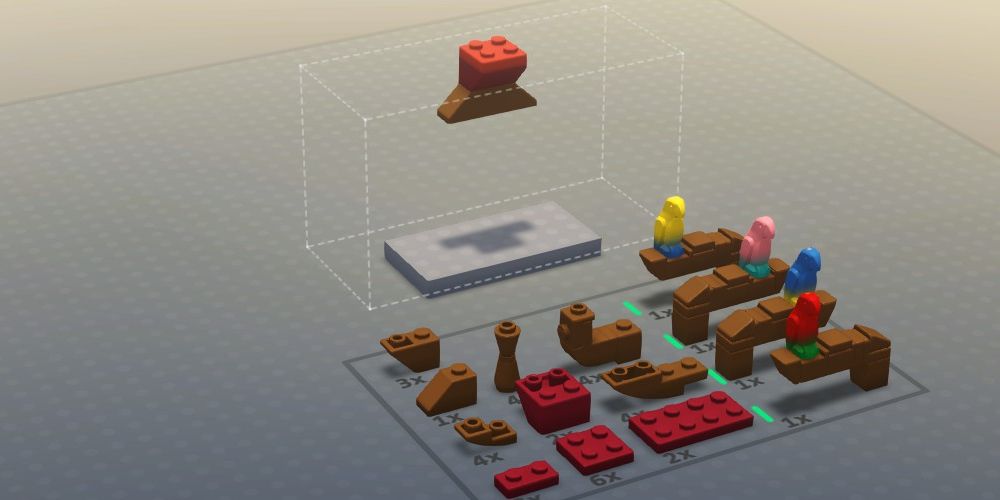
Begin by attaching a red inverted wedge to the anchor. Hang two regular brown wedges underneath it to create a splitter.
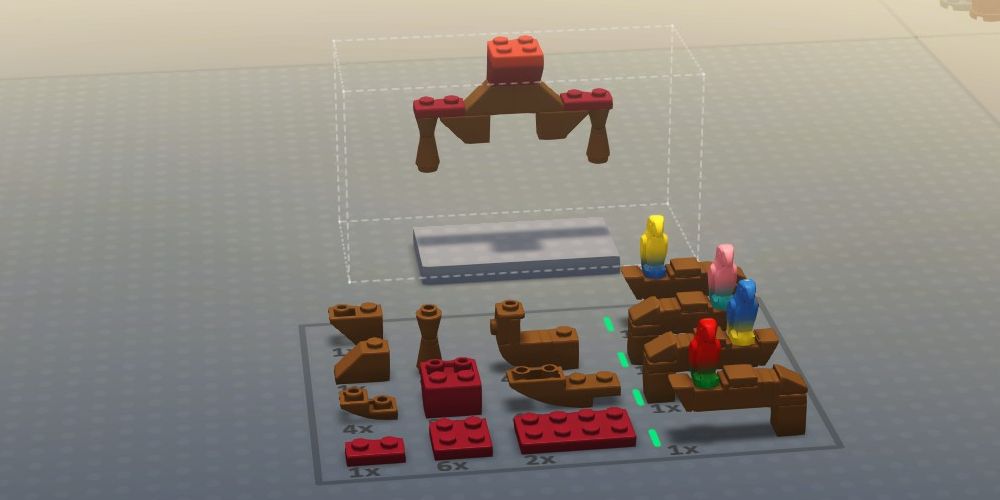
Hang an inverted wedge underneath each of the far ends of the assembly.
Using a red connector on top of each inverted wedge, attach a cone hanging down.
Attach a second cone to each side, so that they hang almost all the way to the floor.
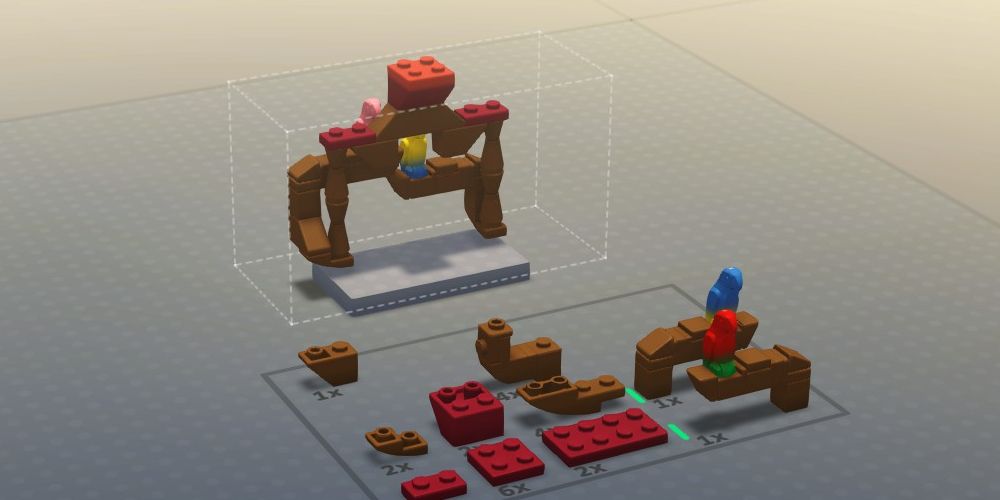
Using curved pieces, extend the assembly to the rear so that you can place two of the parrots behind the anchor. One will need to be slightly higher than the other.
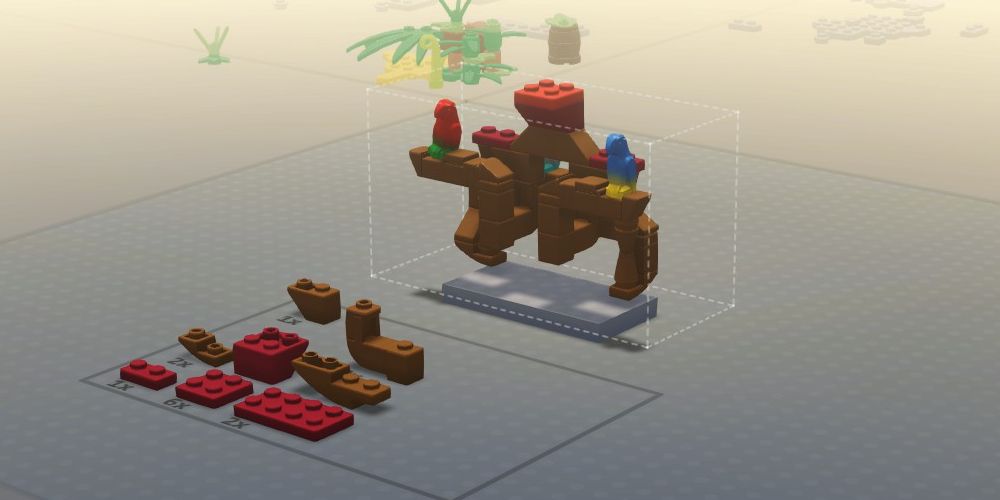
The inverted wedges from earlier still have usable attachment points. Build toward the front to create space for the remaining parrots.
If the perch leans too far in one direction when you run your simulation, add bricks to the other side to counterbalance it.
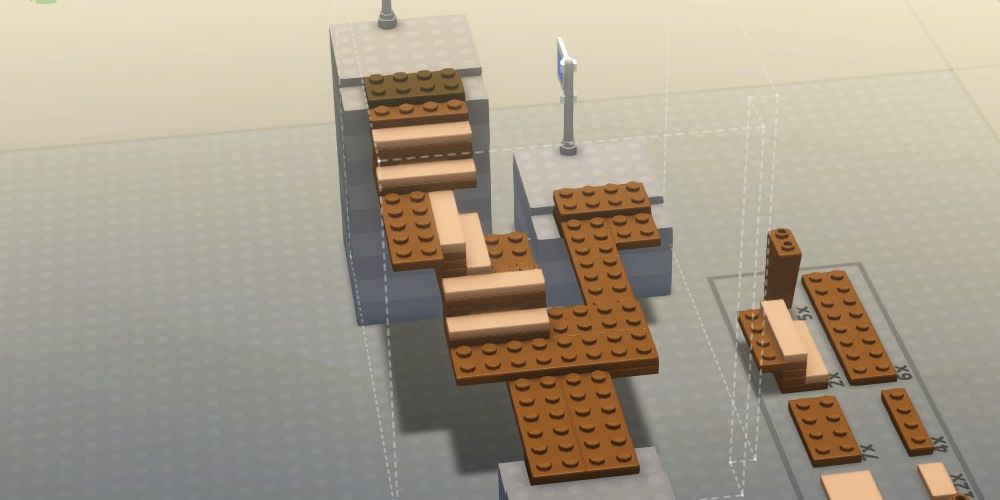
How To Build The Lookout Tower Stairs
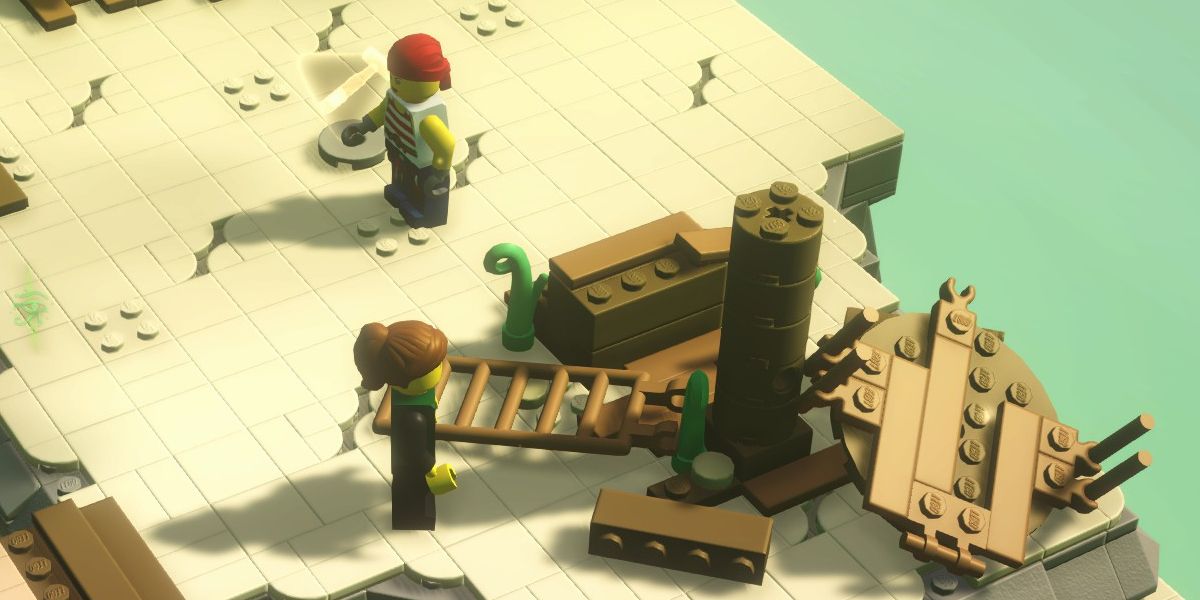
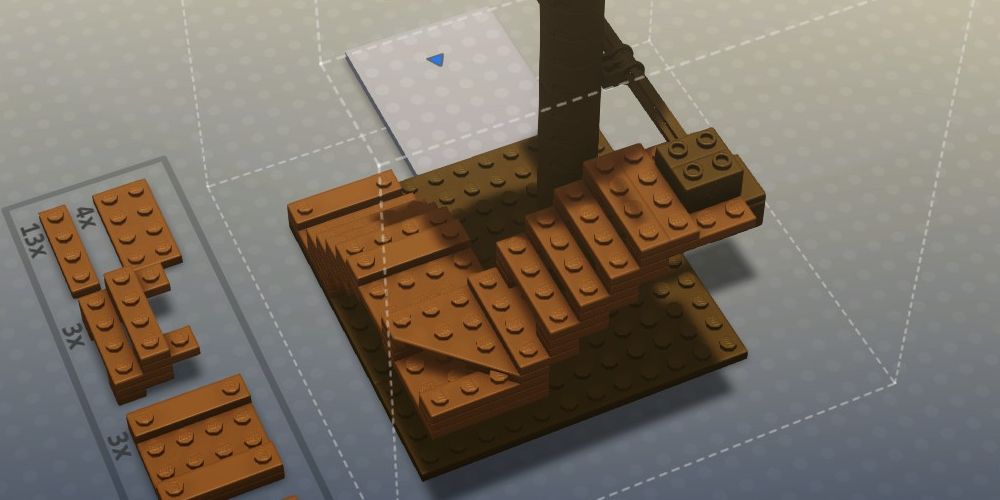
With limited pieces, several obstacles, and considerable height to climb, the lookout tower is one of the most challenging vertical builds in the game.
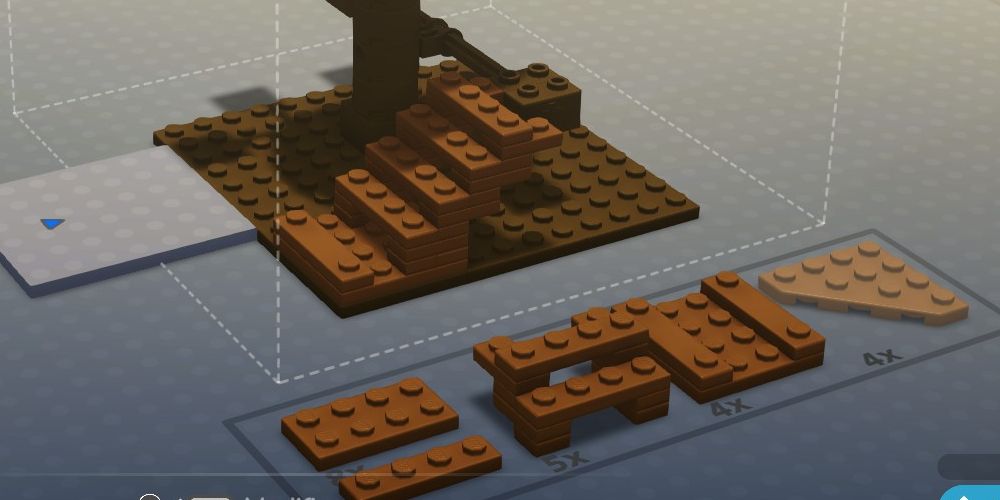
Placement is important from the very beginning. First, put a square piece in the corner to the right of the starting point. Stack two sets of stairs on top of it to reach the first support platform.
Use another square to connect the stairs to the support platform.
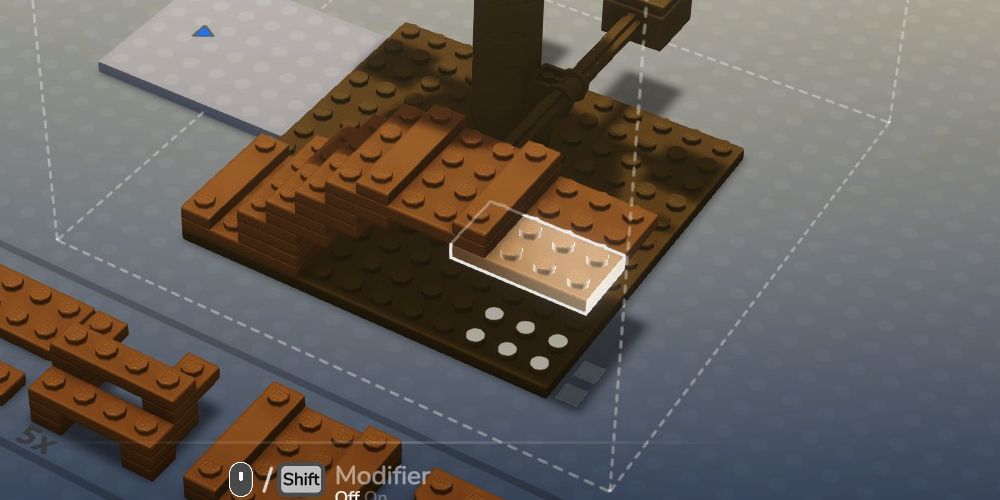
Next, attach a pair of two-by-four plates to the square from underneath. They will hang just barely over the edge of the ground plate, but they'll still be within the bounds of the build area.
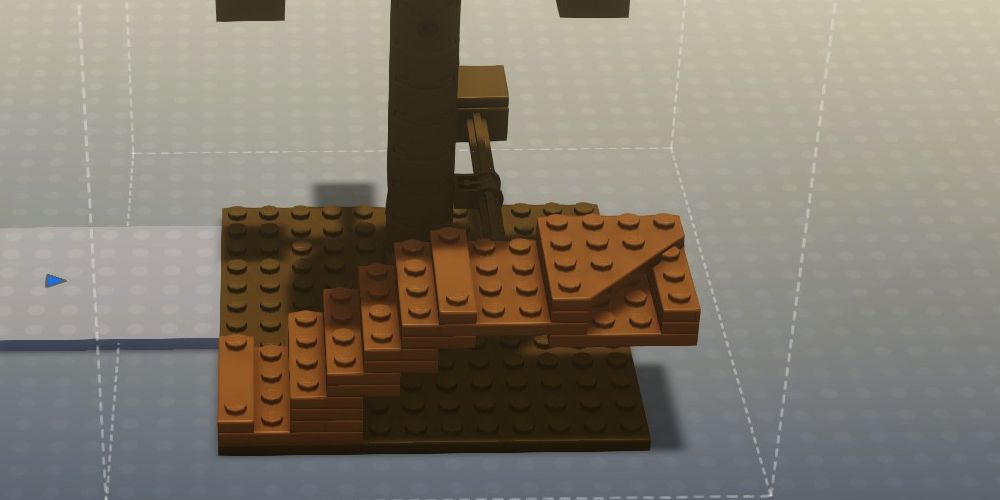
Stack two thin plates at the end of the platform to create a support beam, then place a corner piece on top of the structure as shown above.
Add two sets of stairs, ascending toward the second platform. They won't quite reach, but with a thin plate attached to the end they allow the platform itself to be used as a step up!
If you're worried about the stairs breaking, place a two-by-four plate under the support platform. You can connect it to the stairs from below.
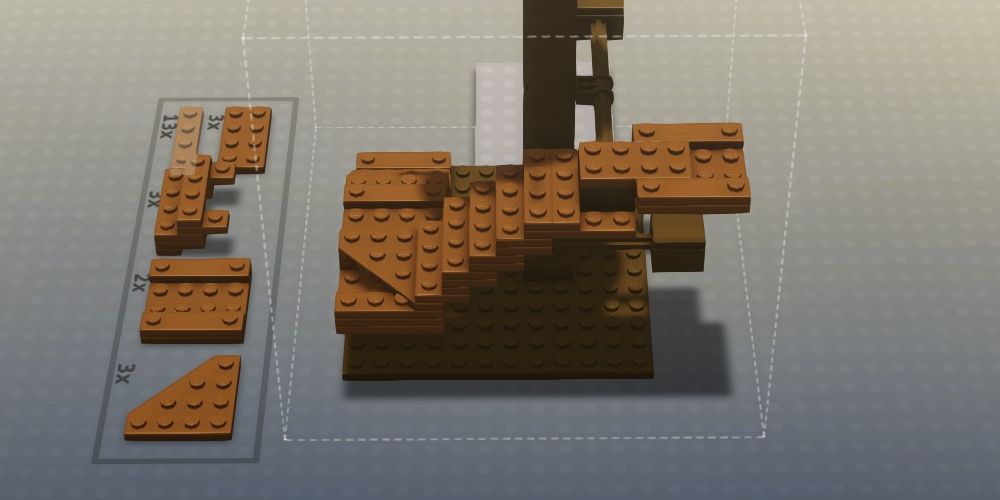
Using a two-by-four plate as a connector, attach a square piece to the far side of the support platform. Be sure not to stack anything else on top of the connector by the stairs, as otherwise it will become too tall to climb.
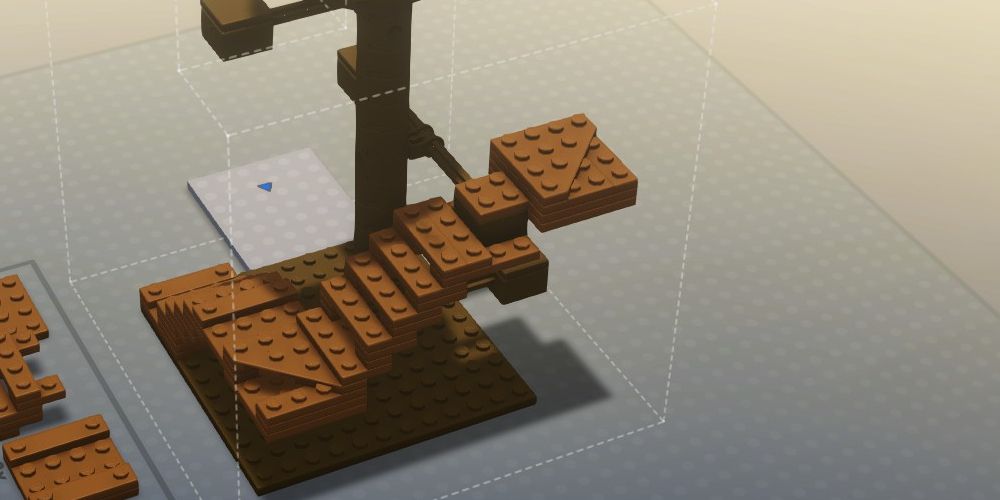
Add a layer of plates on top of the square to give the structure more height, then place a corner piece on top.

Attach the next pair of stairs, leading up to the third support platform. It will come in just a little lower and farther away than is ideal, but that's easily fixed.
Use a plate to connect the stairs to the underside of the support platform. Next, stack a thin plate at the top of the stairs to give them sufficient height to reach the platform.
Attach a two-by-four plate to the support platform, covering only the far side so that the dark brown part can still be used as a step.
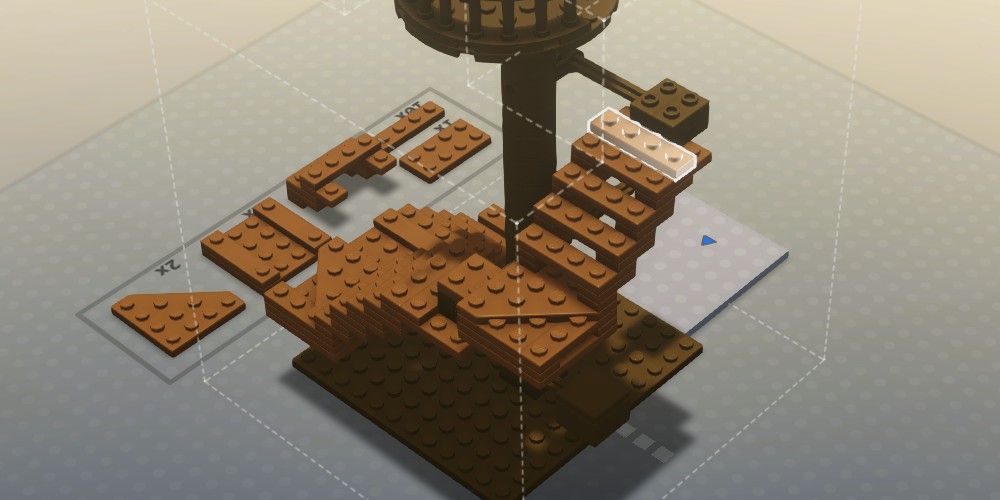
Next, attach four thin plates to the end, creating a square.
Stack a corner piece on top of your new platform, followed by your last stairs and one of the square pieces.
Fill the gap in the square with thin plates.
Use your remaining plates to attach the assembly to the lookout tower. Run your simulation, and make any adjustments necessary to prevent breakage or to keep the robot from getting stuck.
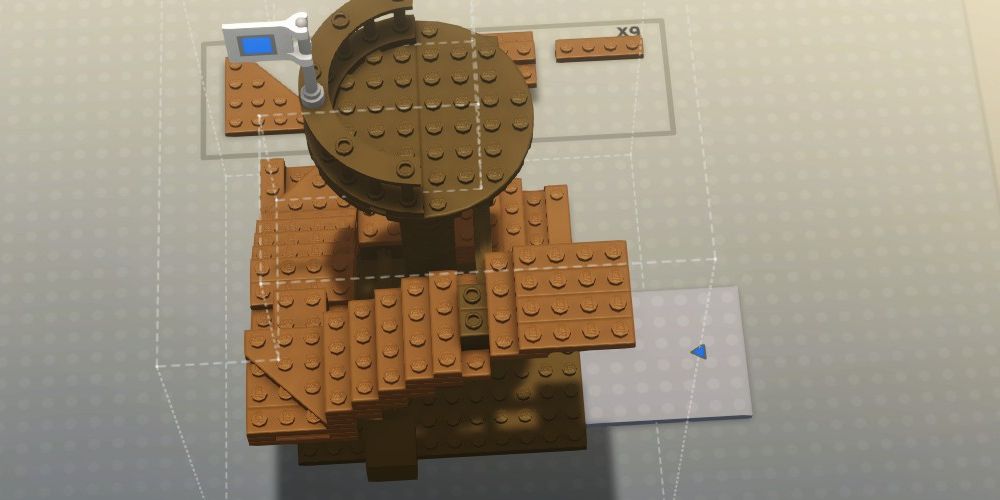
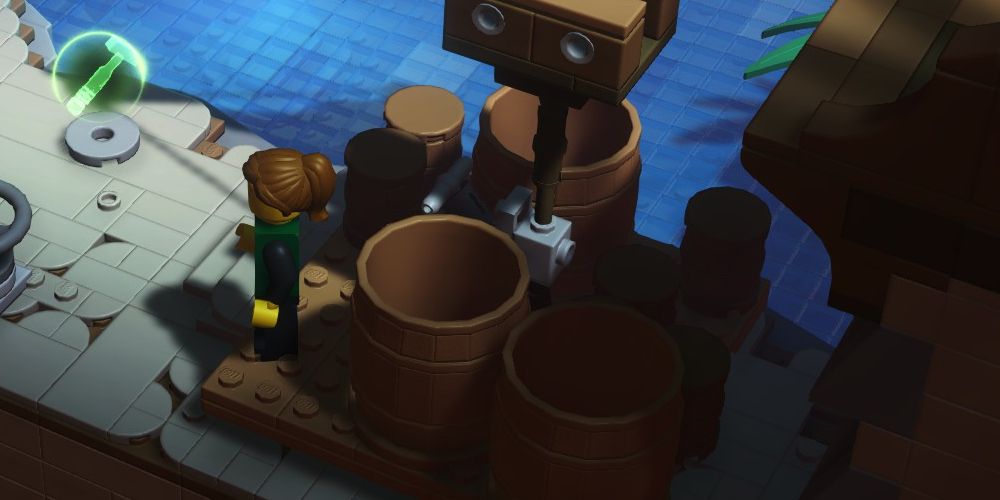
How To Build The Rainwater Collector
The cook's rainwater collector can be frustrating, because it has to be built perfectly. If even a single drop of rain doesn't make it into the barrel, the game won't consider the challenge complete. It can be helpful to run a few simulations at the start just to see where the raindrops land.
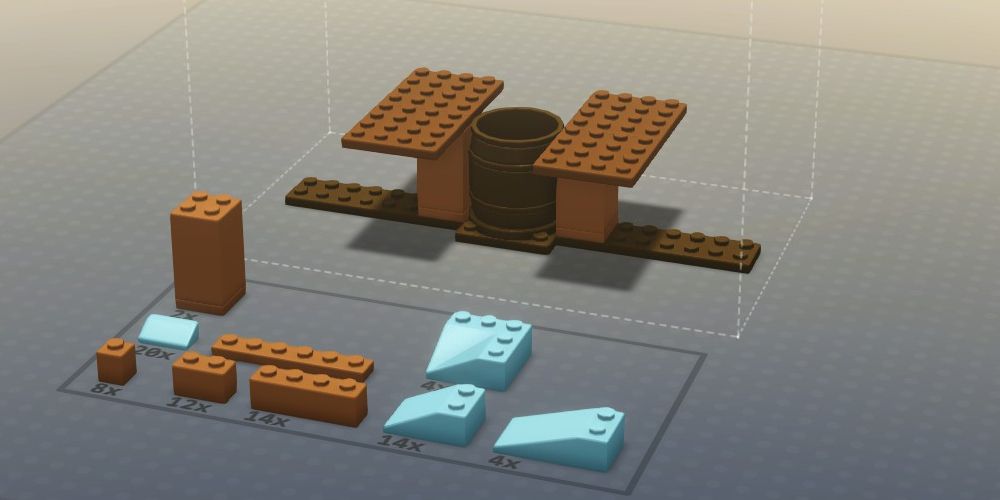
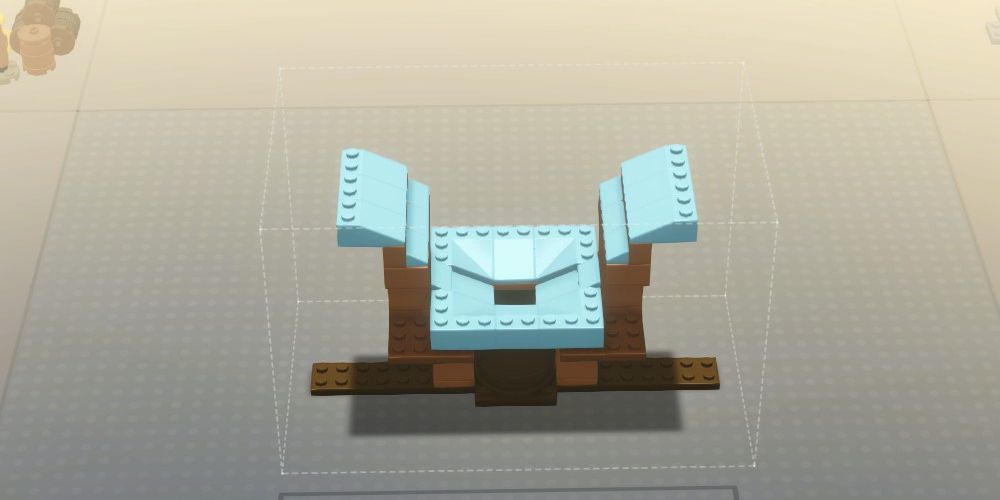
Start by placing a pillar immediately to either side of the barrel. Place two squares on each as shown above to create your main support platforms.
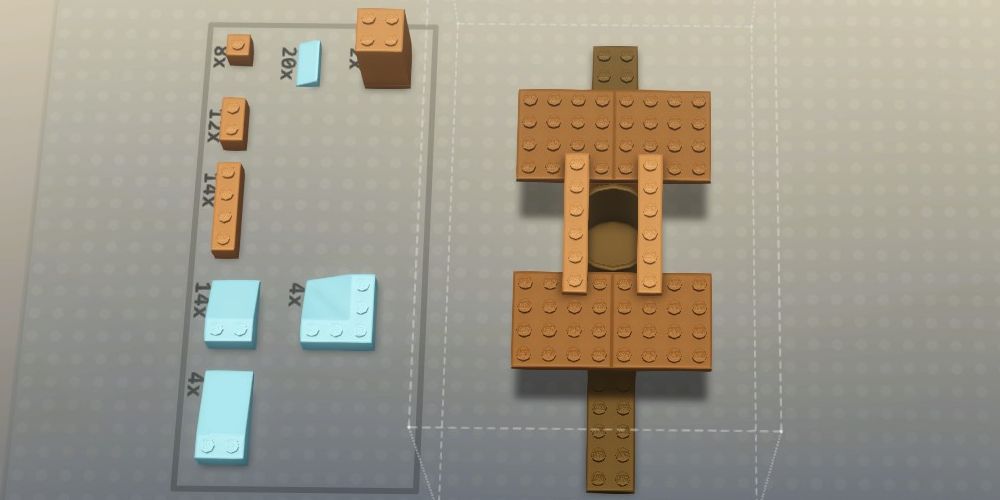
Connect the squares with the two long, thin plates at your disposal. Place them so that they slightly cover two sides of the barrel. The goal is to minimize the chance that any raindrops will bounce off of the barrel's rim.
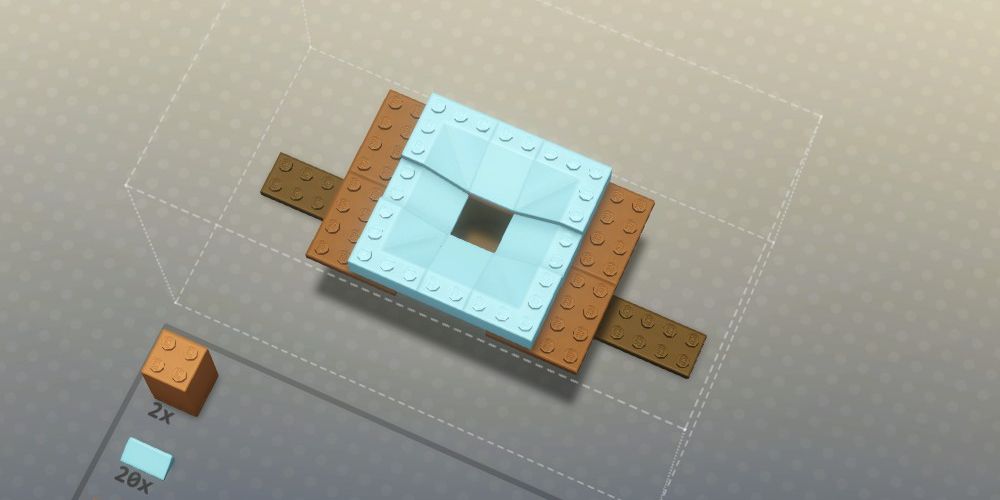
Attach the four corner pieces with a short wedge in between, all sloping toward the center of the barrel. Two of the wedges will be slightly lower than the rest of the assembly, but that's okay.
Ensure the hole over the barrel is as small as possible. If it's too big, raindrops will miss the barrel!
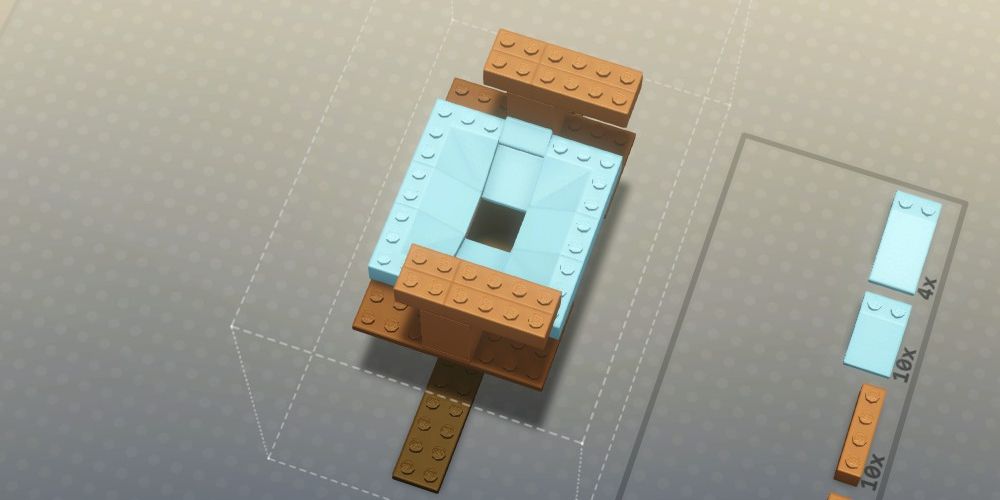
Place a small slope on top of the two short wedges to help direct raindrops toward the center.
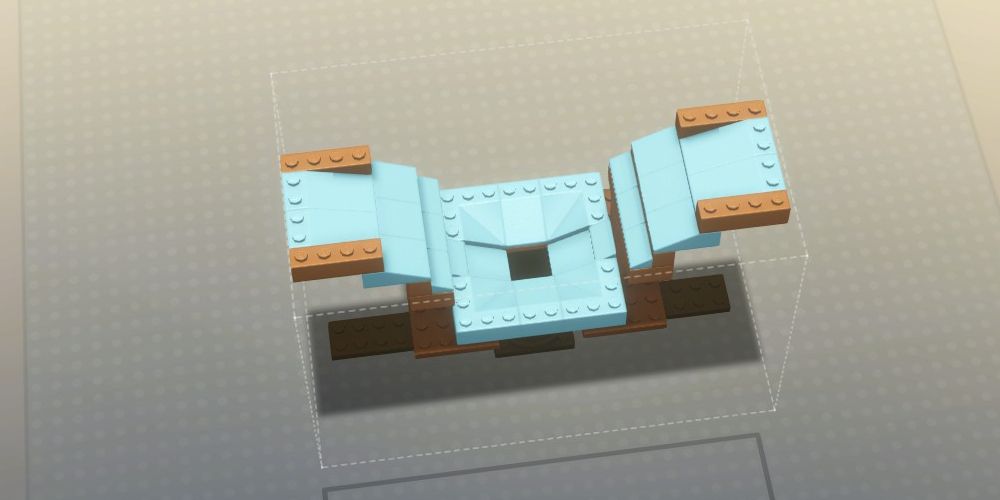
Next, add a pillar to either side of the main structure. Place bricks on top to extend the assembly in both directions, but make sure that it's leaning more toward the piece stockpile. This is because more raindrops fall in that area than the space behind the collector.
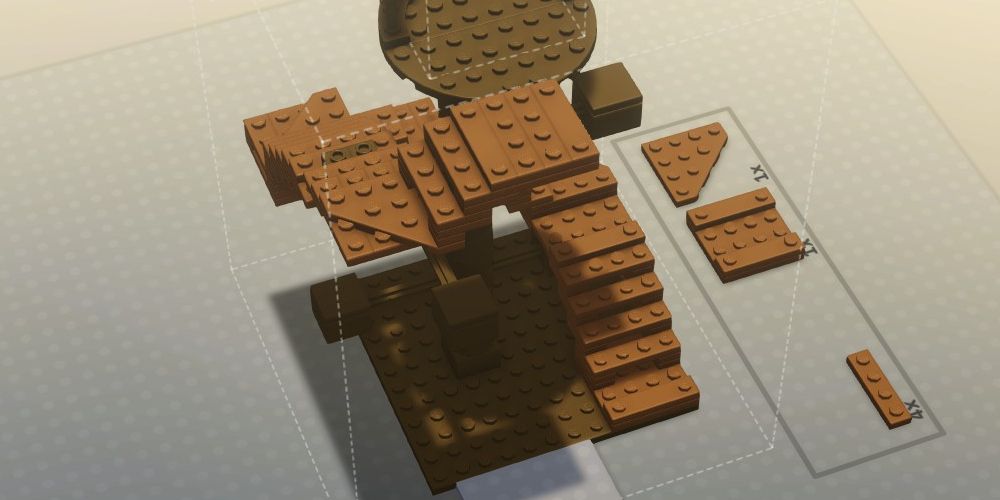
Build up the leftmost and rightmost sides with another set of bricks, then add a set of wedges to each. Place slopes directly below the wedges as shown above to continue feeding into the barrel.
Attach a pair of long wedges to the middle of each side – both should touch the outer edge of the build area. Place a brick on either side of these wedges.
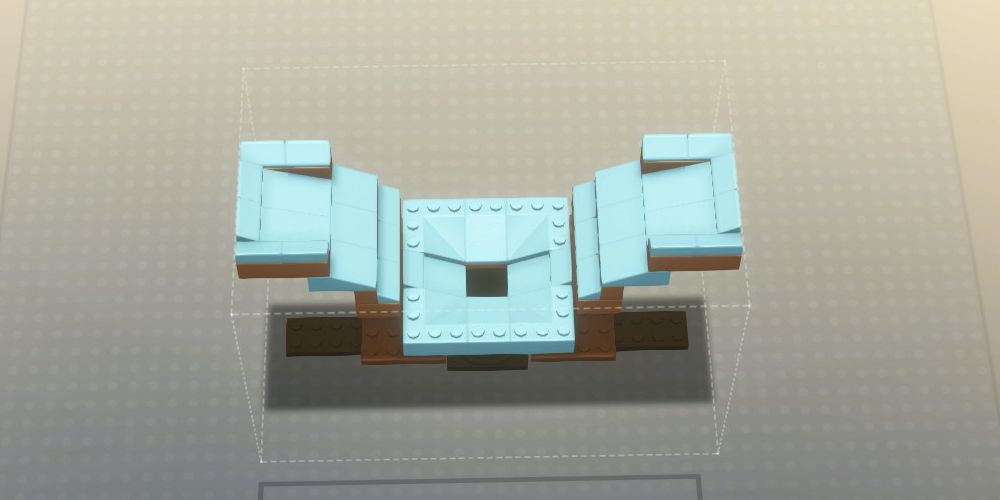
Cover the flat tops of the structure with sloping pieces. You don't need to do so around the edge of the main basin, just the highest parts.
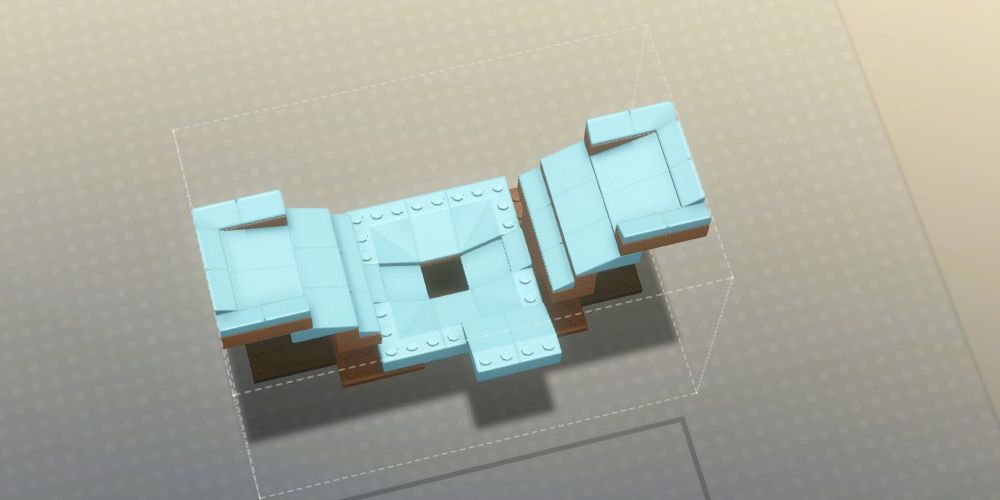
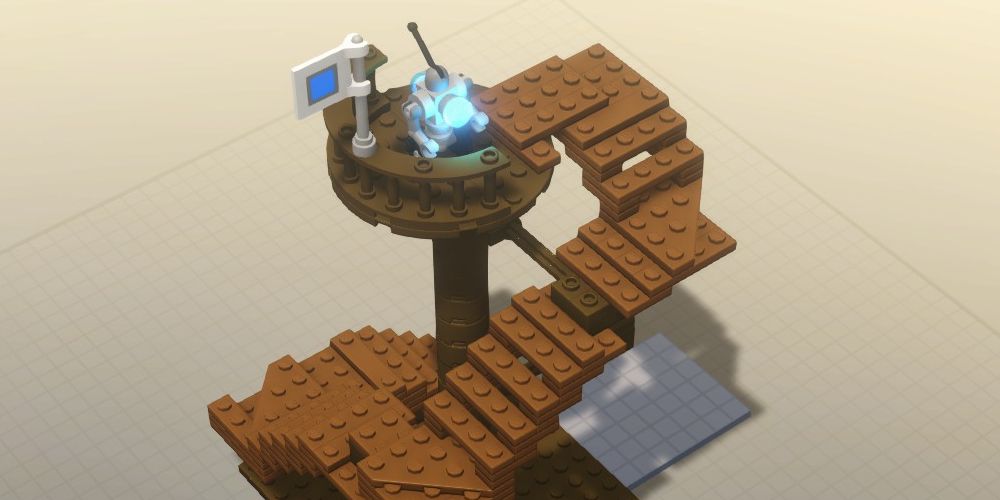
With the main structure complete, run a simulation. Chances are that a handful of raindrops still won't make it into the barrel. Watch where they land and add slopes to the structure specifically to get those raindrops back on track. Use the above image as an example.
If it looks like you caught everything but the game still isn't letting you complete the challenge, move the camera around. Look for raindrops that may have gotten stuck on the way down in a spot you couldn't see before, or bounced off of a wall somewhere.
You should have enough leftover pieces to catch any stray raindrops – in our playthrough, there were three. Once all the rain is in the barrel you can move on.
How To Build The Cargo Lift
In a secret cave, you'll need to repair an old cargo lift to reach the legendary pirate ship. This challenge requires you to not only build a platform capable of holding weight, but to distribute that weight evenly and keep the lift balanced.
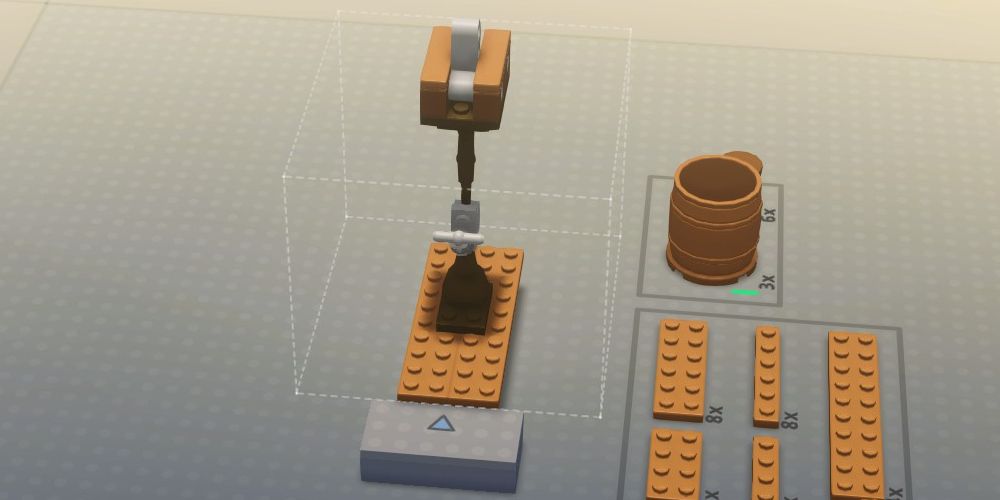
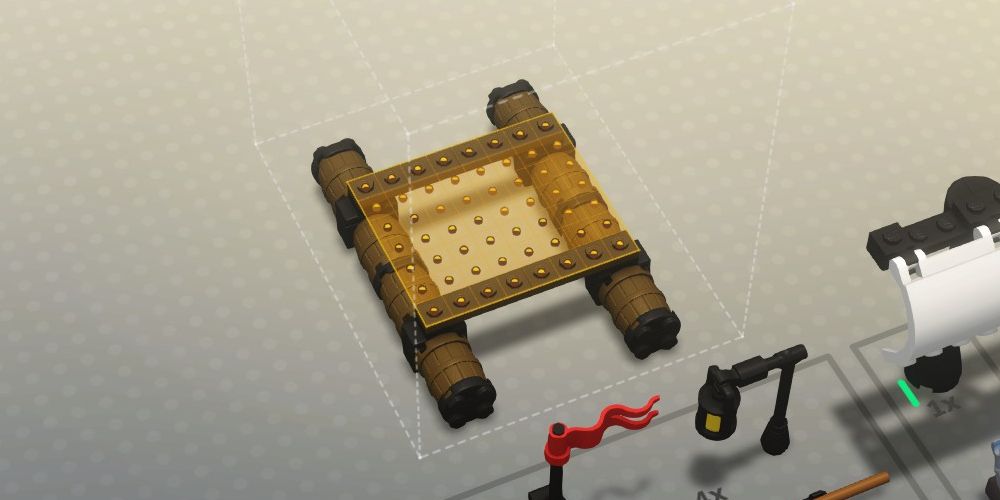
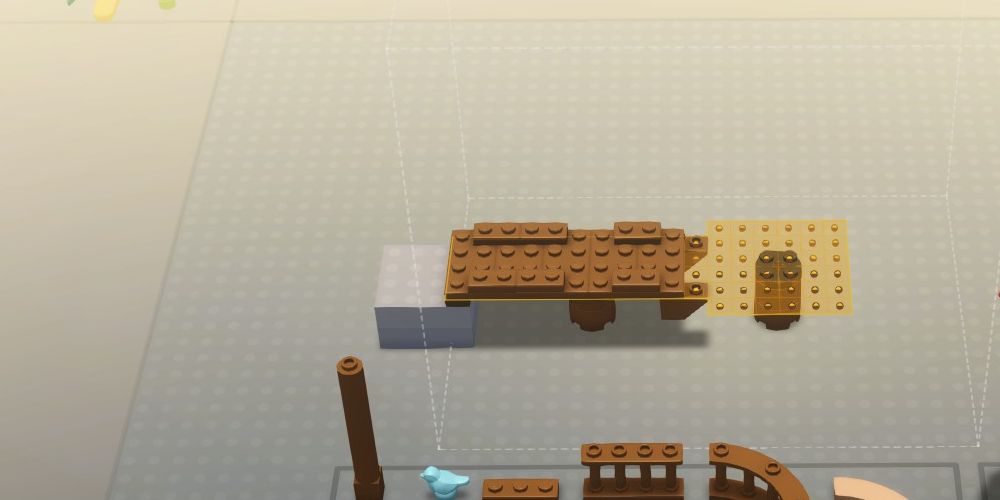
Start by using two of the longest plates available to create a path from the starting point to the lever in the middle.
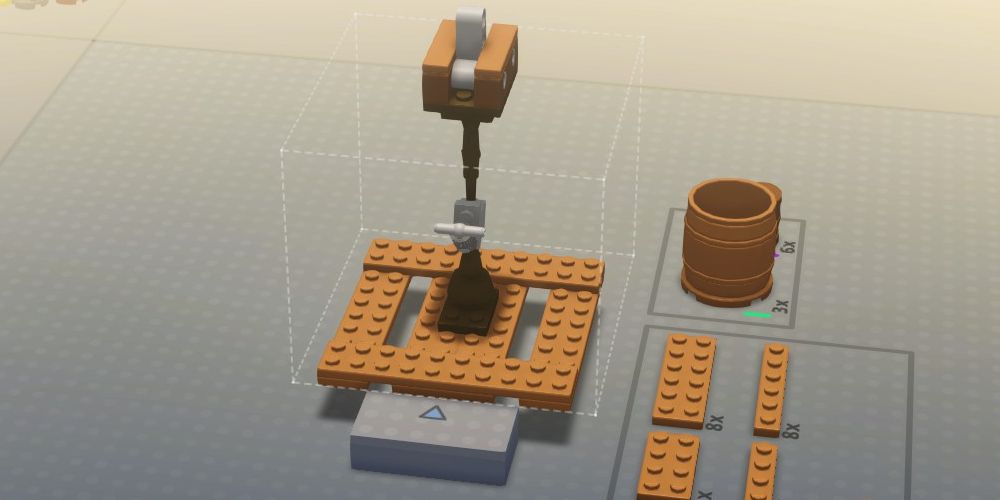
Use the remaining long plates to build a square around the lift.

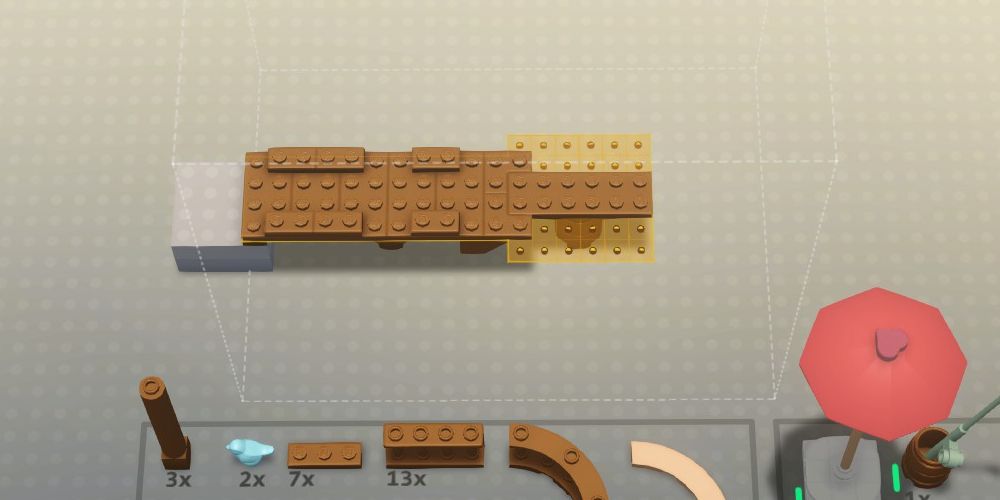
Next, use two-by-four plates to fill in the gaps to the left and right of the lift.
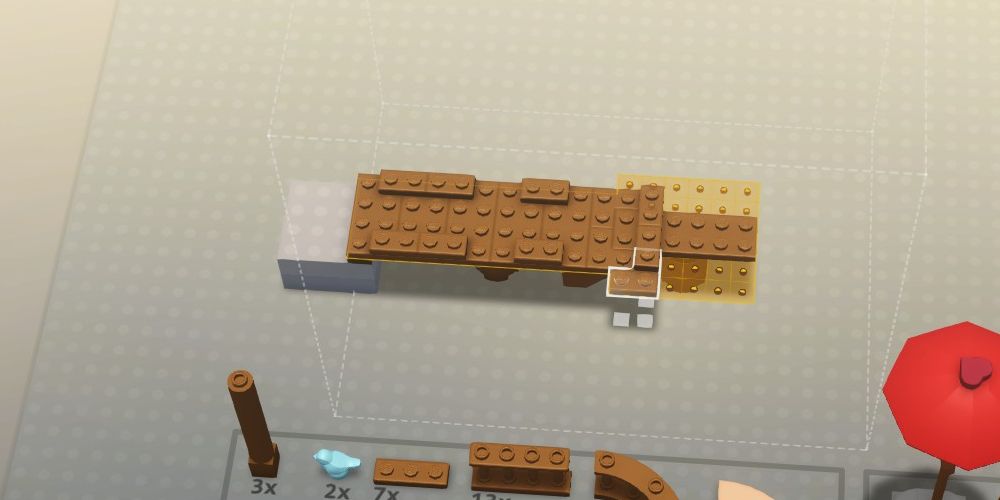
Place bricks in front of the switch to create a handy step up!
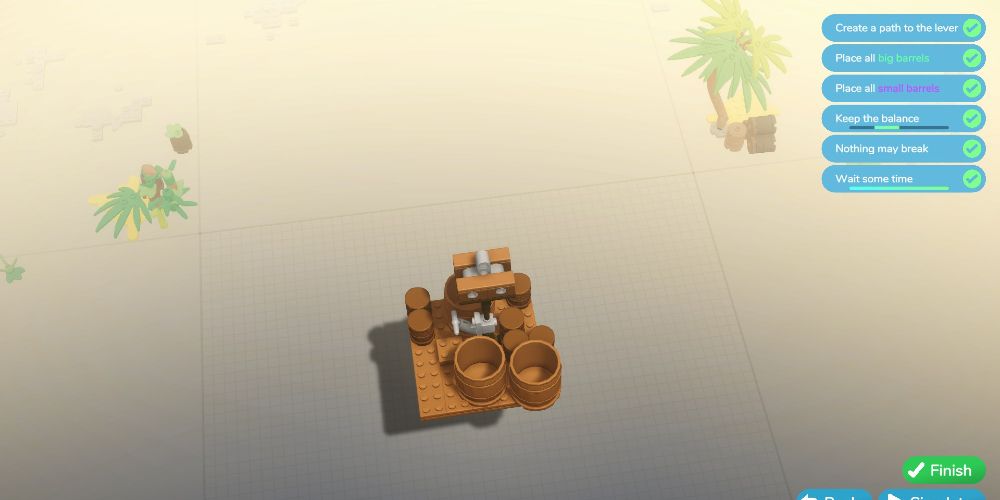
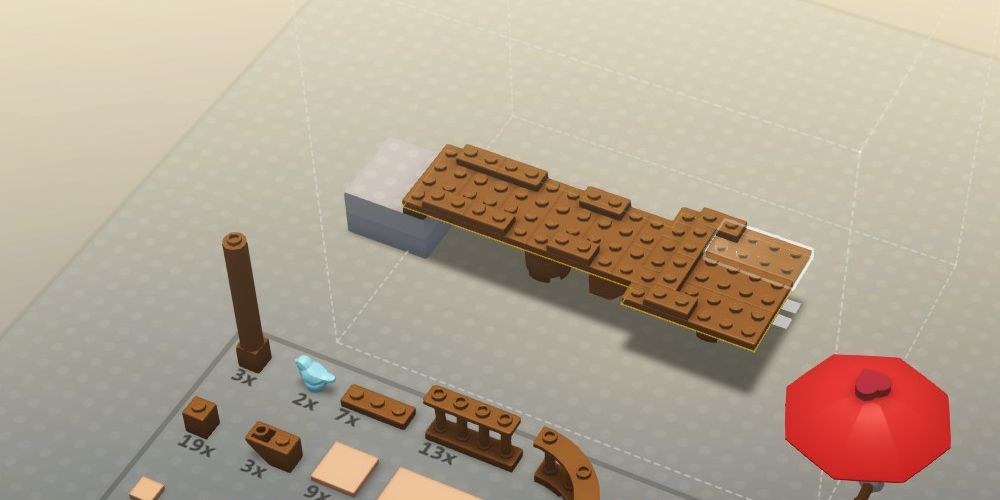
Now, the challenge is to distribute the weight of the nine barrels evenly across the platform. The configuration pictured above is proven to work. You can also add plates to the platform on the lighter side to incrementally add weight instead of shifting barrels.
How To Build The Gangplank

It's fitting that the final challenge in the game is a bridge. This time, however, you'll be building vertically, then dropping the bridge down!
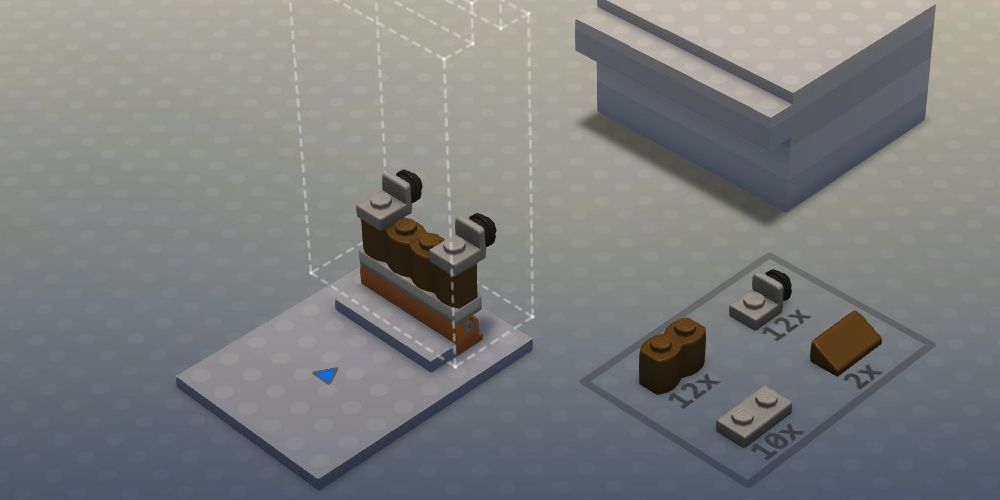
Place a pair of the rounded brown pieces side-by-side on the base plate. Attach one of the irregular gray pieces to each side, with the black part facing the flag.
Place one of the flat gray pieces at the center.
.jpg)
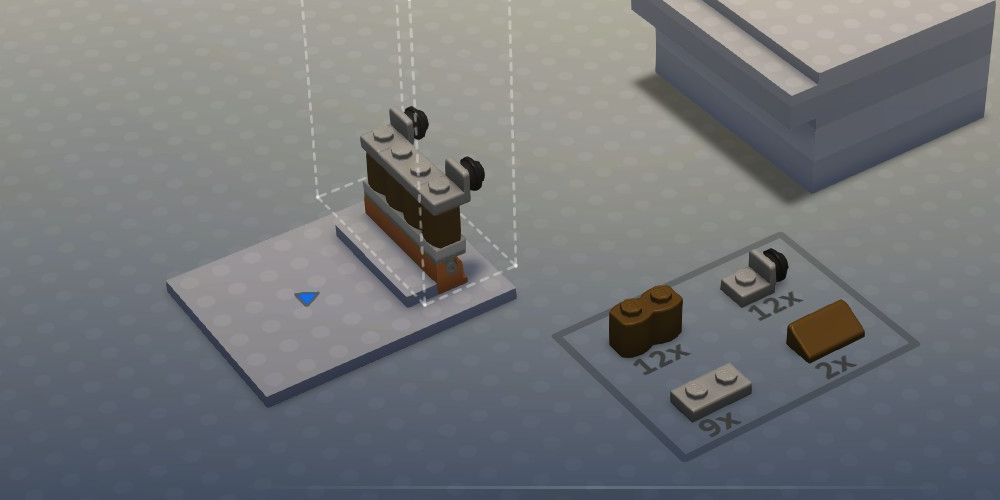
Repeat the above steps four more times, building the structure taller until you reach the point where the build area narrows.
Place the next set of rounded pieces as normal, but only cover the top with a pair of small flat plates.
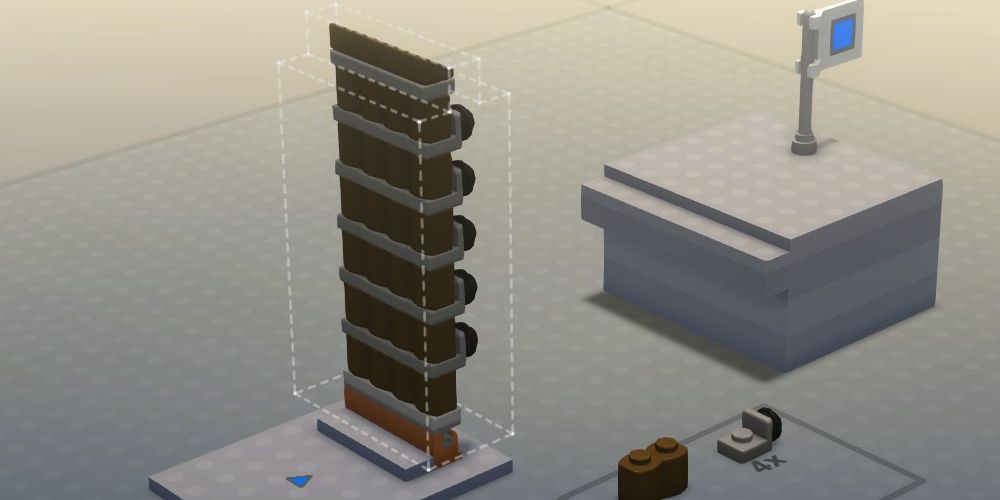
Place the two triangular pieces at the very top of the assembly, with the slanted edges facing toward the flag.
When you run your simulation, the gangplank should hold together when it lands, allowing the test robot to cross. Board the ship and return to the pirates' hideout in style!
Source: Read Full Article