Quick Links
- Prerequisites To Complete
- Traveling To The Twilight Sepulcher
- Navigating Through The Twilight Sepulcher
- Speaking With Nocturnal
- Rewards For Completing Darkness Returns
After making your way through the Thieves Guild questline in Skyrim, it's finally time to take part in the last quest titled Darkness Returns. With the newly acquired Skeleton Key, you will need to make your way to the Twilight Sepulcher and come face to face with Nocturnal.
In this guide, we are going to go over everything you need to know about completing the Darkness Returns, including the rewards you will receive after completion. Although this quest is the final one in the Thieves Guild story, it's fairly straightforward and can be completed quickly. First, let's take a look at all the quests that you will need to complete before starting Darkness Returns.
Prerequisites To Complete
Below, you can find a complete list of every quest that you need to complete before making it to Darkness Returns. This includes every quest in the Thieves Guild questline.
| Quest Name | NPC To Speak With |
|---|---|
| A Chance Arrangement | Brynjolf
|
| Taking Care of Business | Brynjolf
|
| Loud and Clear | Brynjolf
|
| Dampening Spirits | Maven Black-Briar
|
| Scoundrel's Folly | Mercer Frey
|
| Speaking With Silence | Mercer Frey
|
| Hard Answers | Karliah
|
| The Pursuit | Karliah
|
| Trinity Restored | Karliah
|
| Blindsighted | Karliah and Brynjolf
|
Accepting Darkness Returns
After completing Blindsighted, you will automatically receive this quest from Karliah. Here, she will tell you that the Skeleton Key must be returned to the Twilight Sepulcher.
Traveling To The Twilight Sepulcher

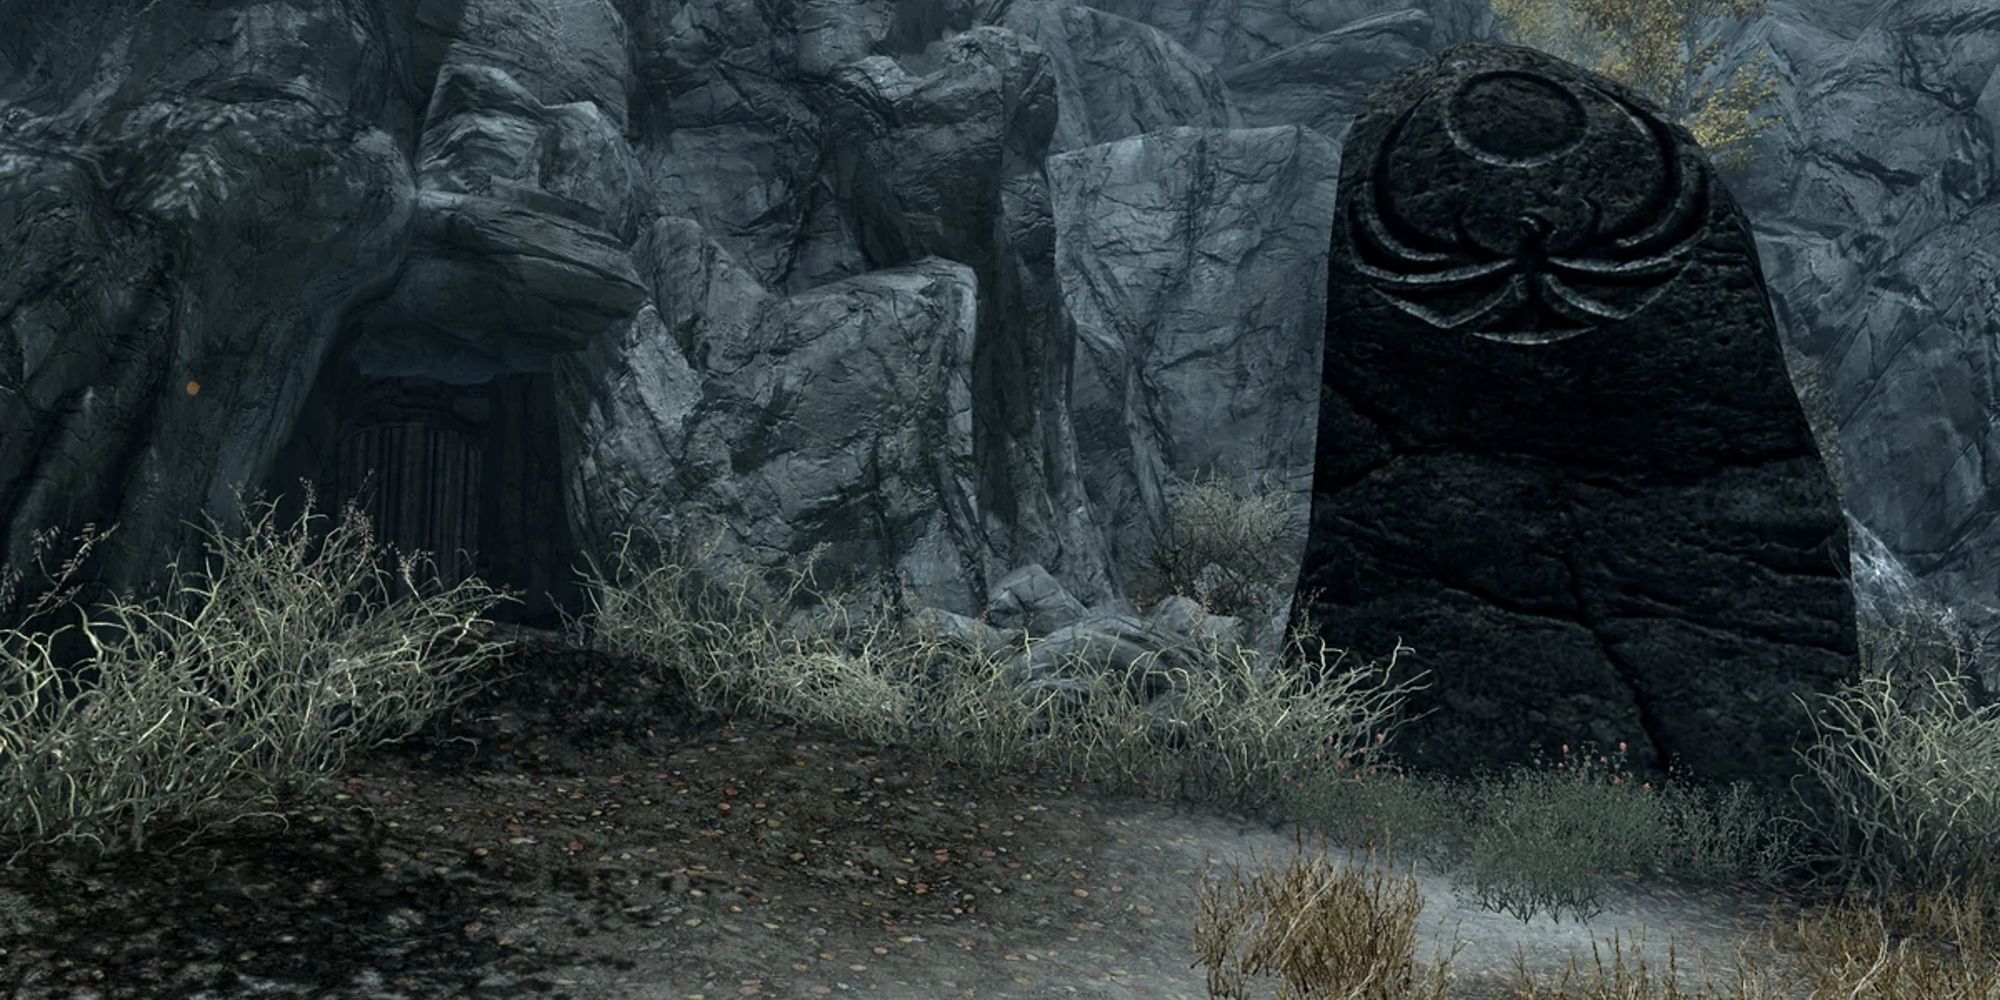
The Twilight Sepulcher is a tomb, located to the northwest of Falkreath. To get here, start in Falkreath and head in the tomb. There are no other locations nearby, making it easy to find.
This desolate tomb is home to the Ebonmere, a portal to Nocturnal's plane of Oblivion. When Mercer Frey stole the Skeleton Key, this portal was disrupted, which is why you will need to place the Skeleton Key back.
Navigating Through The Twilight Sepulcher
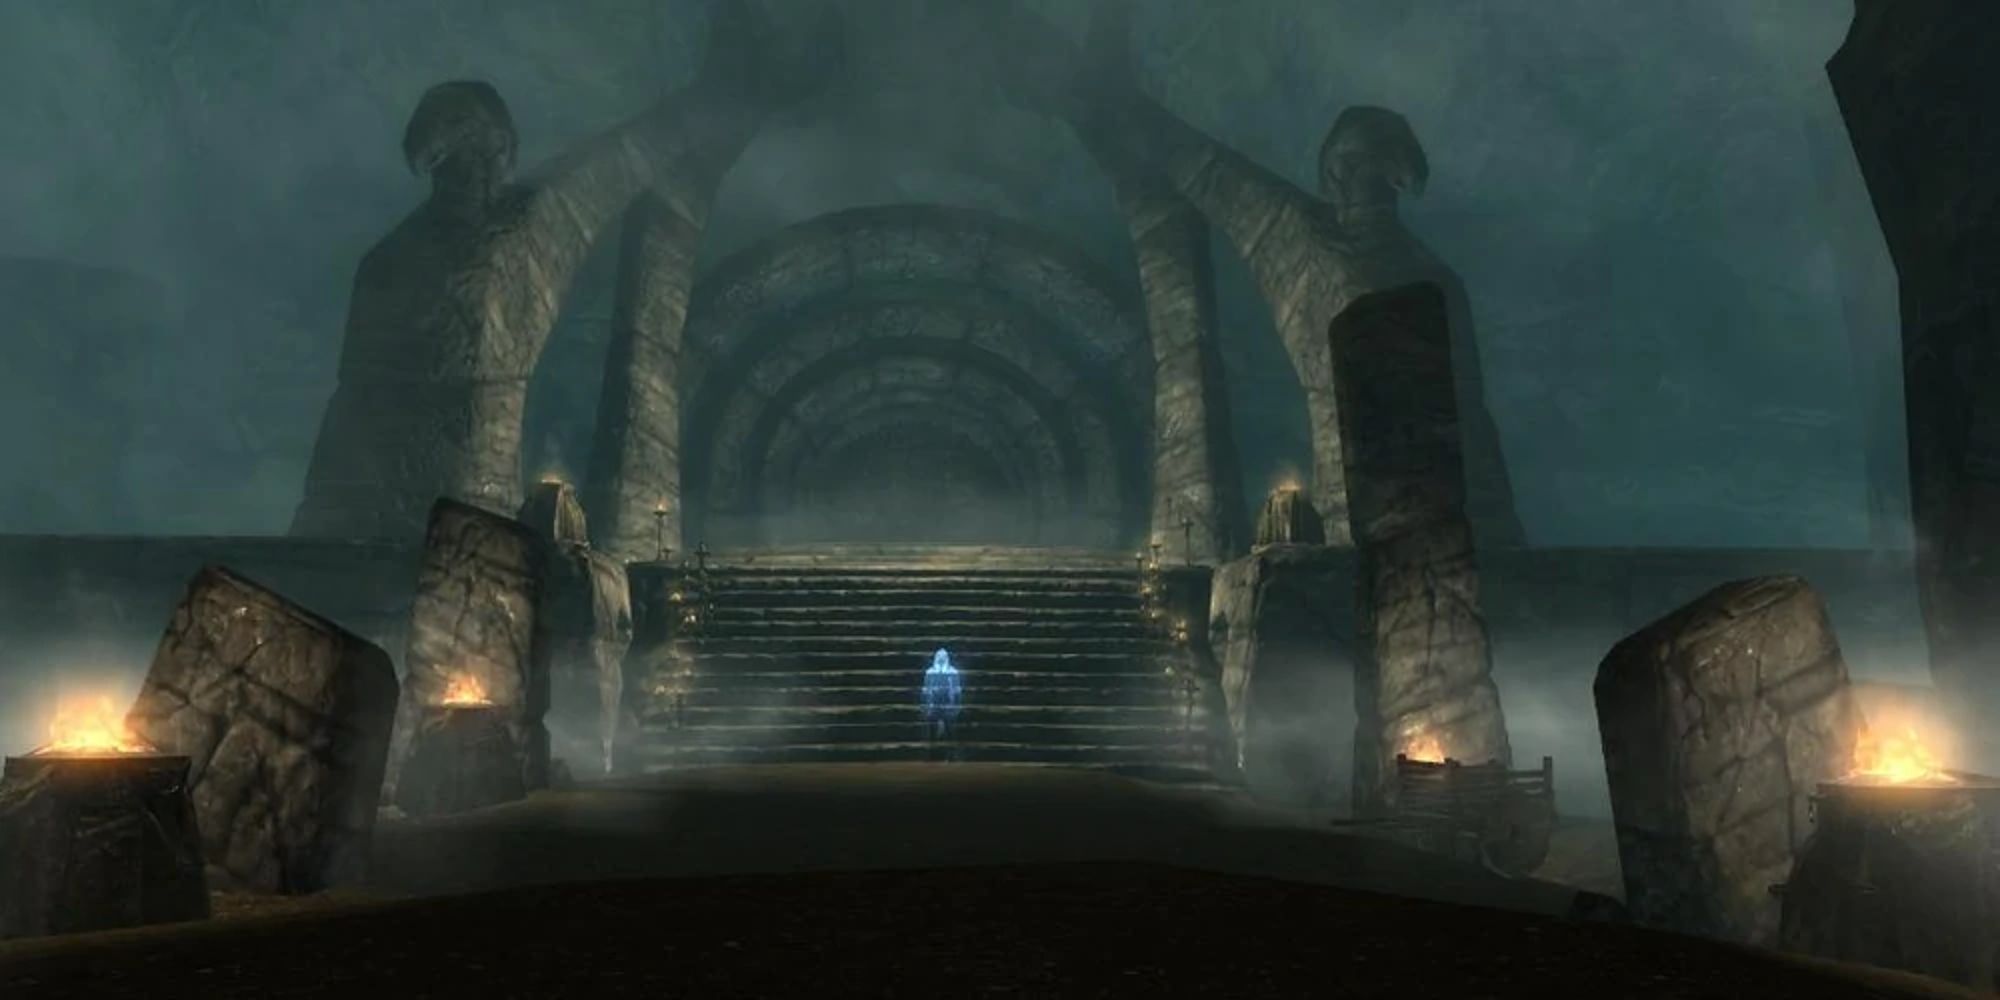
Once inside the Twilight Sepulcher, speak with the Nightingale Sentinel, named Gallus. Upon speaking to Gallus, you will learn of the Pilgrim's Path, consisting of five trials. You can either head straight to the first trial, located behind Gallus, or retrieve Nystrom's Journal. Retrieving the journal is optional, but it will contain vague riddles on how to complete the trials. The journal can be found to the right of Gallus, near a Nystrom's skeleton.
Trial One
The first trial you will face involves aggressive Nightingale ghosts. Kill or sneak by these ghosts to proceed forward. Killing the ghosts will allow you to grab the loot in the room. For additional loot, head to the left room with the alchemy table and press the button under the desk. Doing so will reveal a room with loot.
Trial Two
For this trial, you will need to navigate through the room while staying in the darkest shadows. If you accidentally go into the light, you will begin to take large amounts of damage.
Trial Three
The third room you enter will hold a statue, two sconces, and a dead bandit. Here, you will need to pull two chains next to the scones. By doing this, the light in the scones will go out and the door behind the statue will open.
Trial Four
There are two ways to tackle the fourth trial area, which includes a hallway full of traps and a room full of aggressive sentinels.
The trapped hallway can be avoided by picking a master lock on a door to the left of the first hallway. If you manage to successfully pick the lock, you will bypass all the traps and move into the final room with sentinels.
If you chose to go through the trapped hallway, look out for swinging axes and battering rams. These can deal a lot of damage, and the axes will transmit diseases.
Kill the sentinels in the last room, grab any loot, and then head into the fifth trial.
Trial Five
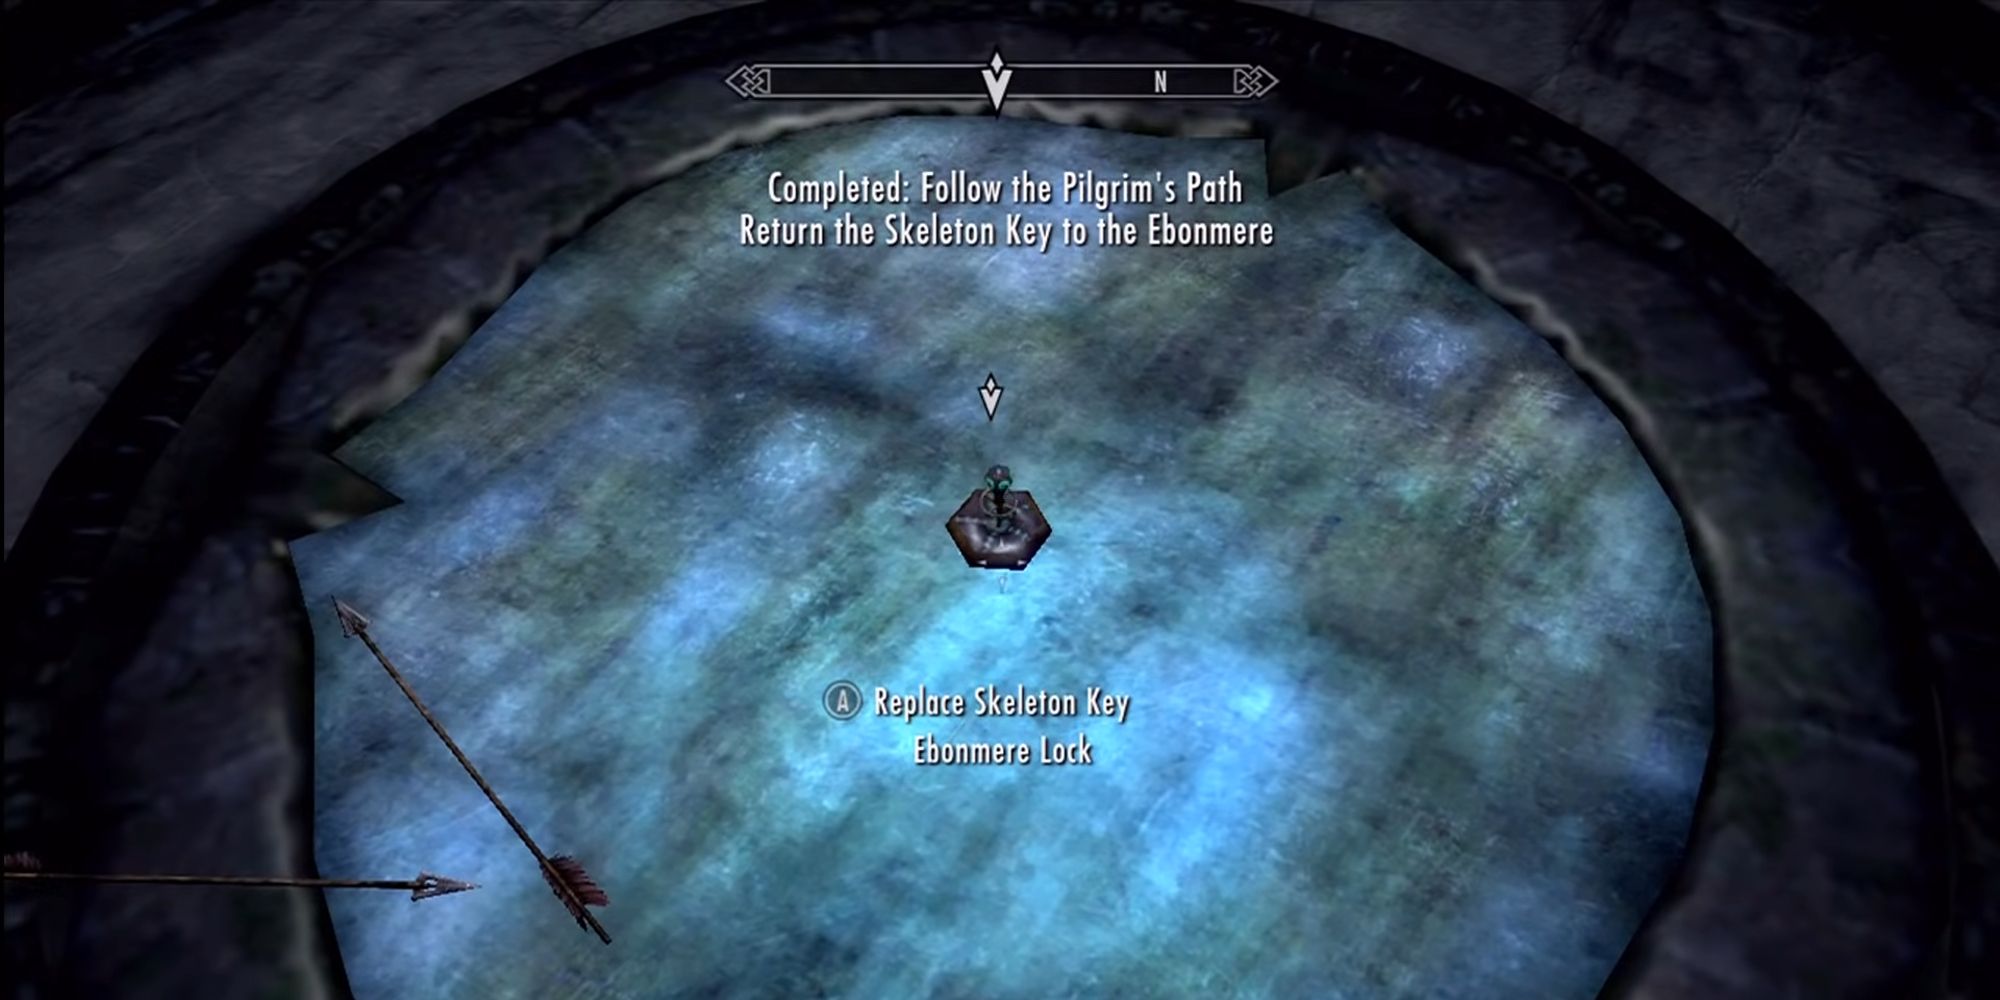
Finally, you are at the fifth trial. When you enter the room, you will see a giant pit. It's important to note that once you enter the pit, you cannot turn around. Be sure that you have all the loot before heading into the pit.
Jump into the pit and wait a few seconds before the skeleton key reacts. Once this happens, the floor of the pit will disappear and you will see the Ebonmere lock. Place the Skeleton Key here, and Nocturnal will be summoned.
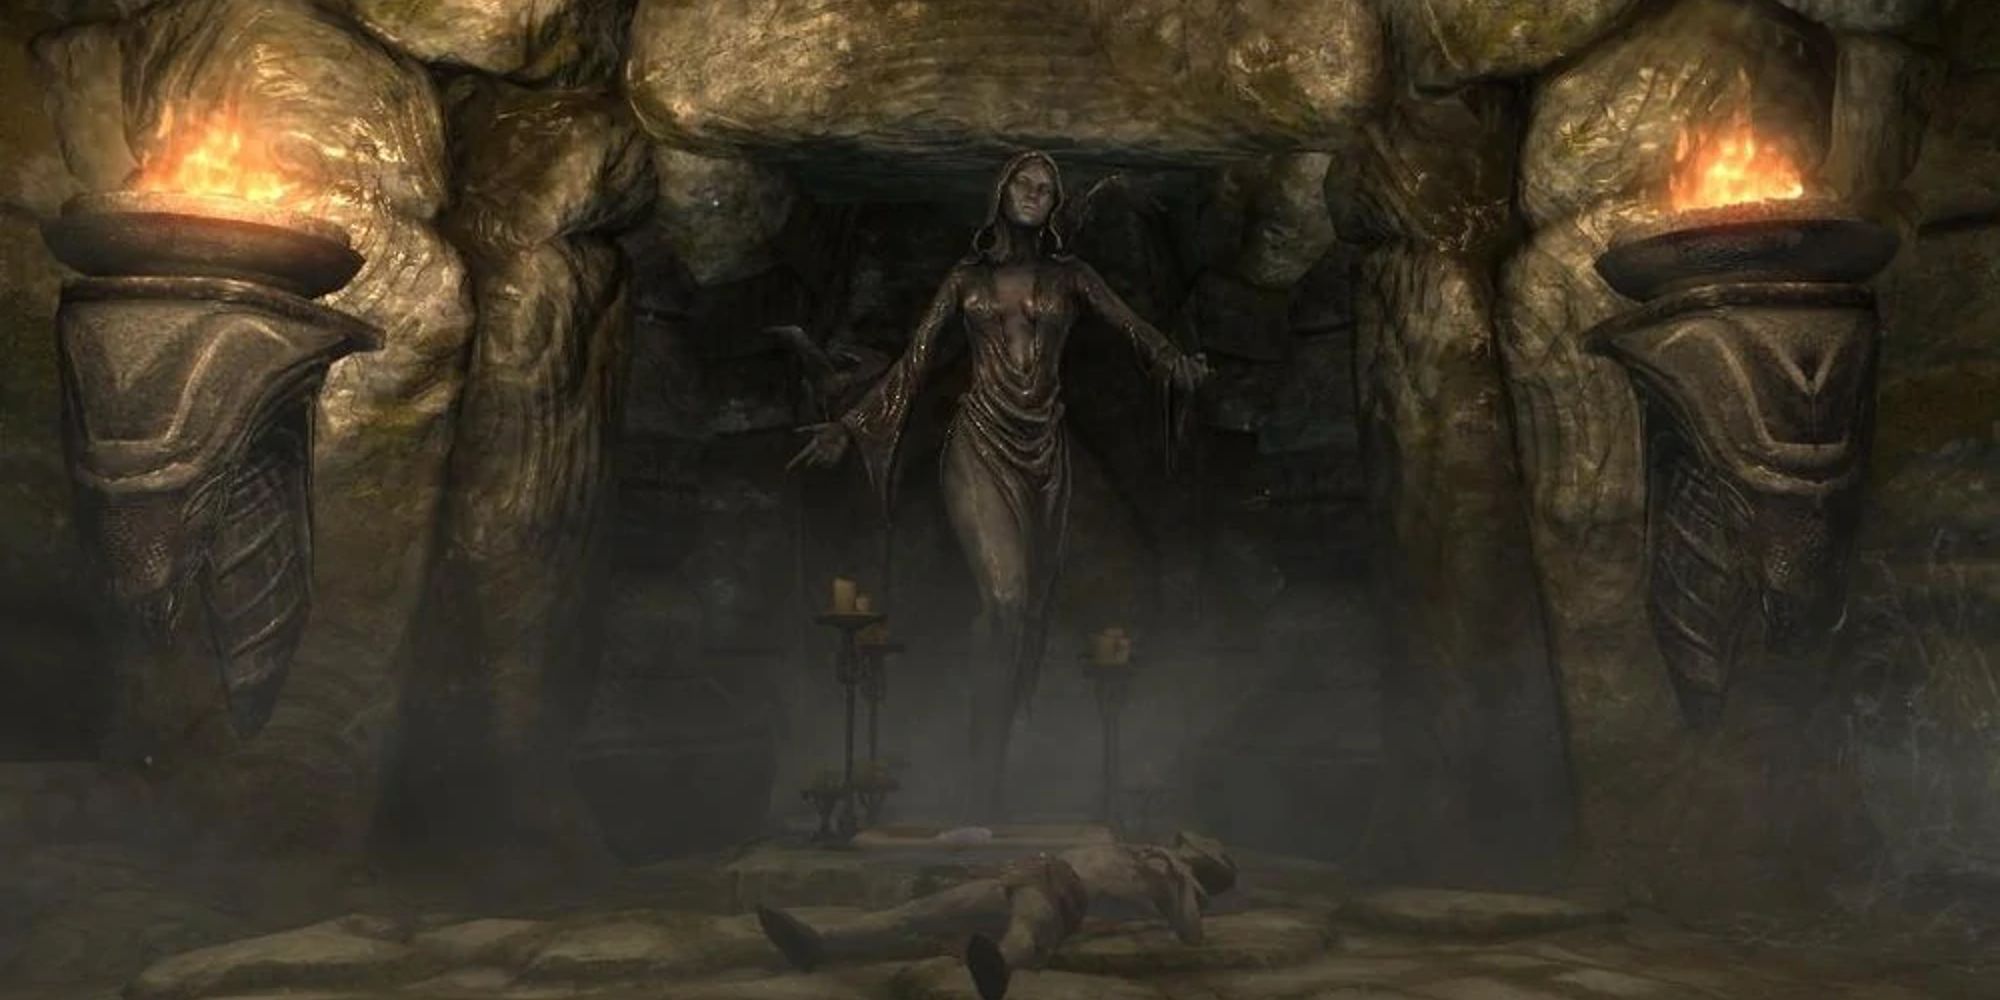
Speaking With Nocturnal
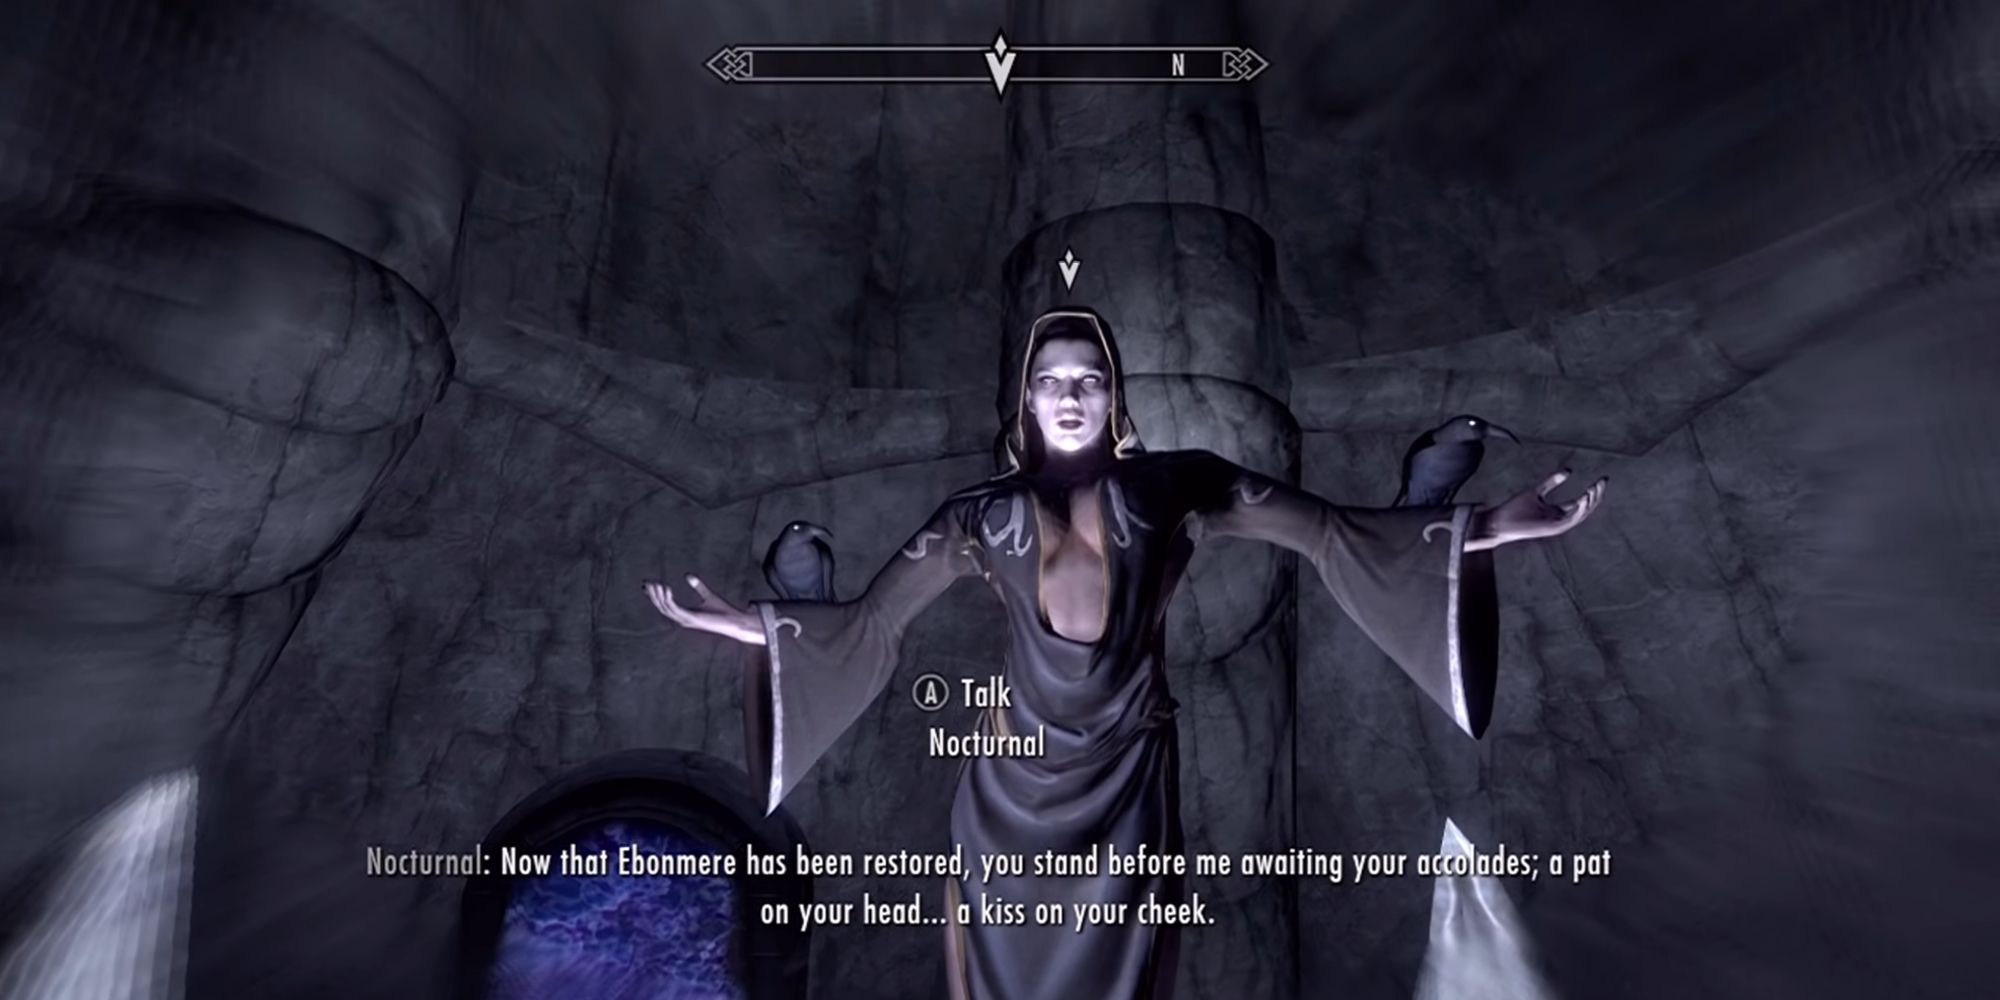
With the key placed, Nocturnal will appear and speak to you. Nocturnal will thank you for returning the key, and allow you to become a 'true' Nightingale agent. Listen to her talk about this, and then speak with Karliah.
| Note: There may be a bug here where Karliah disappears as you speak with Nocturnal. It's important to save often to avoid getting stuck here. If this does happen, you can also wait an hour or two (some players report needing to wait up to five hours), which may make Karliah reappear. When she reappears, quickly speak with Nocturnal so she doesn't disappear again. |
Now that the Skeleton Key has been returned, you will have the option to become an Agent of Strife, Subterfuge, or Shadows. Karliah will explain what each means, but let's take a quick look at each below.
| Agent Type | What It Means |
|---|---|
Strife
|
When using your Strife greater power, you will instantly absorb 100 health points from your target. |
Subterfuge
|
When using your Subterfuge greater power, the judgment of those around you will be clouded. This means that nearby people and creatures will attack anyone around, regardless of who they are. |
Shadows
|
When using your Shadow greater power, you will become invisible while crouching for 120 seconds. |
Each of these powers can be used once a day, but you will only be able to accept one. Fortunately, you can change your chosen greater power once a day as well; all you need to do is return to the Twilight Sepulcher.
| Note: There is a bug while re-choosing your Agent status as well. With this bug, the symbols for each status will not appear when reselecting. Be sure to save before heading into the Twilight Sepulcher to avoid getting stuck here. |
Once you have chosen your Agent status, head to the portal to leave.
Rewards For Completing Darkness Returns
After completing this quest, you are done with the Thieves Guild main questline! You will have the option to continue on with quests to restore the guild, as well as become the leader.
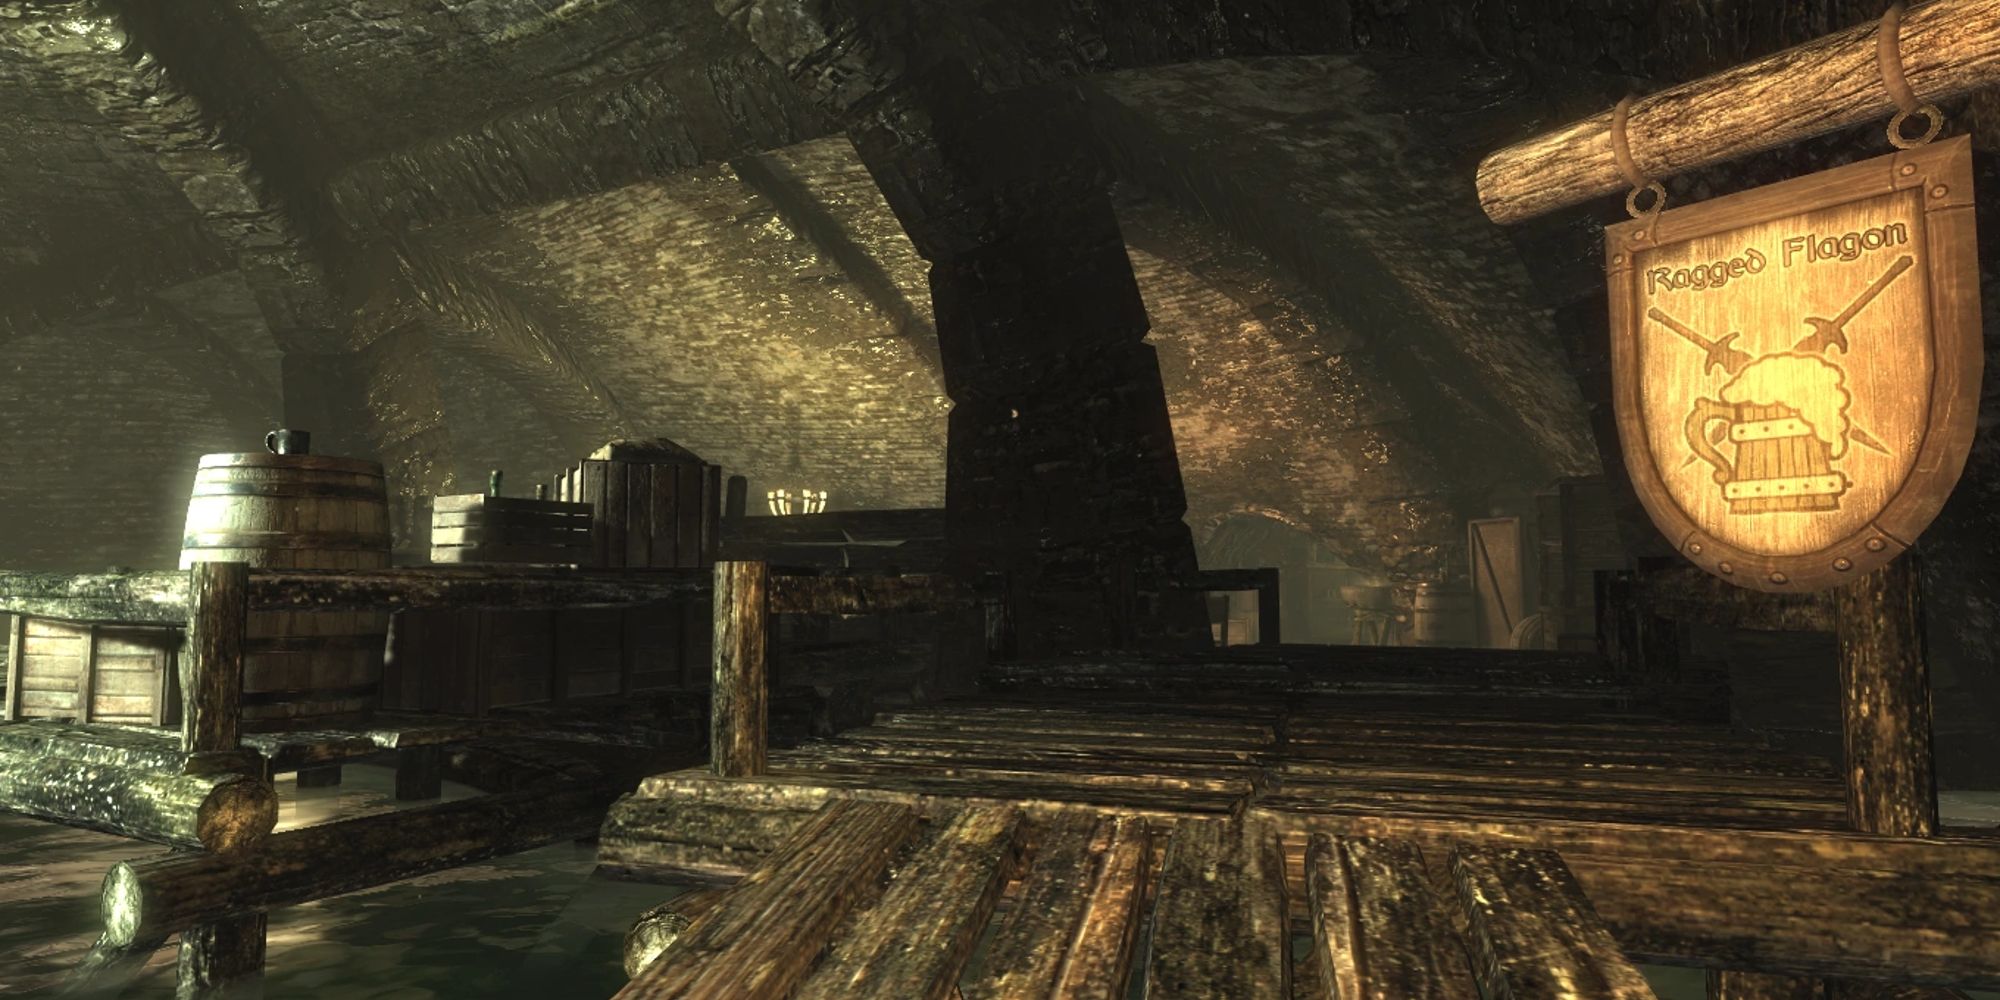
As a reward for completing the quest, you will get one of the powers mentioned above, and unlock the quest Under New Management; this quest prepares you to become the Guild Master. Head back to the Ragged Flagon in Riften to begin Under New Management.
Source: Read Full Article