Lost Ark’s dungeons are no joke, being the game's highlights for many. Between the stunning visuals, the hordes of trash mobs to kill, and the fun (and more often than not, challenging) boss fights, what’s not to love?
Even with all those positive aspects going for the dungeons, the fact that they also have Mokoko Seeds hidden throughout them also makes them all the more enticing (and perhaps gives you a reason to come back to the dungeon after beating it). There are ten seeds tucked away in the final and climactic dungeon of the North Vern story, Ancient Elveria. Bear in mind that this dungeon is the first Abyssal Dungeon, a great weekly activity to do while in tier 1 endgame content.
Mokoko Seed 1
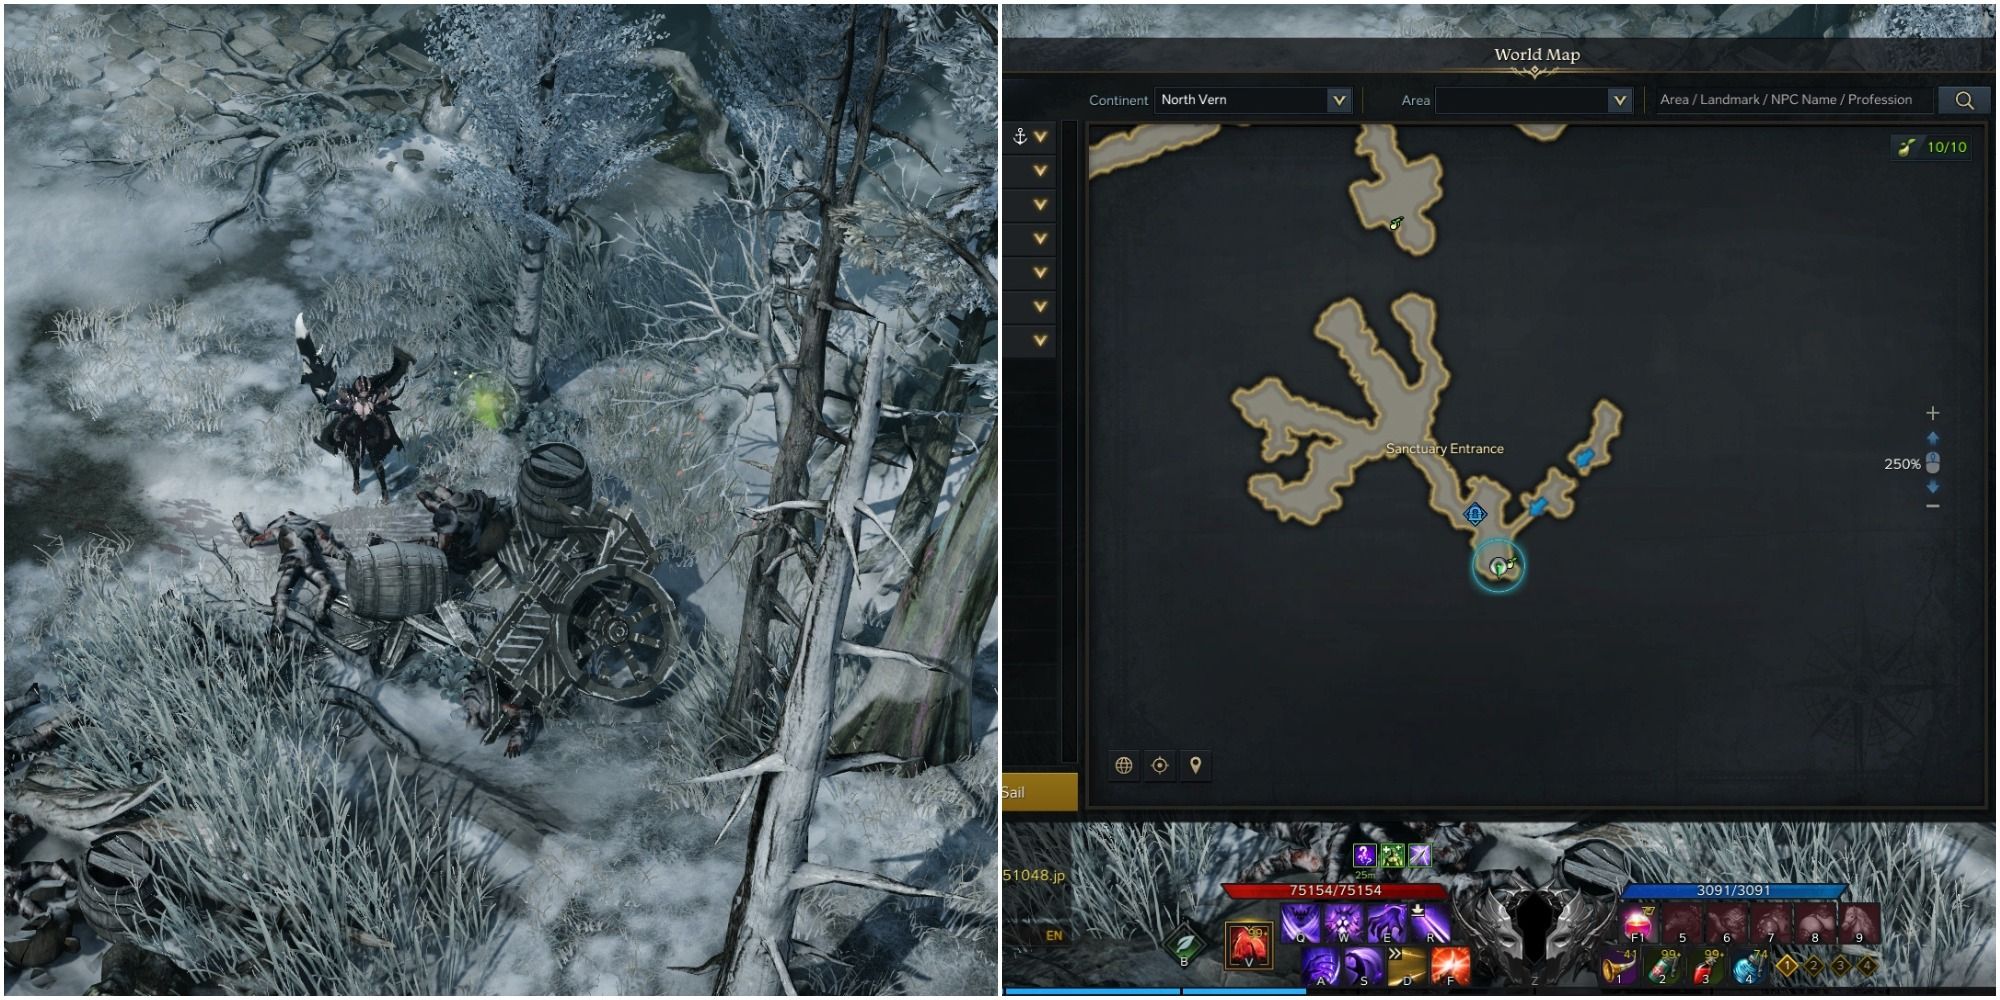
You can pick up the first seed at the start of the dungeon before you even start the in-dungeon story by talking to Thar. It’s located next to a pile of wooden debris and a couple of dead bodies.
This seed is also the only seed located in the first part of the dungeon (Sanctuary Entrance), so once you pick it up, don’t worry about finding the next one until Garum smacks you and Thar through a wall (in a cutscene) and into the next area.
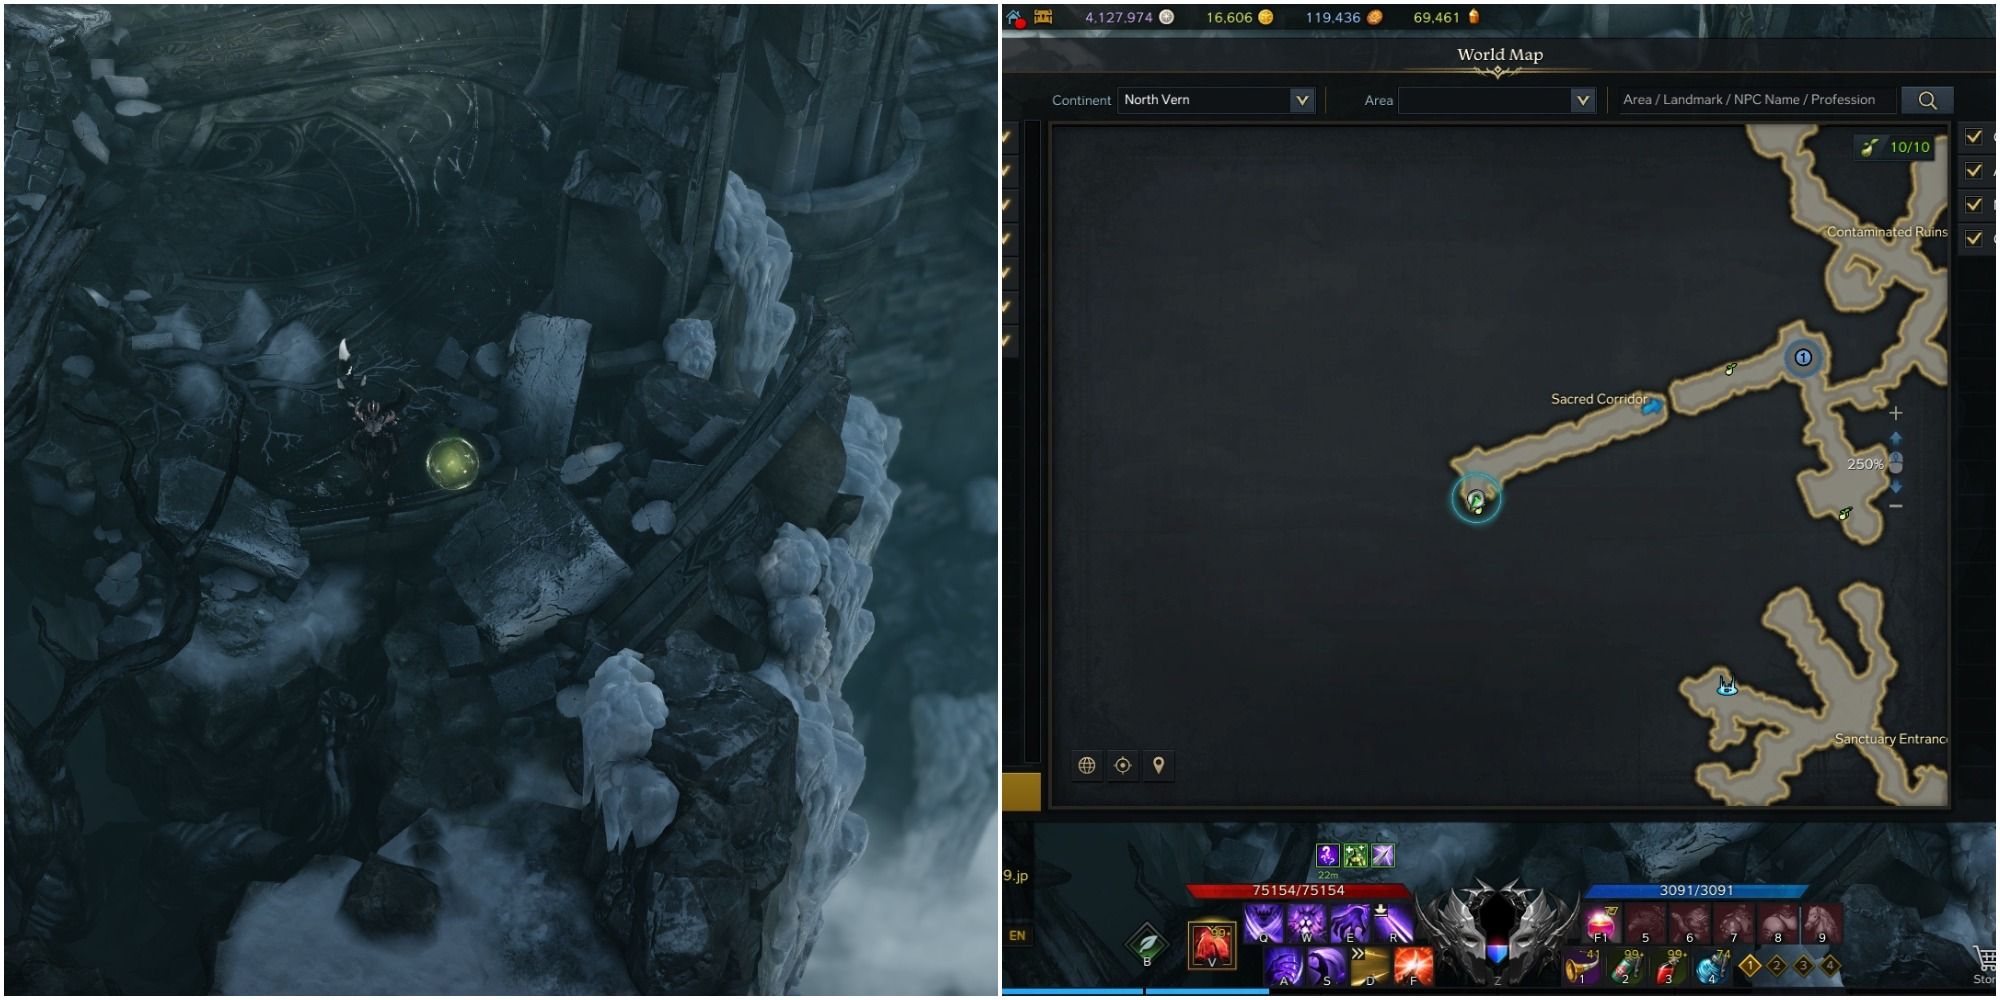
Mokoko Seed 2
The second seed is pretty easy to waltz past and miss, as it is in the room you are knocked into by Garum post-cutscene (beginning of the dungeon’s second area: Sacred Corridor). Especially if you're spamming “esc” to skip the cutscene, you’re probably just trying to seize control of your character as soon as you can and walk forward, leaving it behind. So, once Garum slaps you through the wall, don’t forget to walk down to the broken building’s edge.
Also, if you carry on to the point where Thar stabs Garum and they break the bridge as they fall, you can’t get back once you jump over the chasm, so if you miss the second or first seeds, you’ll have to run the dungeon again to get to them.
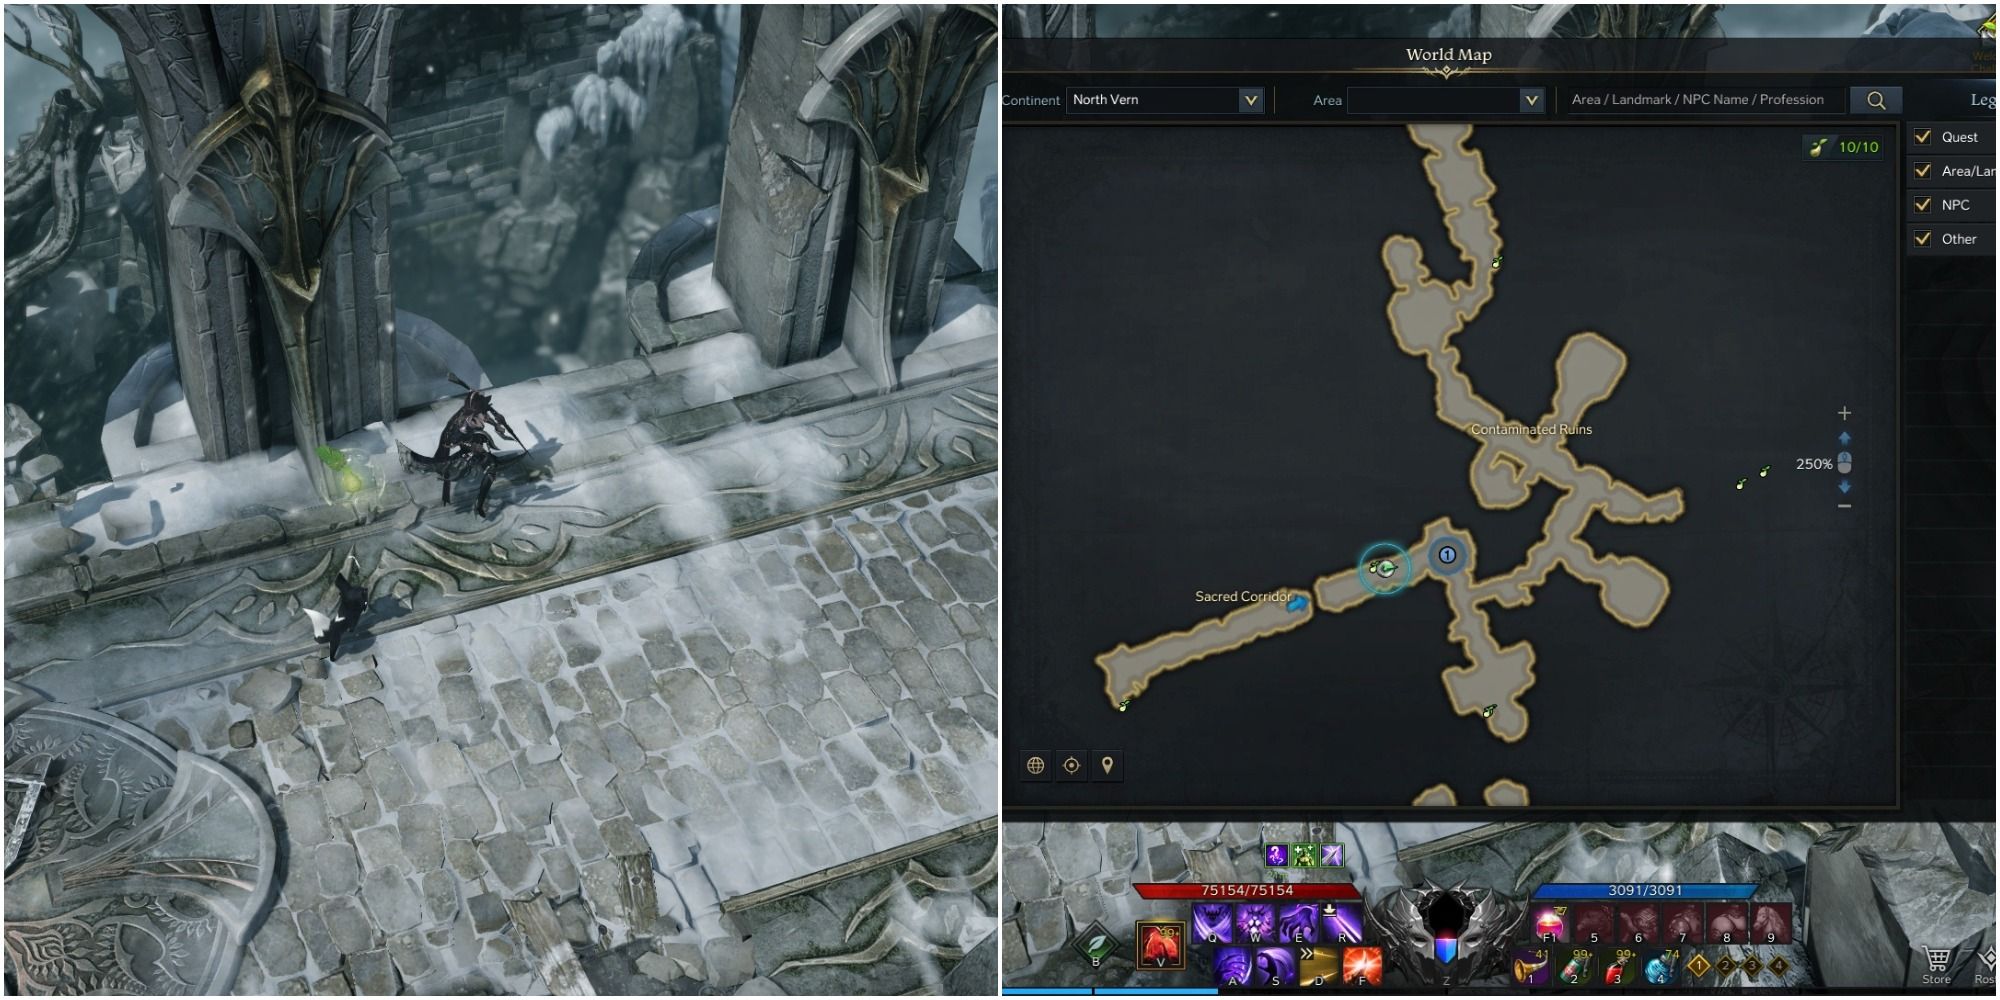
Mokoko Seed 3
The third seed is more in the open than the others, as it’s located at the base of one of the columns along the pathway. You’ll find it a few steps away from you after jumping across the broken bridge (that Thar and Garum break upon falling).
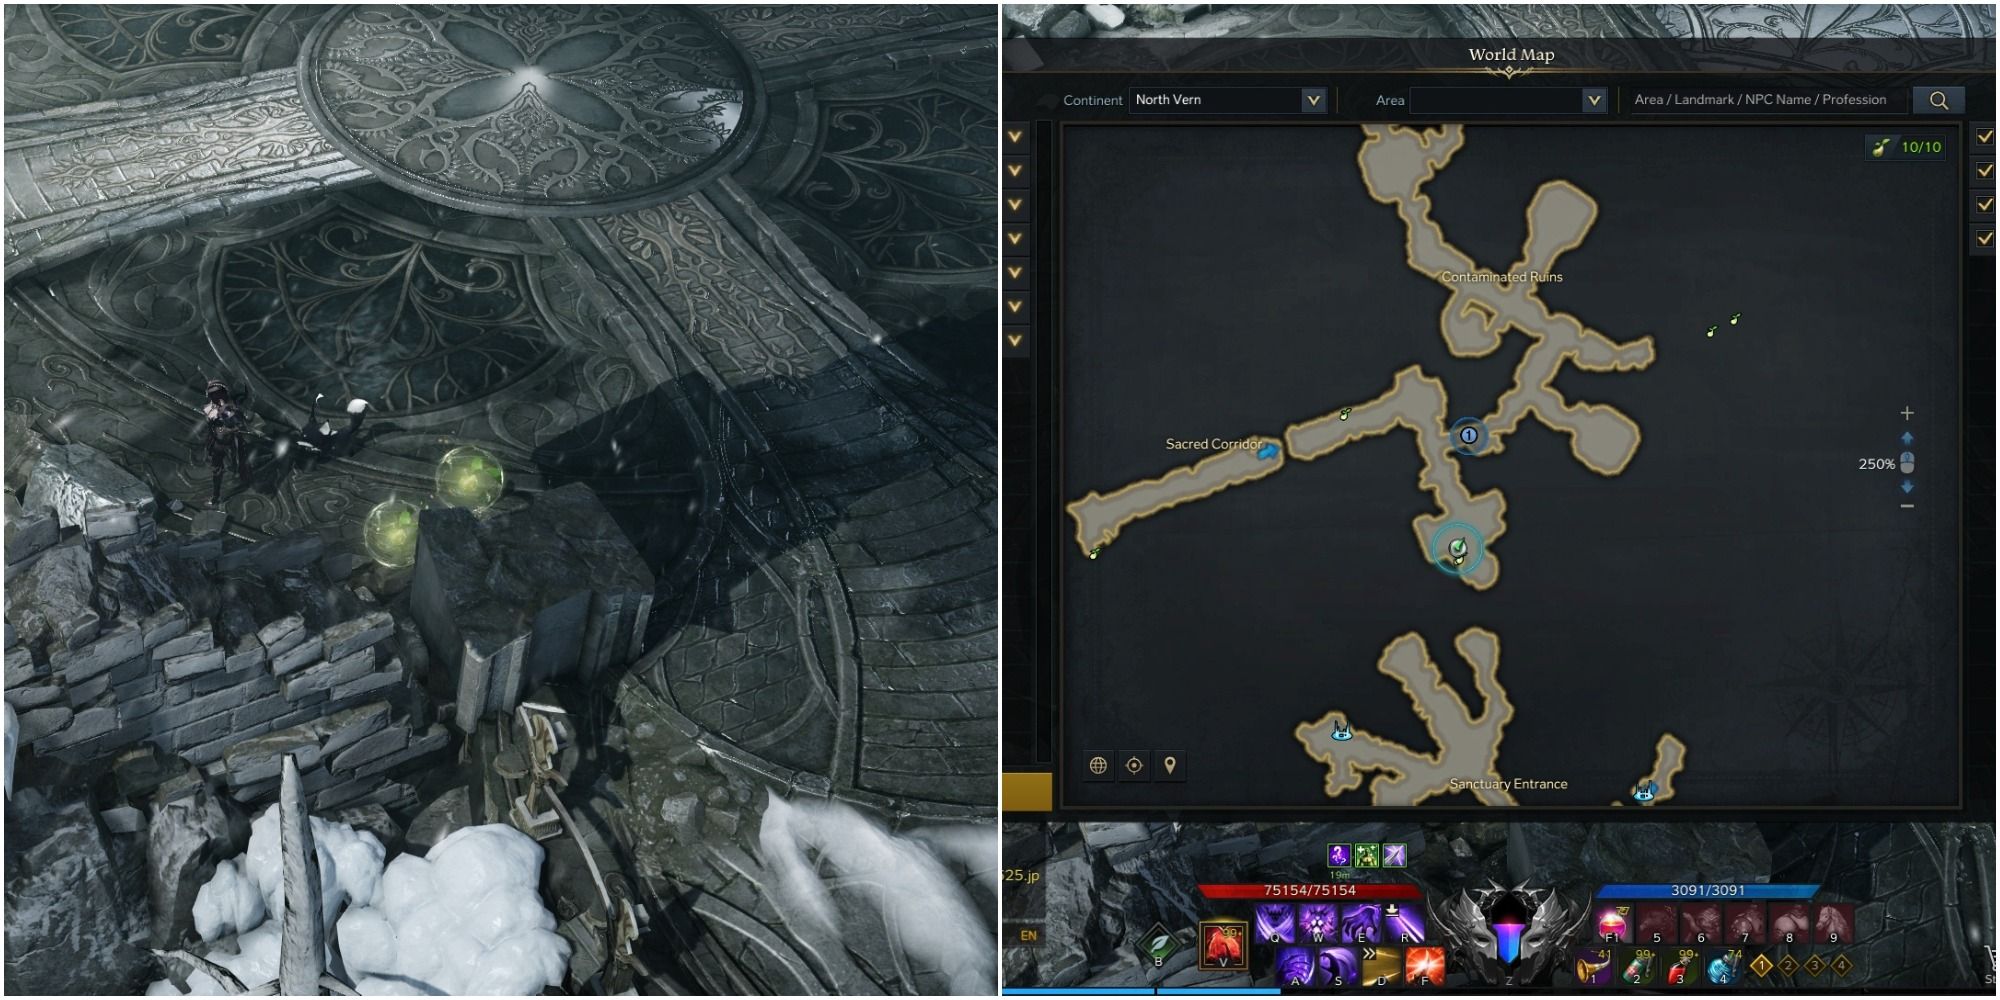
Mokoko Seeds 4 and 5
A large column obscures the fourth and fifth seeds. If you walk close to it, said column will dephase, allowing you to see both seeds, which are quite close to one another. These are in the room with the three necromancers that keep spawning undead until you kill them, so make sure to clear them out before picking up these two seeds.
At this point, it’s worth mentioning that if you want to interact with the third piece of the sixth hidden story of North Vern’s Adventurer's Tome, do so before putting on the necromancer’s disguise. If you do, you’ll lose your progress in the hidden story and have to go back and interact with the first two pieces again.
Mokoko Seed 6
The sixth seed is not particularly tricky, as it is found behind the gate (on the right) that leads to the Gatekeeper Ningath fight, but in order to successfully retrieve seeds seven and eight after this, there is one thing you need to do on your way to seed six. Once you’re disguised, upon entering the ritual room, you are given the option to remove your disguise and disrupt the ritual, or ignore the ritual and infiltrate. It is imperative that you ignore the ritual and walk out of the room through the double doors without killing any of the necromancers.
Once you reach the gate, stand in the highlighted checkpoint box to progress the story, and the game will remove your disguise for you. After retrieving the sixth Mokoko seed, keep going and defeat Gatekeeper Ningath. Once done, do not hop on the elevator lift and continue in the dungeon, since you’ve got to back-track a bit to get Mokoko seeds seven and eight.
Mokoko Seeds 7 and 8
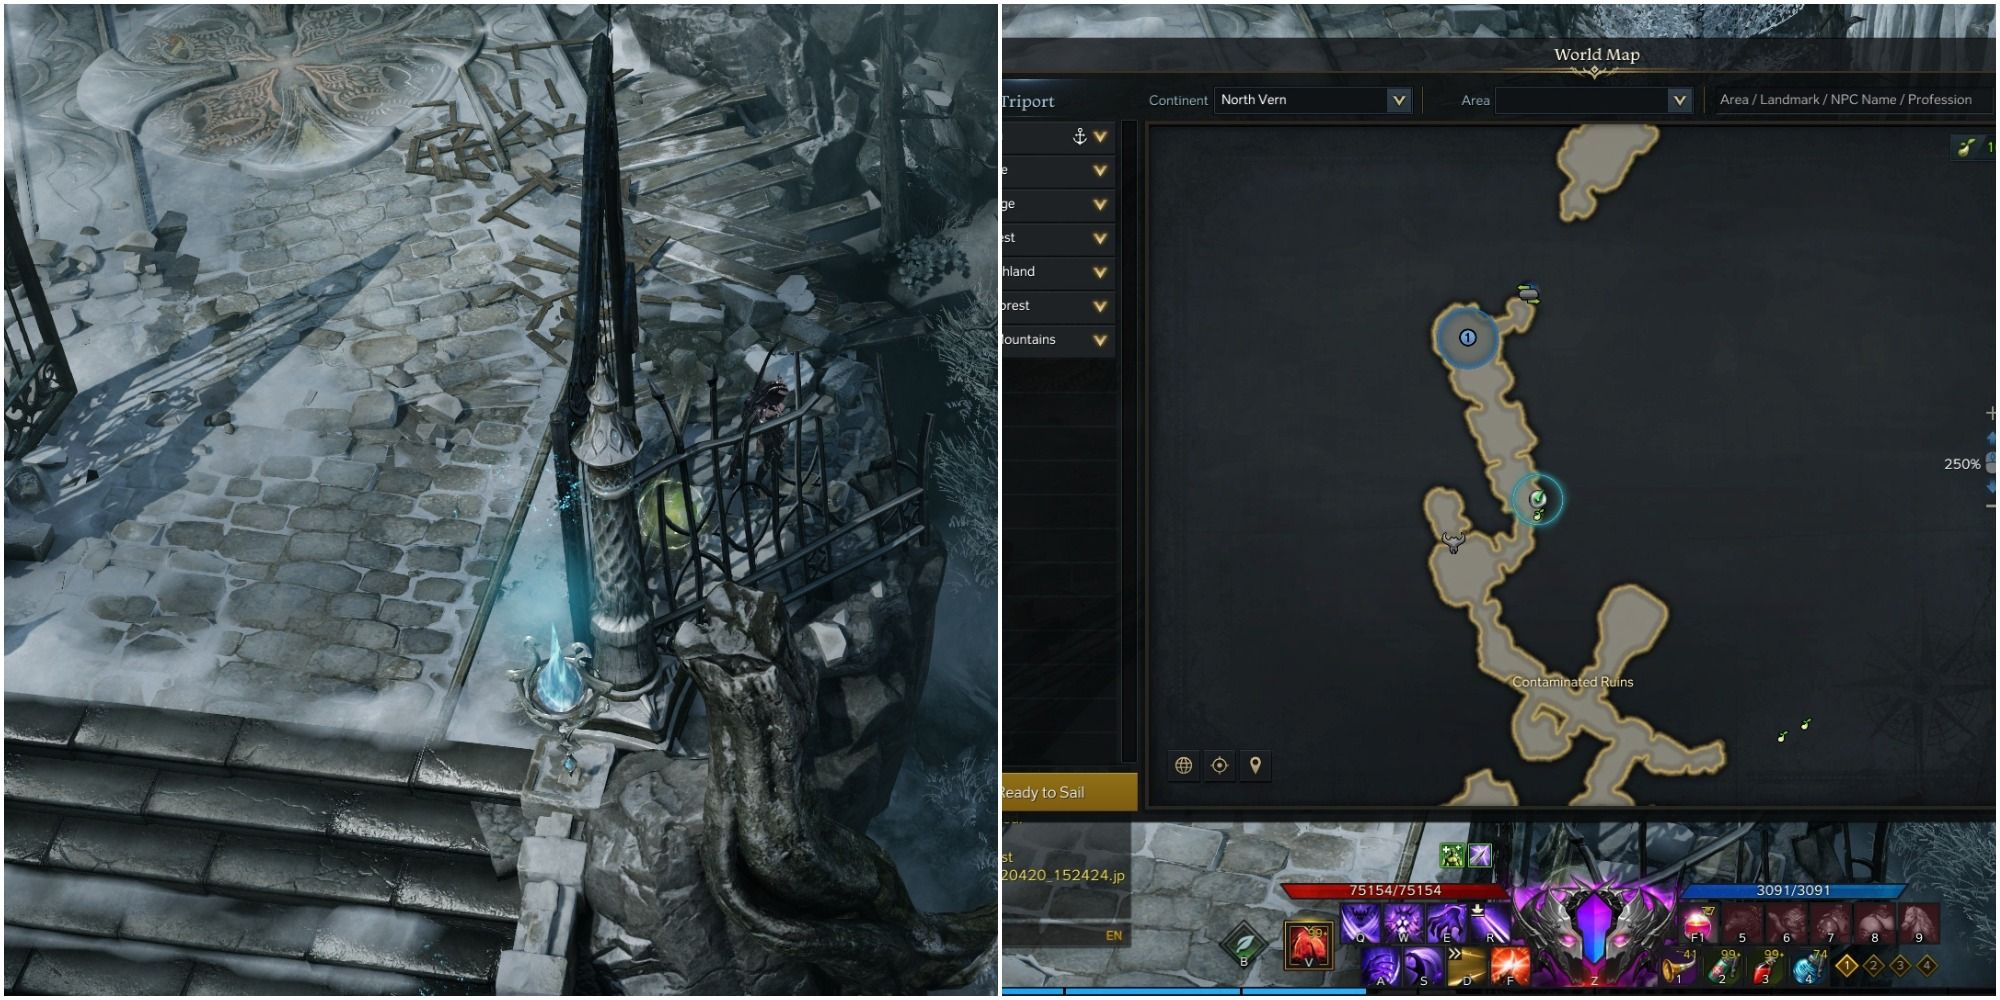
After retrieving the sixth Mokoko seed in the boss-fight area of Gatekeeper Ningath (and killing him), it’s time to work your way back through the Contaminated Ruins (feel free to kill the High Necromancer in the ritual room, he’s not needed alive at this point). Keep going all the way to its end, by the broken statue with no lower body, as shown in the picture above.
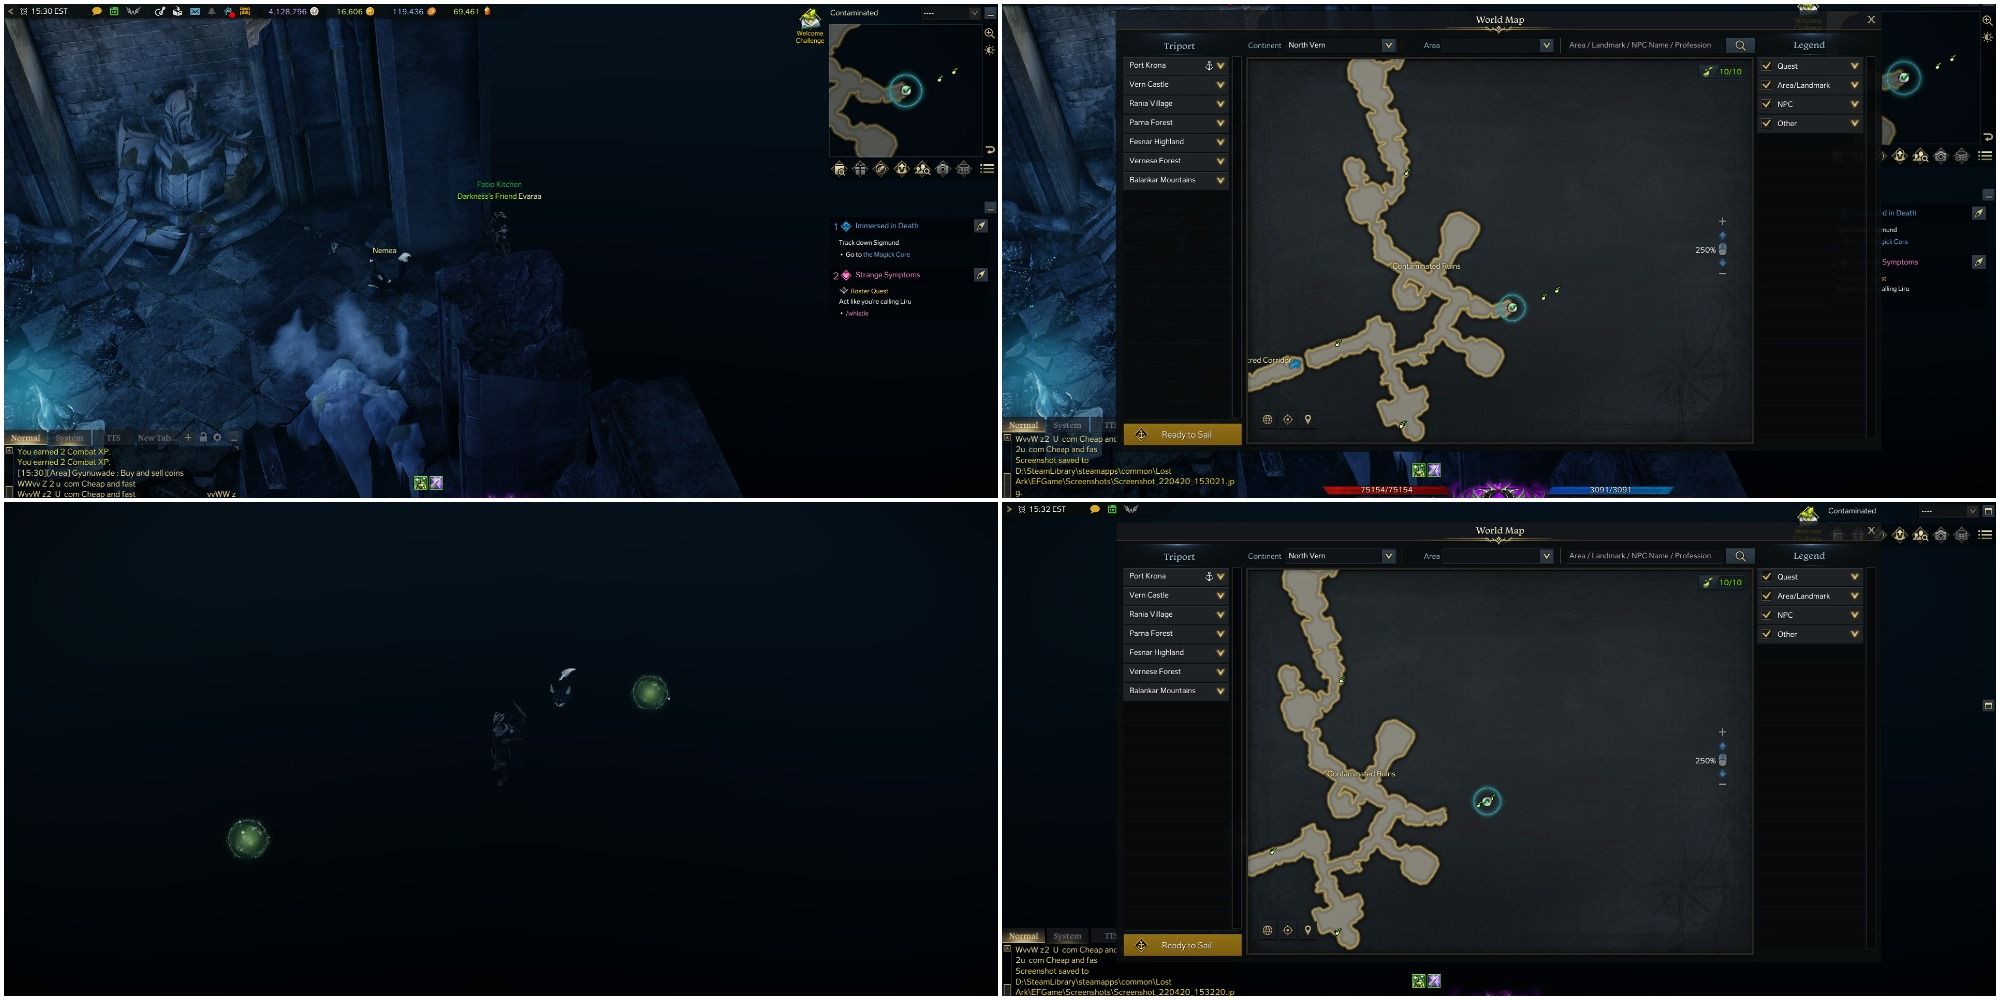
That is a hidden entrance; simply walk through the wall, going off-map and into the darkness, to pick up the next two seeds. They’re next to each other and easy to see against the pitch-black ground.
Mokoko Seed 9
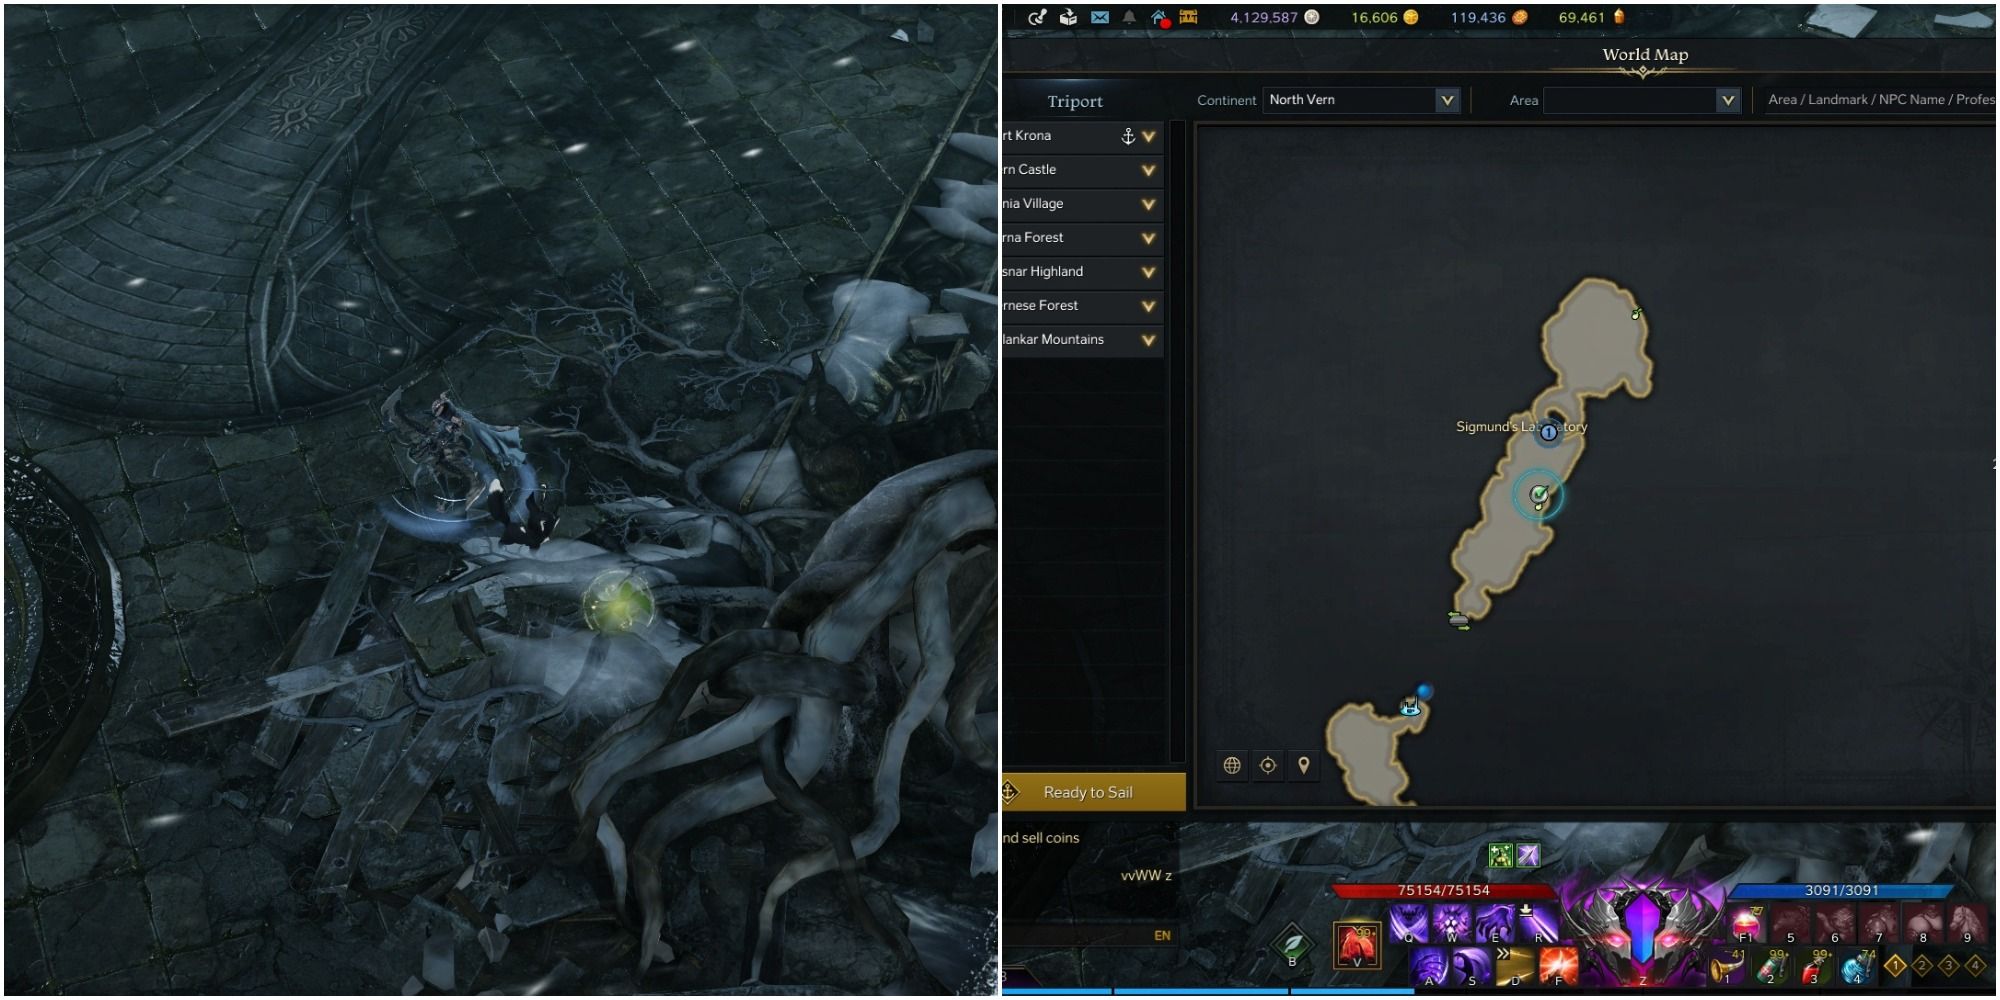
The ninth seed is found in the last strip of land in the dungeon, Sigmund’s Laboratory. It is in the hallway preceding the final room where you fight Sigmund himself. It’s easy to pass this seed by amidst all the undead trash mobs, so once you’ve killed them off (and preferably before engaging Sigmund), go pick up the seed on the right side of the hallway.
Mokoko Seed 10
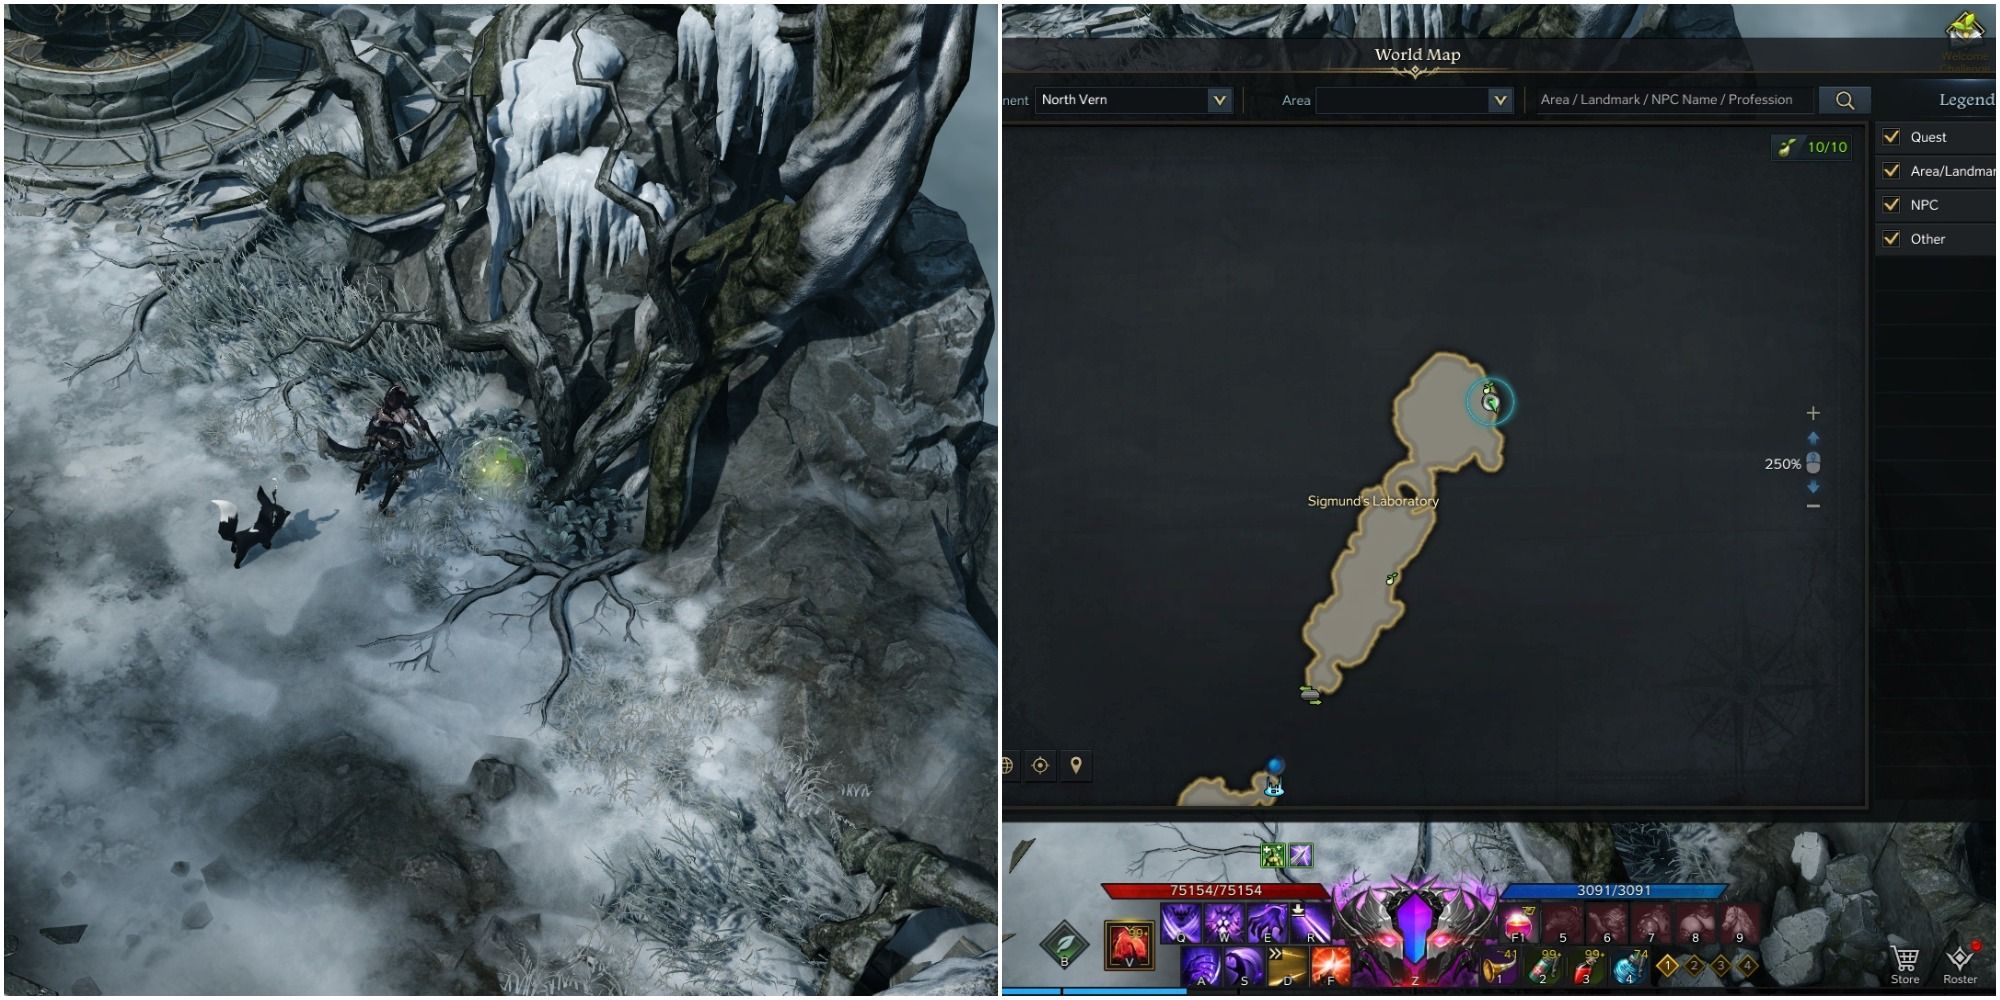
The tenth and final seed is found in the very last room of the dungeon, where you fight Garum (again) and Sigmund. You can’t get the seed before the boss fight, since after the cutscene that sees you walk into the room you’re immediately in combat with Garum. So, once you defeat Sigmund, don’t immediately use your Song of Escape to leave the dungeon, and don’t forget to grab the last seed after the boss fight!
Now that you’ve got all the seeds here go and tidy up the remaining post-dungeon story so you get your first Power Pass!
Source: Read Full Article
